EasyManua.ls Logo

Coleman CHD200 - User Manual

Coleman CHD200
20 pages
Print Icon
To Next Page IconTo Next Page
Loading...
CHD200 User Manual
Question and Answer IconNeed help?

Do you have a question about the Coleman CHD200 and is the answer not in the manual?

Summary

About Your Trail Camera

About this Manual

Introduction to the manual's content and scope, noting potential differences from actual product.

Copyright Information

Details proprietary rights and usage restrictions for the manual content.

FCC Interference Statement

Outlines FCC compliance rules for digital devices and measures to mitigate radio frequency interference.

Cautionary Statements

Provides warnings regarding modifications and user compliance with FCC rules.

RF Exposure Warning

Advises on safe operation concerning radio frequency exposure limits and installation requirements.

CE Mark Warning

Discusses potential radio interference in domestic environments and user responsibilities for compliance.

Safety and Handling Precautions

General guidelines for safe operation, handling, and care of the camera to prevent damage or injury.

Camera Handling Information

Specific safety instructions for camera usage, lens care, and avoiding environmental hazards.

Battery Handling and Safety

Critical information on battery installation, usage, and disposal to prevent damage or explosion.

USB Adapter Safety

Precautions for using the USB adapter to prevent damage, electric shock, or fire hazards.

First Use

Camera Interface Overview

Identifies and describes the physical ports, buttons, and components of the camera.

Installing Batteries

Step-by-step instructions for correctly inserting AA batteries into the camera.

Inserting Memory Card

Guide on how to properly insert and remove an SD memory card for storing media.

Powering the Camera On and Off

Instructions on switching the camera between operational modes and power states.

Connecting to a Computer

Procedures for connecting the camera to a PC for file transfer via USB.

Connecting to a TV

Steps for connecting the camera to a television for viewing media files.

Using IR Night Vision Mode

Explains the function and operation of the camera's infrared LEDs for low-light recording.

Using Your Camera

Camera Setup and Settings

Guide to configuring basic camera settings like date, time, language, and operational modes.

Mode Selection

How to choose between Photo, Video, or Photo & Video recording modes.

Photo Resolution Settings

Configuration options for adjusting image quality and file size for photos.

Photo Series Settings

How to set the camera to capture multiple photos per trigger.

Video Resolution Settings

Adjusting video quality and file size parameters.

Video Length Settings

Setting the duration for each recorded video clip.

Audio Recording Settings

Enabling or disabling audio capture during video recording.

Shot Lag Settings

Configuring the delay between consecutive photo captures.

Motion Sensor Sensitivity

Adjusting the sensitivity of the PIR motion sensor for optimal detection.

Target Recording Time

Setting specific times for the camera to activate recording.

Time Lapse Recording

Configuring the camera to capture images at set intervals for time-lapse videos.

Language Selection

Setting the user interface language for the camera's menus.

Time and Date Settings

Configuring the camera's internal clock and date/time format.

Photo Stamp Settings

Adding date and time stamps to captured photographs.

Password Protection

Enabling and setting a password to secure camera access upon startup.

Beep Sound Settings

Turning on or off the audible feedback for button presses.

Format Memory Card

Erasing all data from the memory card to prepare it for use.

Serial Number Configuration

Setting a custom serial number for the camera.

Reset Camera Settings

Restoring all camera settings to their factory default values.

View Firmware Version

Displaying the current software version installed on the camera.

Camera Placement Guidelines

Instructions on positioning the camera for optimal image and video capture.

Video Recording Procedure

Steps for initiating, recording, and stopping video capture.

Photo Shooting Procedure

Steps for capturing still images with the camera.

Playback Mode Operations

How to review captured photos and videos on the camera interface.

Delete Single File

Procedure for deleting an individual photo or video file from the memory card.

Delete All Files

Process for erasing all media from the memory card.

Slideshow Playback

Viewing captured images in an automated slideshow format.

File Write Protection

Protecting files from accidental deletion by enabling write protection.

Technical Specifications

Coleman CHD200 Specifications

Detailed technical data including lens, sensor, resolution, standby time, and dimensions.

Overview

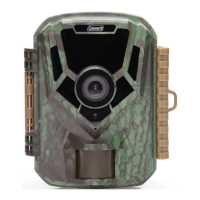
The Coleman CHD200 is a trail camera designed for capturing photos and videos in various environments, including dark conditions, thanks to its built-in infrared (IR) LEDs for night vision recording. The camera is suitable for both indoor and outdoor use, with adjustable motion sensor sensitivity to adapt to different activity levels.

Function Description:

The CHD200 trail camera is primarily used for automatic capture of images and videos based on motion detection. It offers three recording modes: Photo, Video, and Photo & Video, allowing users to choose the most suitable option for their monitoring needs. The camera can record in various resolutions for both photos and videos, providing flexibility in image quality and file size. It also features an audio recording function for videos, if enabled.

A key feature is its night vision capability, utilizing infrared LEDs to capture clear black and white photos and videos in low-light or dark environments. The camera automatically detects ambient light levels and activates the IR LEDs when necessary.

For extended monitoring, the camera includes a "Target Recording Time" function, enabling users to specify a time window for image capture. Additionally, a "Time Lapse" feature allows for capturing long sequences of events over a shorter period, creating time-lapse videos. When Time Lapse is active, the motion sensor is disabled.

The camera can be connected to a computer via USB for transferring and managing photo and video files, or to a TV for direct viewing.

Important Technical Specifications:

  • Model Number: Coleman CHD200
  • Lens: Fixed Focus, f=3.8mm, F/2.3
  • Image Sensor: 2MP CMOS Sensor
  • Shutter: Electronic
  • Pixels (photo): JPEG format, selectable resolutions including 20 MP, 16 MP, 12 MP, 8 MP, 5 MP, 3 MP, 1 MP.
  • Pixels (video): AVI format, selectable resolutions including 1080P, 720P, 480P, 640x480P.
  • LCD Monitor: 2.0 Inch LCD Screen
  • Assistive Light: Infrared LED (for shooting in dark scenery)
  • Sensor Type: PIR (Passive Infrared)
  • PIR Angle: 90°
  • Standby Time: Up to 180 Days
  • PIR Sensor Range: Up to 65ft
  • Trigger Speed: 0.4 Seconds
  • Recording Media: SD, SDHC; Maximum: 32GB
  • I/O Ports: 5-pin Mini USB, USB 2.0 (high speed), Mini DC, Microphone (built-in MIC), Speaker, AV Jack
  • Power: 4 x AA 1.5v batteries
  • Dimensions: 4.3 x 2.98 x 1.8 inches

Usage Features:

  • Battery Installation: Requires 4 x AA size batteries, inserted in the specified direction. A power adapter (not included) can also be used, but the camera cannot be opened while the DC plug is inserted.
  • Memory Card: Uses an SD memory card (not included) for storage. It's crucial to format the memory card before first use (which erases all data) and to use a Class 10 or above card. The card should not be removed or inserted during recording to prevent damage or data loss.
  • Power On/Off & Setup: A switch on the bottom of the camera allows selection between 'SETUP' (for configuration and testing) and 'ON' (for normal operation).
  • Connectivity: Connects to computers via the included USB cable for file transfer (entering Mass Storage mode) and to TVs via USB or an AV cable (not included) for viewing media.
  • Camera Placement: Proper alignment is crucial for optimal image capture. The camera should be attached to a tree or similar object at a height of 3-6 feet. A motion test LED blinks blue in 'SETUP' mode to indicate motion detection, aiding in positioning. Once satisfied, the switch is set to 'ON', and the motion test LED blinks red for 15 seconds before normal operation begins. It's advised to avoid sunny locations or areas with many branches to prevent unwanted recordings.
  • Manual Recording: In 'SETUP' mode, users can manually record videos or capture photos by pressing the SHOT button. A camcorder icon (for video) or camera icon (for photo) indicates the current mode on the LCD screen.
  • Playback Mode: Captured videos and photos can be viewed directly on the camera's LCD screen. Users can cycle through files, play/pause videos, and exit playback mode.
  • Settings Menu: Accessible by sliding the switch to 'SETUP' and pressing the MENU button. This menu allows configuration of various parameters:
    • Mode: Photo, Video, Photo & Video.
    • Photo Resolution: Selectable from 20MP down to 1MP.
    • Photo Series: Capture 1, 2, or 3 consecutive photos per trigger.
    • Video Resolution: Selectable from 1920x1080P down to 640x480P.
    • Video Length: Adjustable from 3-60 Seconds to 1-10 Minutes.
    • Audio Recording: On/Off for video.
    • Shot Lag: Sets the delay between consecutive captures (5-60 Seconds, 1-60 Minutes).
    • Sensitivity Motion Sensors: High, Middle, Low settings for PIR sensor sensitivity.
    • Target Recording Time: On/Off, with customizable start and end times for recording.
    • Time Lapse: On/Off, with customizable intervals (Hours, Minutes, Seconds) for capturing photos to create a time-lapse video.
    • Language: Sets the camera's interface language.
    • Time & Date: Sets current date and time, and formats for time (24h/12h) and date (dd/mm/yyyy, yyyy/mm/dd, mm/dd/yyyy).
    • Photo Stamp: Adds date/time stamp to photos (Time & Date, Date, Off). Once stamped, it cannot be removed.
    • Password Protection: Sets a 4-digit password to access the camera. If forgotten, a specific button combination (MENU + PLAY while sliding to SETUP) can unlock it.
    • Beep Sound: On/Off for button press sounds.
    • Serial Number: Allows setting a custom serial number.
    • Reset Settings: Restores factory default settings (does not delete media).
    • Version: Displays current firmware version.

Maintenance Features:

  • Formatting Memory Card: An option in the settings menu to erase all photos, videos, and data from the memory card. This action is irreversible.
  • Write Protect: Protects photo/video files from accidental deletion. Files must be unprotected before they can be deleted. Options include protecting current file, all files, or unlocking current file, all files.
  • Cleaning: Do not use abrasive chemicals, cleaning solvents, or strong detergents. Wipe the product with a slightly damp soft cloth.
  • Storage: Download all pictures and remove batteries if storing the camera for a long period.
  • Battery Safety: Use only provided or recommended battery types. Incorrect battery insertion can cause damage or explosion. Dispose of used batteries according to instructions. Keep batteries out of reach of children. Stop using batteries if their color changes or shape is twisted.
  • Adapter Safety: Do not expose the USB adapter to high temperatures or moisture. Do not attempt to repair, disassemble, change, or transform the adapter. Avoid sudden temperature changes to prevent condensation. Do not touch the plug with wet hands. Do not use travel voltage converters or AC/DC power inverters.

Safety Precautions:

  • Do not disassemble or attempt to service the camera.
  • Avoid exposing the camera to moisture or extreme temperatures.
  • Allow the camera to warm up when moving from cold to warm temperatures.
  • Do not touch or put pressure on the camera lens.
  • Do not expose the lens to direct sunlight for extended periods.
  • Do not use the flash or LED Light near a person's eyes to prevent eye injury.
  • Do not use the camera while walking, driving, or riding a vehicle to prevent accidents.
  • Handle the camera strap with care; do not place it around the neck of an infant or child to prevent suffocation.
  • Do not subject the LCD screen to impact.
  • To prevent fire or electric shock, do not expose the appliance to rain or moisture.
  • Ensure correct battery type and fully charged batteries are used to prevent lens issues.
  • This device complies with FCC RF radiation exposure limits and Part 15 of the FCC Rules. Any changes or modifications not expressly approved by the responsible party could void the user's authority to operate the equipment.

Coleman CHD200 Specifications

General IconGeneral
BrandColeman
ModelCHD200
CategoryDigital Camera
LanguageEnglish

Related product manuals