EasyManua.ls Logo

Coleman RANGEVIEW 5 9230-110 User Manual

Coleman RANGEVIEW 5 9230-110
2 pages
To Next Page IconTo Next Page
Page #1 background imageLoading...
Page #1 background image
STITCH LINE
RANGEVIEW
TM
5 MODEL 9230-110
Before you begin
Read all instructions before set up.
• Select a level campsite clear of rocks, branches, and other hard
or sharp objects, to install your tent.
WARNING: Keep clear of overhead power lines.
Do not set up your tent under trees.
For best results in windy conditions, position end of tent into
the wind.
Enlist the help of at least one other person to assist you when
it is time to assemble the tent.
Fig. 2
To Set Up Tent
1. Unfold tent and spread out on a clean, level surface with the
door facing the desired direction. Unzip door.
2. Stretch six corners of tent until
floor is taut then hammer stakes
through loops to secure. (Fig.1)
3. Assemble all interlocking shock-
corded, black and gray tent poles,
separate by size and set aside.
4. Insert black & gray poles through
sleeves in top of tent as shown. (Fig. 2)
5. Insert one end of each diagonal
black pole into pins in rear corners
of tent. (Fig. 3)
6. Go to opposite end of each pole
and gradually apply pressure to the
pole forming an arch. Insert the pin
into the pole
end at the tent
corners. Repeat
with remaining
Gray Side Poles
and long, Side-
to-Side Black
Pole. (Fig. 4)
Fig. 4
Parts and Components
Description Part Number
Main Poles, Black (2) 9230-1151
Side Poles, Gray (2) 9230-1161
Long, Side-to-Side Pole, Black (1) 9230-1171
Rainfly Pole, Black with Plastic Tips (1) 9230-1181
Rainfly 9230-1191
7. Attach frame clips along edges
of tent to all gray and black
frame poles (Fig. 5)
Fig. 5
To Attach Rainfly
1. Open rainfly and lay out flat
with seams and small pockets
facing up.
2. Insert plastic tip of black rainfly
pole into first pocket on rainfly.
(Fig. 6)
3. Insert other plastic tipped end
of rainfly pole into pocket on opposite side of rainfly.
4. Turn rainfly over and drape over tent making sure rainfly pole
is centered over the door. (Fig. 7)
NOTE: When positioned properly, seams on rainfly will
always align with
poles on tent.
Fig. 6
Fig. 8
6. Hook clips on elastic
loops of rainfly onto rings
on all corners of the tent.
(Fig. 9 & 10)
5. Secure rainfly to tent poles
with hook & loop fasteners
located on underside of rain-
fly. (Fig. 8)
To Set Up Tent (continued)
(continued on other side)
Long, Side-to-Side,
Black Pole
Gray Side Poles
(front to back)
Black Main Poles
(diagonally)
Fig. 1
Front Door of tent
Fig. 3
Fig. 10
Fig. 9
Fig. 7
Question and Answer IconNeed help?

Do you have a question about the Coleman RANGEVIEW 5 9230-110 and is the answer not in the manual?

Coleman RANGEVIEW 5 9230-110 Specifications

General IconGeneral
Capacity5-person
Seasons3-season
Doors1
Windows4
Pole MaterialFiberglass
Floor MaterialPolyethylene
VentilationMesh roof

Summary

Setting Up The Tent

Initial Tent Placement and Pole Assembly

Unfold tent, secure floor with stakes, assemble poles and insert into sleeves.

Inserting Diagonal Poles

Insert one end of each diagonal black pole into rear corner pins.

Forming Tent Arches

Apply pressure to poles to form arches and insert ends into corner pins.

Attaching Frame Clips

Attach frame clips along tent edges to all gray and black frame poles.

Attaching the Rainfly

Positioning and Securing the Rainfly

Lay out rainfly, insert rainfly pole, drape over tent, and secure using fasteners.

Connecting Rainfly to Tent Corners

Hook elastic loops of rainfly onto rings on all corners of the tent.

Securing Guylines

Tie guylines onto web straps, stretch until taut, and secure with stakes.

Door Mat Installation

Securing the Door Mat

Unfold the door mat and secure it with stakes to the ground.

Storing the Tent

Preparation for Storage

Place poles/stakes in bag, ensure tent is dry, unzip doors/vents before storing.

Folding and Final Storage

Fold tent to size, roll tightly, and store in a clean, dry area.

Tent Features and Access

Operating Vents and Door Flap

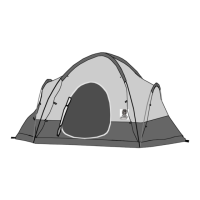
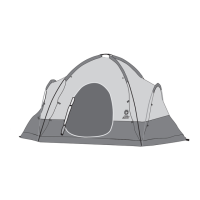
Manage door vent, rear window vent, and secure the door flap.

Cooler Access and Ventilation

Utilize zippered openings for ventilation or access to a beverage cooler.

Electrical Cord Entry

Unzip the lower right corner panel to bring in an electrical cord.

Important Usage Information

Condensation Management

Explains condensation formation and minimization through ventilation.

Tent Care and Storage Tips

Advise on drying tent, avoiding dirt, and not storing poles inside.

Pole Storage Recommendation

Warns against leaving tent poles telescoped together during storage.

Sunlight Exposure Warning

Warns that prolonged sun exposure can damage tent material.

Fire Safety Warning

Keep flame and heat sources away from tent fabric.
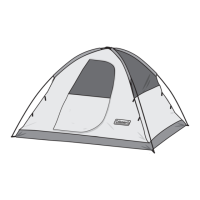
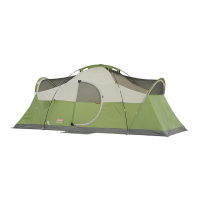
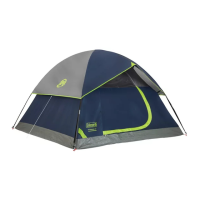
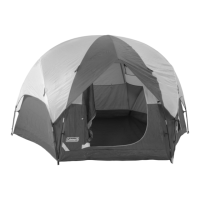
Related product manuals