EasyManua.ls Logo

Coleman Tent - User Manual

Coleman Tent
2 pages
Print Icon
To Next Page IconTo Next Page
Loading...
Fixez l’armature à la toile de la tente
Introduisez une cheville dans le bout du mât
principal (noir) qui se trouve à côté de la porte
d’entrée (ill. 3 et 4).
Allez à l’autre bout du mât et arquez le mât
progressivement jusqu’à ce que vous puissiez
rentrer la cheville dans son extrémité.
Agissez de la même façon avec le deuxième
mât principal.
– Introduisez alors la cheville restante dans le
bout du mât latéral, allez à l’autre bout du mât
et arquez le mât progressivement jusqu’à ce
que vous puissiez rentrer la cheville dans son
extrémité (ill. 3 et 4).
Agissez de la même façon avec le deuxième
mât latéral.
Pebble Creek
6,1x 3,35 m
1
Étalez et positionnez la tente et les mâts
Étalez et positionnez la tente en orientant
les portes tel que désiré (ill. 1).
Ouvrez la glissière des portes.
Ancrez les coins de la tente avec les ganses
de piquet. Tendez bien le tapis de sol (ill. 2).
– Finissez d’ancrer la tente à l’aide des
ensembles cheville et bague.
– Emboîtez les mâts solidarisés de l’armature
(quatre mâts).
Enfilez les mâts dans leur manchons
respectifs. Les mâts noirs – les plus longs –
se croisent et forment un X au milieu de la
tente. Les mâts gris – plus courts – s’insèrent
dans les passants d’avant en arrière des
côtés, alors que le mât central noir – le plus
court se place dans le passant du milieu de
la tente, d’avant en arrière (ill. 1).
2
Quand vous êtes prêt
à monter votre tente
Choisissez un endroit propice:
de niveau et sans pierres,
branches ou matières dures
et pointues
– Ne placez pas la tente sous
les arbres
Pour obtenir les meilleurs
résultats s’il y a du vent,
mettez l’arrière au vent
2 mâts de double toit
Mâts latéraux
(gris)
Mât central
court (noir)
Introduisez les mâts
emboîtés dans les passants
Instructions relatives au modèle 9272-210C
ill. 1
ill. 2
Piquet passé
dans la bague d’une
ganse de piquet
ill. 4
Armature de la
tente montée
Pièce n
o
9272-321
Pièce n
o
9272-323
Pièce n
o
9272-325
Pièce n
o
9272-315
ill. 3
Insérez la cheville
dans le bout du mât
Double toit
2 mâts principaux (noirs)
2 mâts latéraux (gris)
Pièce n
o
9272-319
Pièce n
o
9272-317
1 mât central (noir)
2 mâts droits (noir)
PIÈCES VARIÉES
Connect Frame to Tent
– Insert one pin into the end of main black tent
pole to the side of the door. (illus. 3), (illus. 4)
– Go to opposite end of pole and gradually
apply pressure to the pole forming an arch
until you are able to insert the pin into the
pole end.
– Repeat for second pole.
– Insert remaining pin into the end of side pole,
go to opposite end of pole and apply
pressure until you arch the pole and can
insert the pin into the pole. (illus. 3), (illus. 4)
Repeat for other side pole.
Pebble Creek
20’x11’
1
Layout & Positioning
of Tent, Pole Assembly
Layout and position tent with doors
facing desired direction. (illus. 1)
– Unzip doors.
Stake down tent corners, using the stake
loops. Keep the floor taut. (illus. 2)
Stake down tent through the rings on the pin
and ring system.
Assemble frame poles by interlocking shock-
corded poles. (four poles)
Insert the poles into pole sleeves. The longer
black poles should cross forming an “X” in
the middle of tent. The shorter side grey
poles insert into sleeves running front to
back. The shorter black center pole runs
straight front to back. (illus. 1)
2
When You Are Ready
To Set Up Your Tent
– Select a level campsite clear of
rocks, branches and other hard
or sharp objects.
– Do not set up your tent under trees.
For best results in windy conditions,
position the end of tent into the wind.
(2) Rainfly Poles
Side poles
(Grey)
Short Center
Pole (Black)
Assembled poles inserted
through pole sleeves
Instructions apply to Part Number 9272-210C
illus. 1
illus. 2
Tent stake
through ring
on stake loop
illus. 4
Tent frame
set-up
Part No. 9272-321
Part No. 9272-323
Part No. 9272-325
Part No. 9272-315
illus. 3
Insert pin into pole end
Rainfly
(2) Main T
ent Poles
(Black)
(2) Side Poles (Grey)
Part No. 9272-319
Part No. 9272-317
(1) Center Pole
(Black)
(2) Upright Poles
(Black)
POLE ASSEMBLY PARTS
Question and Answer IconNeed help?

Do you have a question about the Coleman Tent and is the answer not in the manual?

Summary

Tent Setup: Layout and Positioning

Site Selection and Tent Placement

Choose a level campsite clear of hazards and position the tent facing the desired direction.

Staking the Tent Floor

Stake down tent corners and rings using the stake loops to keep the floor taut.

Assembling and Inserting Poles

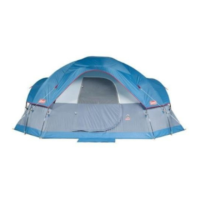
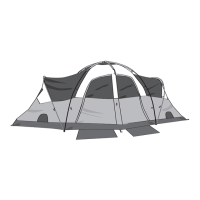
Assemble shock-corded poles and insert them into sleeves, forming an 'X' and front-to-back structure.

Tent Setup: Connecting Frame

Connecting Main Tent Poles

Insert pins into main tent poles, apply pressure to form an arch, and secure pins into place.

Connecting Side Tent Poles

Insert pins into side poles, apply pressure to arch them, and secure the ends.

Overview

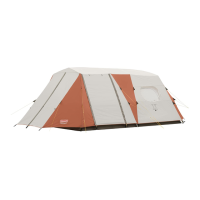
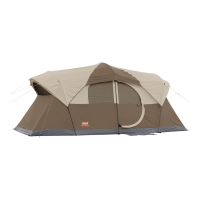
This document provides instructions for setting up a Coleman Pebbe Creek™ 20'x11' tent, identified by Part Number 9272-210C.

Function Description

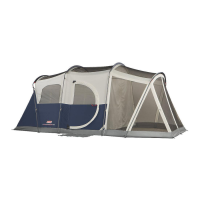
The Coleman Pebbe Creek™ 20'x11' tent is a large outdoor shelter designed for camping. Its primary function is to provide a temporary, enclosed space for sleeping and storage, offering protection from the elements. The tent features a robust frame structure to maintain its shape and stability, and a rainfly for additional weather protection.

Important Technical Specifications

The tent's dimensions are 20 feet by 11 feet, indicating a substantial footprint suitable for multiple occupants or ample gear storage. The pole assembly parts are categorized by type and part number:

  • (2) Main Tent Poles (Black): Part No. 9272-321
  • (2) Side Poles (Grey): Part No. 9272-323
  • (1) Center Pole (Black): Part No. 9272-319
  • (2) Upright Poles (Black): Part No. 9272-317
  • (2) Rainfly Poles: Part No. 9272-325
  • (Rainfly): Part No. 9272-315

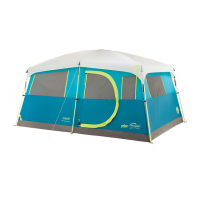
These specifications highlight the multi-pole design, which suggests a sturdy and potentially multi-room or zoned interior structure. The color-coding of the poles (black for main, center, and upright; grey for side) is a common feature in tents to aid in assembly.

Usage Features

Site Selection and Preparation

Before setting up the tent, users are advised to:

  • Select a level campsite: This ensures comfort and stability.
  • Clear the area: Remove rocks, branches, and other hard or sharp objects to prevent damage to the tent floor and ensure a comfortable sleeping surface.
  • Avoid setting up under trees: This is a crucial safety tip, likely to prevent damage from falling branches or sap, and to reduce exposure to lightning during storms.
  • Position the tent into the wind: For best results in windy conditions, the end of the tent should face the wind. This minimizes wind resistance and potential stress on the tent structure.

Layout and Positioning of Tent, Pole Assembly

The setup process begins with laying out the tent and assembling the poles:

  1. Layout and Position: Lay out the tent with the doors facing the desired direction. Unzip the doors to facilitate access and potentially aid in initial positioning.
  2. Staking: Stake down the tent corners using the stake loops to keep the floor taut. Additionally, stake down the tent through the rings on the pin and ring system, which likely refers to the points where the poles connect to the tent base.
  3. Pole Assembly: Assemble all frame poles by interlocking the shock-corded sections. The instructions specify four poles, but the parts list indicates more, suggesting that some poles might be pre-assembled or that the "four poles" refers to the main structural components.
    • Main Poles: The longer black poles should cross in the middle of the tent, forming an "X" shape.
    • Side Poles: The shorter grey poles insert into sleeves running from front to back.
    • Center Pole: The shorter black center pole also runs straight from front to back.
    • Pole Sleeves: All assembled poles are inserted through designated pole sleeves on the tent fabric.

Connecting Frame to Tent

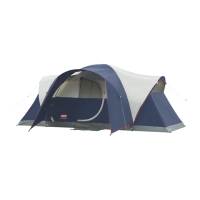
Once the poles are assembled and inserted into their sleeves, they need to be connected to form the tent's frame:

  1. Main Black Tent Poles:
    • Insert one pin into the end of a main black tent pole, specifically to the side of a door.
    • Go to the opposite end of the same pole and gradually apply pressure to form an arch.
    • Continue applying pressure until you can insert the pin into the pole end on the other side.
    • Repeat this process for the second main black tent pole.
  2. Side Poles:
    • Insert a remaining pin into the end of a side pole.
    • Go to the opposite end of the pole and apply pressure to arch it.
    • Insert the pin into the pole end on the other side.
    • Repeat this process for the other side pole.

This method of arching poles and inserting pins is a standard practice for creating tension in the tent fabric and ensuring a stable, taut structure. The illustrations (illus. 3 and illus. 4) visually support these steps, showing how a pin is inserted into a pole end and the overall tent frame set-up.

Maintenance Features

While the document does not explicitly detail maintenance features, the design choices imply certain aspects:

  • Shock-corded poles: This design makes poles easy to assemble and disassemble, and helps keep pole sections together, reducing the chance of losing parts. It also simplifies storage.
  • Pole sleeves: Integrating poles into sleeves protects them from direct exposure to the elements and reduces stress points on the tent fabric compared to clip systems, potentially extending the tent's lifespan.
  • Staking system: The use of stake loops and a pin-and-ring system for staking down the tent ensures a secure pitch, which is crucial for stability and longevity, especially in adverse weather. Proper staking prevents undue stress on the tent fabric and poles.
  • Rainfly: The inclusion of a separate rainfly (Part No. 9272-315) is a key maintenance feature, as it provides an additional layer of waterproofing and UV protection, shielding the main tent body from wear and tear and extending its life. The rainfly poles (Part No. 9272-325) suggest a structured rainfly that maintains an air gap for ventilation and prevents condensation, further contributing to the tent's overall condition and user comfort.

Overall, the Coleman Pebbe Creek™ 20'x11' tent is designed for ease of setup and robust performance, making it a suitable option for campers seeking a spacious and reliable outdoor shelter.

Coleman Tent Specifications

General IconGeneral
BrandColeman
ModelTent
CategoryTent
LanguageEnglish

Related product manuals