Do you have a question about the Coleman WEATHERMASTER 10 TENT and is the answer not in the manual?
Follow safety guidelines for tent setup, including avoiding power lines and lightning.
Unfold the tent on a clean surface, unzip doors, pull corners taut, and secure with stakes.
Assemble and insert ridge poles, leg poles, and window poles, ensuring proper connection.
Snap plastic hooks onto leg poles and adjust poles to stretch the tent to its finished size.
Assemble and install vertical and main door poles into their respective sleeves and hinges.
Drape the rainfly over the tent, ensuring seams face down and are centered over poles.
Fasten the rainfly to leg poles and window vent poles using hook & loop fasteners and metal hooks.
Loop guylines over stakes, stretch them tight, and hammer them into the ground at an angle.
Insert toggles of the divider panel through the top and bottom fabric loops at the tent's center.
Unzip the access panel to bring in an electrical cord, using only UL approved cords.
Unzip the side opening flap for cooler access or increased ventilation.
Ensure poles and stakes are in storage bag, and tent is clean and dry before packing.
Fold tent to bag width, roll tightly, and place in carry case for clean, dry storage.
Understand condensation, protect fabric from damage, and safely remove stakes.
Keep flame sources away from tent fabric; it can burn if in continuous contact with flame.
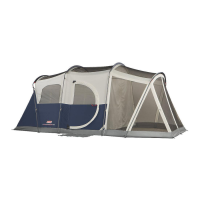
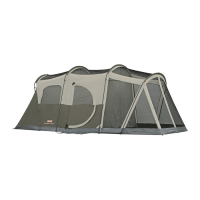
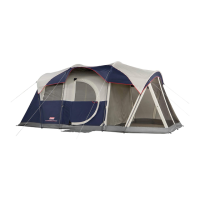
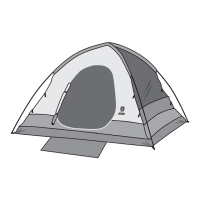
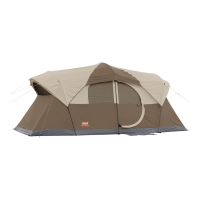
This document describes the Coleman WeatherMaster 10 Tent, a large camping tent designed for comfortable outdoor living. The tent features a spacious interior, a hinged rigid door for easy access, and a rainfly for protection against the elements. It also includes a room divider for privacy and dedicated access points for electrical cords and a cooler.
The Coleman WeatherMaster 10 Tent serves as a temporary shelter for camping and outdoor activities. Its primary function is to provide a protected and comfortable space for multiple occupants. The tent's design emphasizes ease of setup and durability, making it suitable for various weather conditions. The inclusion of a rainfly offers an additional layer of protection against rain and sun, while the hinged rigid door enhances convenience and security. The tent also incorporates features that improve ventilation and accessibility for utilities and refreshments.
The tent requires a level site clear of sharp objects for installation. It is crucial to avoid setting up under trees due to potential lightning strikes or falling limbs. For optimal performance in windy conditions, the narrow end of the tent should face into the wind. The assembly process is facilitated by color-coded poles and sleeves, and it is recommended to have at least two people for setup.
The tent utilizes a combination of steel and fiberglass poles. The main structure is supported by steel poles, including Long Leg Poles (with red marking), Short Leg Poles, and Curved Ridge Poles (some with red marking). Fiberglass poles are used for the Side Window Poles and Door Poles. The poles are shock-corded for easy assembly. The Leg Poles are assembled by pushing down a steel button on the tapered end and inserting it into an end with four holes, ensuring the button locks into the third hole. Curved Ridge Poles are inserted into sleeves on the top of the tent, with the red-marked pole going into the center sleeve. The curved ends of the Leg Poles (with red marking) are then inserted into the ends of the Ridge Poles (with red marking), and the remaining short Leg Poles are inserted into the ends of the remaining Ridge Poles.
Two shock-corded black Window Poles are assembled and inserted into sleeves at each end of the tent. The tapered metal tip of the Window Pole is then inserted into a hole in the Leg Pole. Gentle rotation of the Leg Pole may be necessary to align the hole. Pressure is applied to the window pole to form an arch, and the pin is inserted into the leg pole end at the corners of the tent. Plastic hooks located at the sides and corners of the tent snap onto the Leg Poles for attachment. Web straps with plastic hooks on the sides of each end panel Window Vent also snap onto the corner Leg Pole.
To achieve the finished size, the Leg Poles are stretched. This involves pushing a button on the Leg Pole while twisting the lower Leg Pole section counterclockwise. The top Leg Pole section is then pulled up until the tent is taut. Finally, the lower Leg Pole is twisted clockwise until the button locks into the center or lowest hole. This process is repeated for all remaining Leg Poles. Plastic stakes are inserted through web straps on both sides of the tent and driven in to secure it.
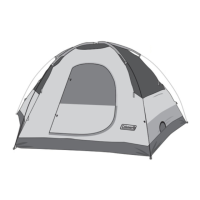
The tent features a hinged, rigid door for convenient entry and exit. The Vertical Door Pole (shorter black pole with plastic cap tips) is assembled and inserted through a zippered sleeve on the side of the door and into the hinge. The end of the Vertical Door Pole is inserted into the bottom hinge plate, and pressure is applied to form a slight bow before inserting the other tip into the top hinge. The vertical sleeve is then zipped up. The main Door Pole (longer black pole with plastic cap tips) is assembled and inserted into the zippered sleeve at the top of the door. One end of the Door Pole is inserted into the top hinge plate, pressure is applied to form a bow, and the other end is inserted into the bottom hinge. The sleeve is then zipped up to enclose the Door Pole.
The rainfly is draped over the tent, ensuring the seams face down and it is centered over the tent poles. Hook and loop fasteners on the underside of the rainfly are wrapped around each Leg Pole and Window Vent Pole location. Metal hooks on the elastic straps of the rainfly are inserted into the hole on each Leg Pole. Guyline ends are looped over stakes, stretched tight, and hammered into the ground at an angle to secure the rainfly.
A divider panel can be installed through the center of the tent by inserting toggles through the top and bottom fabric loops, providing privacy within the tent.
The tent includes an access panel in the lower left corner, which can be unzipped to bring in an electrical cord. Only UL-approved cords rated for outdoor usage should be used.
A smaller zippered opening on the side of the tent provides added ventilation and easy access to a beverage cooler. Unzipping the flap exposes a screen for ventilation, or unzipping the other flap creates an avenue to bring beverages into the tent.
Before storing, the tent must be clean and dry. The rainfly should be removed, and the tent spread out on the floor with doors and vents unzipped to allow for thorough drying. Any caked dirt should be brushed off. Storing a wet or dirty tent, even for a short period, can lead to damage and mildew.
All poles and stakes should be placed in their designated storage bag to prevent damage to the fabric items in the carry case. Tent poles should not be left telescoped together during storage. After cleaning and drying, the tent should be neatly folded to the width of the pole storage bag, placed on top of it, rolled tightly, and then placed in the carry case. Store the tent in a clean, dry area.
Stakes should always be removed by pulling on the stake itself, not by pulling on the tent fabric. Pulling on the tent to remove stakes can result in property damage or personal injury.
Condensation can form inside the tent due to factors like cold weather, high humidity, breath, perspiration, or wet clothing. This is not leakage but a natural phenomenon. It can be minimized by removing wet clothing from the tent and ensuring good ventilation.
Avoid setting up the tent under trees where tree limbs, sap, bird droppings, or moisture can cause damage to the tent fabric and its coating, leading to leaks or loss of flame-resistant properties. Prolonged exposure to ultraviolet rays from the sun can seriously damage the material and cause discoloration, so avoid leaving the tent set up for weeks at a time.
The tent fabric meets the flammability requirements of CPAI-84. However, it is important to keep all flame and heat sources away from the tent fabric, as it can burn if left in continuous contact with a flame source. Applying any foreign substance to the tent fabric may render its flame-resistant properties ineffective.
| Capacity | 10-person |
|---|---|
| Rooms | 2 |
| Setup Time | 20 minutes |
| WeatherTec System | Yes |
| Material | Polyester |
| Weight | 31 lbs |
| Shape | Cabin |
| Doors | 2 |
| Floor Material | Polyethylene |
| Dimensions | 17 x 9 ft (5.18 x 2.74 m) |
| Center Height | 6 ft 8 in (2.03 m) |
| Poles | Steel/Fiberglass |
| Pack Size | 28 x 12 x 12 in (71 x 30 x 30 cm) |