EasyManua.ls Logo

Coleman SCREENED WEATHERMASTER 9232C379 User Manual

Coleman SCREENED WEATHERMASTER 9232C379
2 pages
To Next Page IconTo Next Page
Page #1 background imageLoading...
Page #1 background image
SCREENED WEATHERMASTER
17'X9'
1
Layout & Positioning of Tent
– Layout and position tent with screen room
facing desired direction. (illus. 1)
– Stake down tent, starting with
the corners. Do not stretch
too tight. Angle the stakes
slightly toward the tent.
(illus. 2) Keep the floor taut.
– Stake down the remainder
of the stake loops.
– Unzip the door.
2
Assemble & Place Roof Poles
Assemble all shock-corded
roof poles. When assembled will
form a continuous arch with both
ends pointing down. (illus. 3)
– Select center roof poles with
red stickers, then insert through
the two center roof sleeves and
the roof pole sleeve at the front
of the screen room. (illus. 4)
– Select end roof pole, with blue
sticker, then insert through the roof
sleeve at end of the tent. (illus. 4)
When You Are Ready
To Set Up Your Tent
– Select a level campsite
clear of rocks, branches
and other hard or sharp
objects.
– Do not set up your tent
under trees.
– For best results in windy
conditions, position the
end of tent into the wind.
(3) Center Curved Roof Poles
(Red Sticker) Part No. 9232C372
(1) Rear (Blue Sticker)
Part No. 9232C373
(6) Center Upright Poles
(Red Sticker) Part No. 9232C374
(2) Rear Brace Poles
(Blue Sticker) Part No. 9232C375
Rainfly Part No. 9232C371
Instructions apply to Part Number 9232C379
illus. 3 Curved roof pole assembly.
illus. 4 Curved roof pole system shown
inserted through pole sleeve.
illus. 2
Stake loops
properly staked
Front of
screen
door
Roof sleeve
illus. 1
Roof pole sleeve
Shock-corded poles
Forms an arch
POLE ASSEMBLY PARTS
Question and Answer IconNeed help?

Do you have a question about the Coleman SCREENED WEATHERMASTER 9232C379 and is the answer not in the manual?

Coleman SCREENED WEATHERMASTER 9232C379 Specifications

General IconGeneral
Product NameColeman SCREENED WEATHERMASTER 9232C379
Model Number9232C379
CategoryTent
Capacity6 people
VestibuleNo
Screened RoomYes
Doors1
WeatherTec SystemYes
Carry BagYes
MaterialPolyester
Water ResistanceYes
Center Height6 ft (1.83 m)
Frame MaterialSteel/Fiberglass
RainflyIncluded

Summary

Setting Up Your Tent

Tent Pole Assembly Parts

Tent Layout and Positioning

Assembling Roof Poles

Raising Center Tent Poles

Raising Tent Ends

Important Usage and Safety Information

Condensation Management

Manage tent condensation by ensuring good ventilation and removing wet items.

Tent Storage and Care

Dry tent thoroughly before storage and do not telescope poles.

Stake Removal

Remove tent stakes by pulling the stake itself, not the fabric.

Seam Sealing

Seam sealing is recommended for additional protection against leaks.

UV Exposure Warning

Avoid leaving tent set up for extended periods due to UV damage.

Flame Resistance

Keep tent away from heat sources; fabric meets flammability standards.
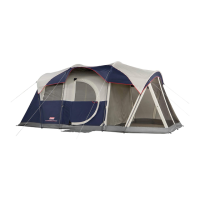
Related product manuals