EasyManua.ls Logo

Coleman SUNDOME 10'x10' User Manual

Coleman SUNDOME 10'x10'
2 pages
To Next Page IconTo Next Page
Page #1 background imageLoading...
Page #1 background image
Connect Frame to Tent
– Insert one end of main tent pole
onto pin of pin & ring system at tent
corner. (illus. 3)
– Go to opposite end of pole and
gradually apply pressure to the pole
forming an arch until you are able to
insert the pin into the pole.
– Repeat for second pole. (illus. 4)
1
Layout & Positioning
of Tent, Pole Assembly
– Layout and position tent with door
facing desired direction. (illus. 1)
– Unzip door.
– Stake down tent using the rings of the
pin & ring system at the corners of the
tent. Keep the floor taut. (illus. 2)
Assemble frame poles by
interlocking shock-corded poles.
This will make two long poles.
– Insert the poles diagonally into pole
sleeves.The center of the poles should
cross forming an “X” in the middle of
tent. (illus. 1)
2
Assembled
poles
inserted
through
pole
sleeves
illus. 1
illus. 4
Tent frame set-up
illus. 2
Tent stake through ring
illus. 3
Insert pole end onto
pin & ring
SUNDOME
®
10’x10’
When You Are Ready To Set
Up Your Tent
– Select a level campsite clear of
rocks, branches and other hard
or sharp objects.
– Do not set up your tent under trees.
For best results in windy conditions,
do not position the door of tent
into the wind.
(1) Rainfly
Pole
Rainfly Part No.
9180-313
(2) Main Tent
Poles
POLE ASSEMBLY PARTS
Instructions apply to Part Number 9160P191
Part No. 9180-314
Part No. 9180-316
Question and Answer IconNeed help?

Do you have a question about the Coleman SUNDOME 10'x10' and is the answer not in the manual?

Coleman SUNDOME 10'x10' Specifications

General IconGeneral
BrandColeman
ModelSUNDOME 10'x10'
CategoryTent
LanguageEnglish

Summary

When You Are Ready To Set Up Your Tent

Select a Level Campsite

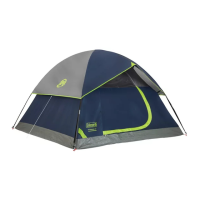
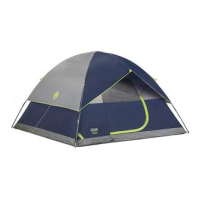
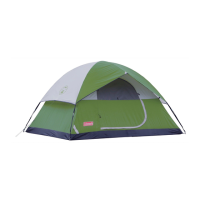
Choose a flat campsite clear of rocks, branches, and sharp objects for tent setup.

Tent Placement in Wind

For windy conditions, avoid positioning the tent door directly into the wind.

Layout & Positioning of Tent, Pole Assembly

Position Tent and Unzip Door

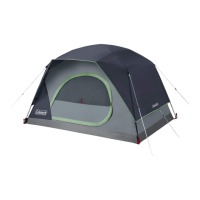
Lay out the tent with the door facing the desired direction and unzip it.

Stake Tent Floor

Stake down the tent floor using the corner pin & ring system, keeping it taut.

Assemble Frame Poles

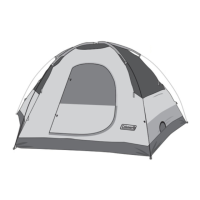
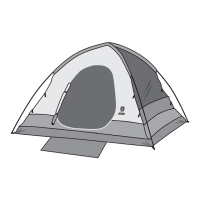
Interlock shock-corded poles to create two long poles for the tent frame.

Insert Poles into Sleeves

Insert poles diagonally into sleeves, crossing them in the center to form an 'X'.

Connect Frame to Tent

Attach Pole to Pin & Ring

Connect one end of a main tent pole to the pin & ring system at a tent corner.

Form Tent Arch

Apply pressure to the pole, forming an arch until it connects to the opposite corner pin.

Attach Tent to Frame Using Frame Clips

Attach Frame Clips

Fasten frame clips along the tent edges to the frame poles for secure attachment.

Adjust Corner Stakes

Make necessary adjustments to the tent corner stakes for proper tension.

Attach Rainfly

Assemble Rainfly Pole

Assemble the rainfly pole by interlocking its shock-corded sections.

Insert Rainfly Pole

Insert the assembled rainfly pole into the reinforced pockets on the rainfly underside.

Attach Underside of Rainfly

Secure the rainfly to its pole by attaching the fabric underside to the pole.

Drape Rainfly Over Frame

Drape the rainfly over the tent frame with the pole side facing down.

Connect Elastic Loops

Connect the rainfly's elastic loops to tent fabric loops using 'S' hooks.

Secure Rainfly Attachments

Fasten the rainfly securely using the attachments on its underside.

Stake Out Guylines

Stake out the tent using the six guylines for added stability, especially in wind.

Related product manuals