EasyManua.ls Logo

Commax TP-6AC User Manual

Commax TP-6AC
2 pages
To Next Page IconTo Next Page
Page #1 background imageLoading...
Page #1 background image
TP–6/12AC
Installation manual
Cautions for installation
Troubleshooting
1. Installation tools & parts : Nipper, Screw driver, UTP cable(Cat 5.E)
2. Products : TP-6/12AC , RF-1A
3. Wiring & setting method
3-1. Place the TP-6AC(12AC) upside down on the target place like [Picture 1]
3-2. Tighten the 4 screws with a proper screw driver Connect wires like [Picture1]
Be sure not to change the sequence of wires.
3-3. After nishing connecting wires, tighten the screws.
3-4. Connect wires of “RF-1A” to the products, No.1 with “+”wire, No.2 with “-“wire. Like [Picture 2]
4. Number Setting
4-1. The rst, second and third connected products can be set by switch up at DIP switch of each product like [Picture 3]
- DIP switch setting & wiring for other extension units, refer to user manual.
* “V/R” S/W is for bell sound volume control.
* “P”S/W is the function to talk without picking up the phone when interphone receive a call from other interphone
which is working with [Broadcasting] button
1. Total connected cable length shouldn’t be over 500M between rst & last product (0.65m/m)
2. Be sure not to change the wiring sequence.
1. A voice through the phones feels quite low or they are not working at all.
Test the interphones with short wires than normal or connected 1 more power source.
2. It doesn’t make a call to the targeted interphone
Check setting of DIP switches after turn it all down
3. A user can hear the voice coming from other connected products.
It is a sign of working properly. Conference call is supported.
RF-1A
[ Picture 2 ]
[ Picture 1 ]
[ Picture 3 ]
Question and Answer IconNeed help?

Do you have a question about the Commax TP-6AC and is the answer not in the manual?

Commax TP-6AC Specifications

General IconGeneral
BrandCommax
ModelTP-6AC
CategoryIntercom System
LanguageEnglish

Summary

Installation Manual

Installation Tools and Parts

Lists required tools and parts for the installation process.

Products

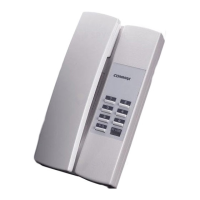
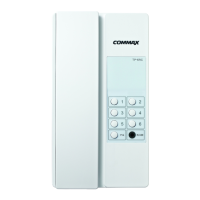
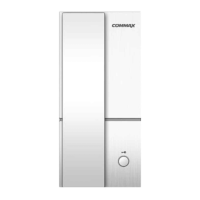
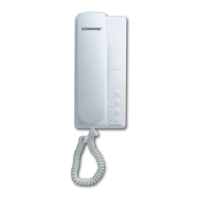
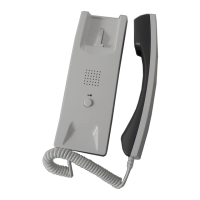
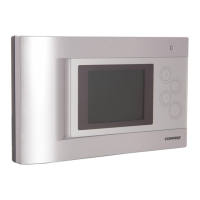
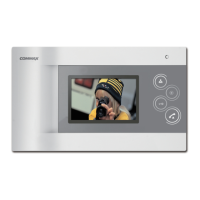
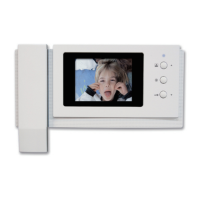
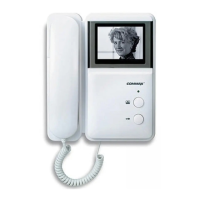
Identifies the specific products involved in the installation, TP-6/12AC and RF-1A.

Wiring and Setting Method

Details the physical connection of wires and the configuration of settings for the devices.

Number Setting

Explains how to set the DIP switches for numbering connected products.

Cautions for Installation

Maximum Cable Length

Specifies the total connected cable length limit between the first and last product.

Wiring Sequence Importance

Emphasizes the necessity of maintaining the correct sequence for wire connections.

Troubleshooting

Low Volume or Non-Working Phones

Addresses issues where phones have low audio or fail to operate.

Call Connection Failure

Guides on resolving problems where calls do not reach the intended interphone.

Audible Conference Calls

Explains that hearing other conversations is normal due to conference call support.

Principle of Each Function

Receiving Calls and Sound Output

Details how the system receives calls and generates audible alerts.

Making a Call

Explains the process of initiating a call between interphone units.

Receiving a Call

Describes the steps involved in receiving an incoming call.

Listening to Broadcasts

Outlines the procedure for receiving broadcasted audio signals.

Related product manuals