This document is a user manual for a Commercial Cool Portable Air Conditioner, models CCPACA10*** and CCPACA12H***. It provides comprehensive information on safety, setup, operation, cleaning, care, troubleshooting, and warranty.
The primary function of this device is to provide portable air conditioning. It offers multiple operating modes including COOL, DRY (dehumidification), FAN, and HEAT (for models with heating options). The unit is designed for use in various room environments, with specific temperature ranges for optimal performance.
Important Safety Instructions and Guidelines:
The manual emphasizes several critical safety points. Users are warned against operating the air conditioner in wet rooms, touching it with wet hands, or using it if it's damaged or malfunctioning. It's crucial not to cover or obstruct the inlet or outlet grilles, and hazardous chemicals should not be used for cleaning. Children should not operate the unit unsupervised. The appliance must always be transported and used in a vertical position on a stable, level surface. In case of accidental tip-over, the unit should be immediately turned off and unplugged. Repairs should only be carried out by qualified personnel.
Power Cord Operation:
The power supply cord includes a current-sensing device. To test it, users must plug in the air conditioner, press the TEST button (which should cause the RESET button to pop out), and then press the RESET button again to engage it. This ensures the cord is supplying electricity correctly. Users are cautioned not to use this device to turn the unit on or off. The reset button must always be pushed in for correct operation. If the power supply cord fails to reset or is damaged, it must be replaced by one obtained from the product manufacturer and cannot be repaired.
Electrical Requirements and Grounding:
The air conditioner requires a 115 volt, 60 Hz, AC only, 15 amp electrical supply. A separate circuit is recommended. The unit is equipped with a 3-wire cord and a 3-prong grounding plug, which must be plugged into a properly installed and grounded wall receptacle. The manual explicitly warns against using three-prong adapters or cutting off the grounding prong, as this can lead to electric shock. If grounding instructions are unclear or the appliance is not properly grounded, a qualified electrician or serviceman should be consulted.
Power Supply Cord Usage:
Extension cords are generally discouraged due to potential safety hazards. If absolutely necessary, only a grounding type 3-wire extension cord with a 3-blade grounding plug and a 3-slot receptacle that matches the appliance's plug should be used. The electrical rating of the extension cord must be equal to or greater than the appliance's rating. The cord should be arranged to prevent it from draping over countertops or tables where it could be pulled by children or tripped over.
Technical Specifications:
- Unit Dimensions (W x D x H): 13" x 11" x 26.8"
- Unit Weight: Approximately 45.2 lbs. (CCPACA10***) / 47.4 lbs. (CCPACA12H***)
- Electric Requirements: 115V ~ 60Hz
Operating Conditions:
The air conditioner operates within specific room temperature ranges depending on the mode:
- COOL Mode: 64°F (18°C) ~ 95°F (35°C)
- DRY Mode: 64°F (18°C) ~ 95°F (35°C)
- HEAT Mode (Electrical Heat Type): 45°F (7°C) ~ 81°F (27°C)
Performance may be affected if used outside these ranges.
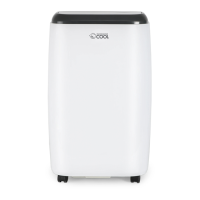
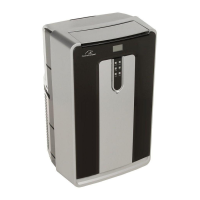
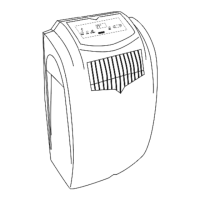
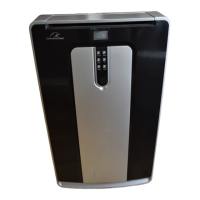
Usage Features - Parts & Controls:
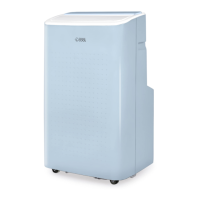
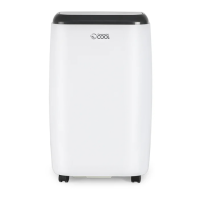
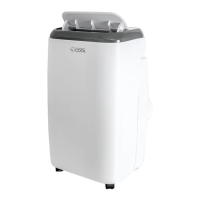
The unit features a control panel, a remote control, slide-out filter, horizontal louvers, carrying handles, casters for portability, a power supply cord, an air exhaust discharge vent, an air intake (evaporator), and a lower drain for AC condensation.
Control Panel and Remote Control:
Both the control panel and remote control offer similar functions:
- POWER Button: Turns the unit ON/OFF.
- MODE Select Button: Cycles through COOL, DEHUM (DRY), FAN, and HEAT modes. Mode indicator lights illuminate to show the selected mode.
- FAN Button: Selects HIGH or LOW fan speed in FAN mode.
- UP (/) / DOWN (V) Buttons (TEMP+/-): Adjusts temperature settings (62°F to 88°F / 17°C to 30°C) or TIMER settings (1-24 hours).
- TIMER Button: Sets AUTO START time when the unit is OFF, or AUTO STOP time when the unit is ON. The LED display shows the set hours.
- LED Display: Shows the set temperature in Fahrenheit, Auto-timer settings, and room temperature in DRY and FAN modes. It also displays error codes like "E0" (temperature sensor error) and "E2" (water tank full).
- Remote Sensor: Receives commands from the remote control.
Remote Control Battery Installation:
The remote control requires 2 x "AAA" 1.5V alkaline batteries (not included). Users are advised to remove batteries if the remote is not used for a month or longer, not to recharge them, and to replace both batteries simultaneously.
Installation Guide:
The air conditioner should be placed on a firm, level floor to minimize noise and vibration. It has casters for easy movement. An air path of at least 12 inches around the unit from walls, furniture, and curtains is required.
The manual includes detailed instructions for installing the window slider kit, which fits most standard vertical and horizontal window applications.
- Minimum Window Opening: 26.5 inches (67.5 cm)
- Maximum Window Opening: 48 inches (123 cm)
The kit can be secured with a bolt. If the window opening is less than the minimum length, one part of the slider kit can be cut to fit, but the hole in the slider kit should never be cut.
Instructions for double-hung sash/sliding casement window installation involve cutting and attaching foam seals to the window stool and top of the window, adjusting the slider kit length, and securing it.
Exhaust Hose Connectors:
The exhaust hose and connectors must be installed for COOL, DEHUMIDIFY, and HEAT modes, but removed for FAN mode.
- Install the hose connector over the air exhaust discharge vent by inserting the left side into the slots and then the right side into the grooves, pushing down to lock.
- Push the exhaust hose into the hose connector.
- Insert the opposite end of the exhaust hose into the window panel hose connector.
The exhaust hose should not be extended beyond its provided length and should not have any sharp bends. An 8-inch space around the unit is recommended for proper air circulation.
Maintenance Features - Cleaning & Care:
- Water Drainage: The unit has a lower drain for AC condensation. In dehumidifying modes, the drain plug should be removed, and a 5/8" universal female connector with a 5/8" hose (not included) should be attached to the drain outlet to direct water to a floor drain or drip pan. The "WATER FULL" indicator light (E2) signifies a full water tank, requiring drainage.
- Cleaning the Air Filter: The air filter should be cleaned at least every two weeks for optimum efficiency. It can be slid out, washed gently in warm water (about 104°F/40°C) with a neutral detergent, rinsed, and dried before re-installation.
- Cleaning the Unit Enclosure: Use a lint-free cloth soaked with neutral detergent, followed by a dry clean cloth.
- Extended Unit Storage (End of Season Operations):
- Drain all water from the unit by removing the rubber plug at the back and the plug from the bottom drain outlet.
- Run the appliance in FAN mode for half a day in a warm room to dry the interior and prevent mold.
- Unplug the appliance, wrap the cord, and remove batteries from the remote control.
- Clean and reinstall the air filter.
- Remove the exhaust hose and cover the window hole or remove the window slider.
Troubleshooting:
The manual includes a troubleshooting chart for common issues:
- Unit does not run: Check for activated overheat safety feature (wait 3 minutes), exhausted remote control batteries, or improper plugging.
- Unit stops suddenly: Check if the SET temperature is too close to room temperature (lower it) or if the air outlet is obstructed.
- Unit is running but room is not cooling: Check for open doors/windows, other heat-generating appliances, dirty air filter, high SET temperature, or improperly installed exhaust hose. Ensure the unit is in Cool Mode.
- Unit does not run and water full indicator light is on (E2): Drain water from the unit. If the problem persists, contact customer service.
- LED display "E0": Indicates a temperature sensor error.
W Appliance Co. provides a limited warranty to the original purchaser:
- 1 year (12 months) for labor
- 1 year (12 months) for parts (manufacturing defects only)
- 5 years (60 months) for compressor part only
The warranty starts from the purchase date. W Appliance Co. will replace defective products with new or remanufactured units.
Exclusions: The warranty does not cover cosmetic damage, altered serial numbers, damage from power surges or improper voltage, misuse, accidents, acts of God, unauthorized repairs, use of non-genuine parts, units transferred from the original owner, refurbished or "as-is" purchases, commercial/rental use, use not in accordance with instructions, improper installations, glass parts or accessories, transportation/shipping costs, food loss due to product failure, or service calls for instruction or household electrical issues.
For service, product literature, supplies, or accessories, customers should call W Appliance Co. Customer Satisfaction Center at 1-855-855-0294, providing proof of purchase, model number, and a description of the problem.