English
Introduction
Your monitor has
been designed
and
manufactured
io the highest
standards,
and subject
to
rigorous
testing.
Provided
it
is
properly operated
and maintained
it will
perform
well for
many years.
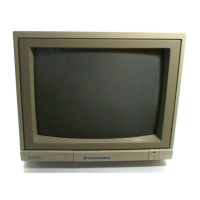
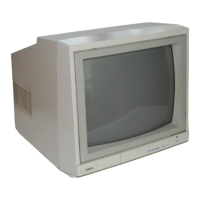
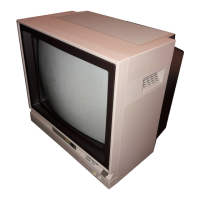
This colour
monitor
is suitable
for use with
home
and personal
computers,
video
recorders,
LaserVision
Players
and TV
Tuners
Connection to the
mains
(For
UK onlyj
Your new
monitor
is designed
to
operate
from
an a.c.
mains supply of 220-240
volts,
50 Hz.
Stabilising circuits ensure
satisfactory
performance within
normal
supply variations.
IMPORTANT: THIS APPARATUS MUST BE
EARTHED.
This can
be
achieved
by fitting a
3 pin plug. The wires in the earthed
mains lead are
coloured according to
the following
code:
BLUE
=
NEUTRAL
BROWN
=
LIVE
GREEN/YELLOW
=
EARTH
If the mains plug (or adaptor) contains
a
fuse,
the value of this fuse should be
3
Amp. Alternatively, if
another type of
plug (not fused) is used, the fuse at the
distribution board should not be greater
than 5
Amp.
If the colours of the wires in the mains
lead do not correspond with the
coloured
markings
identifying the
terminals in your plug, proceed
as
follows . .
.
The BLUE wire should be connected to
the
terminal marked
'N' or coloured
black.
The BROWN wire should be connected
to the terminal
marked
V or coloured
red.
The GREEN and YELLOW wire must be
connected
to the terminal in the plug
marked
by 'E' or the earth symbol
4, or
coloured green or green
and yellow.
Before replacing the plug
cover, make
certain that
the cord grip is clamped
over the sheath of the lead
-
not simply
over the three wires.
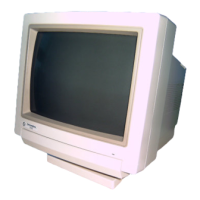
Positioning/Ventilation
In
order
to
prevent
overheating, ensure
that the
ventilation openings in the
monitor
are not covered.
The monitor should not be
placed near a
source of heat nor on a soft surface
since
this would'block the
ventilation
slots
on
the
bottom.
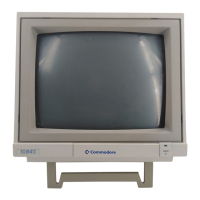
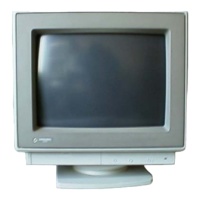
Movable support
You
can
tilt
the
monitor into
a
convenient
position with
regard
to
the computer
by
using the movable
support.
Connection to the mains
You
can connect your monitor to a mains
voltage of
between 220 and 240 V. If the
mains voltage in
your home is different
from this,
consult
your
dealer.
Connections (rear panel)
for
input of video and
audio signals. Each
connector Is marked with its
function.
»CVBS
Ilca
fQ0
dOO
eves/
1
i
a.up'0
"•.
: -
CVBS/L (Luminance) IN (Phono type)
CVBS (composite
signal) or Luminance
input Phono plug type.
For connection of
a
computer or other
CVBS sources.
CHROMA
IN
(phono
type)
Chroma (colour signal) of the phono
plug type. For
connection of
a
computer.
AUDIO IN (Phono type)
For connection of a
signal source with
a
sound (audio) signal output.
LCA/CVBS switch
With the
LCA/CVBS
switch Jl » you can
either choose the LCA signal or the CVBS
signal
oo
TI^HM
L- RG0
Connection (left panel)
Headphones
On the left side of the monitor
you
will find
a 3,5
mm jack-type
socket
for connecting
the headphones.
D
TTL RGB
input (8 pin DIN type 270
)
For connection of a computer with
a
TTL
RGB output with separated
synchronisation (TTL
level).
RGB linear input
(6 pin DIN
type
270°)
For connection of a Video Recorder,
Computer. LaserVtsion Player, TV Tuner,
etc.
Remark:
It you connect
both RGB inputs
simultaneously the
TTL RGB input
automatically
has
priority
over the linear
RGB input.
After switching off
or
removing
the
connection
cable
from the TTL source
RGB linear will
be looped in.
Operation
Switching on
(J)
• Press button (LED lights up).
Switching off
©
•
Press
button
©
again.
Picture and sound controls
For an optimum adjusimenl ot the video and audio input
signals
various
controls are
available.
Open flap
©.