RUCKUS AV Switch Quick
Setup Guide
The RUCKUS AV Switch Quick Setup Guide provides instrucons for a user
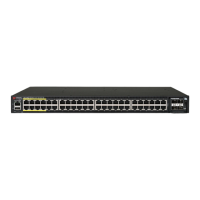
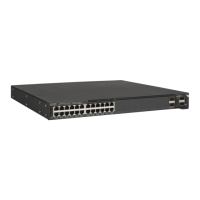
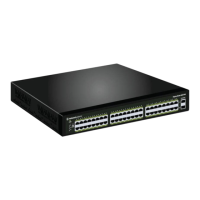
to get started with ICX 8200-24PV and ICX 8200-C08PFV (RUCKUS AV
Switches).
For more informaon on advanced conguraons and management
opons, refer to RUCKUS ICX FastIron and RUCKUS Unleashed user
documentaon available at: hps://support.ruckuswireless.com/
documents.
Package Contents
The RUCKUS AV 8200 shipping box includes all of the following items:
• The RUCKUS AV 8200 device
• An accessory kit containing the following items:
– One US AC power cord, shielded
– One USB Type-C to USB Type-A cable
– One power cord retaining clip
– Four rubber feet (included only with ICX 8200-C08PFV)
– Wall mounng kit containing two wall-mount screws and two plasc
anchors (included only with ICX 8200-C08PFV)
– Two-post rack kit (ICX7000-RMK) containing four rack-mounng
screws and four cage nuts (included only with ICX 8200-24PV)
– Rack mounng kit containing two L-shaped mounng brackets and
two sets of eight sink-head screws (included only with ICX
8200-24PV)
– Read Me First document
– RUCKUS AV Quick Setup Insert document
– Declaraon of Conformity/Regulatory yer
– China RoHS sheet
Default Switch Credenals
RUCKUS AV switches use the following default credenals:
• Username: super
• Password: sp-admin
Aer the rst login, you will be prompted to change the default password.
Managing Your AV Switch in RUCKUS Unleashed
Unleashed automacally discovers an out-of-the-box RUCKUS AV switch
because the switch contains factory default sengs, allowing the
Unleashed Master AP to connect to the AV switch.
Step 1: Powering Up the AV Switch
Place the AV switch on a at surface or mount it on a wall or a rack. For
more informaon on installaon opons, refer to the RUCKUS ICX 8200
Switch Hardware Installaon Guide.
Complete the following steps to power on the AV switch.
1. Connect the US power cable to the 100-240 VAC power source.
If you require a dierent power cable, refer to the RUCKUS Accessory
Guide.
2. Aer the device has booted, verify that the power and status LEDs are
blue.
The power supply LEDs display amber unl the power-on self-test
(POST) is complete, and then change to blue. The switch usually
requires several minutes to boot and complete POST. For more
informaon on the LED behavior, refer to Understanding LED Behavior
on page 2.
Step 2: Assigning an IP Address to the AV Switch
Complete one of the following steps depending on the IP address
assignment method on your network.
1. With DHCP services, use any of the LAN ports on the AV switch to
connect to the LAN network. The DHCP client in the AV switch is
congured to get an IPv4 address automacally aer it boots up.
2. In a LAN without DHCP services, connect to the serial port on the AV
switch and manually congure an IPv4 address. For more informaon,
refer to Connecng to the Serial Port of the AV Switch and
Conguring a Stac IP Address on page 2.
Step 3: Discovering the AV Switch in Unleashed
Once the switch has acquired an IP address, complete one of these steps
in the Unleashed UI to discover the AV switch, depending on how the
Unleashed AP is connected to the AV switch.
1. In a network topology where the Unleashed AP is directly connected
to one of the ports on the AV switch, the Unleashed AP will
automacally discover the AV switch; no addional acons are
required. The AV switch will be listed in the Switches component in
the Unleashed UI.
FIGURE 1 Unleashed AP Directly Connected to the AV Switch
2. In a network topology where the AV switch is not directly connected
to the Unleashed AP, the AP must be able to reach the AV switch
through the LAN network. Use the manual procedure in the
Unleashed UI to discover the AV switch. For more informaon on how
to manually add an AV switch, refer to Adding an AV Switch to
Unleashed Manually on page 3.
FIGURE 2
Unleashed AP Indirectly Connected to AV Switch
Upon discovery, the Master AP securely accesses the AV switch via
SSH using the default credenals, congures enhanced SNMP
sengs, and provisions new command-line interface (CLI) credenals
for the AV switch. This enables the switch to seamlessly integrate into
the Unleashed.
Step 4: Approving an AV Switch to Join Unleashed
If the Auto-Approval opon is enabled, the AV switch is automacally
approved and you may skip this step. If the Auto-Approval opon is
disabled or the switch is not in the factory default state, then once an AV
switch has been discovered, it is listed in the web interface as "Pending"
unl the administrator approves the join request.
Complete the following steps in the Unleashed UI to manually approve a
new AV switch to join Unleashed.
1. In the Unleashed dashboard, expand the Switches component and
select an AV switch that is marked as "Pending" in the list on the le
side of the page.
FIGURE 3 Selecng an AV Switch that is Pending Approval
2. Click Approve.
3. If the AV switch is not in factory default state, the Unleashed Master
AP is unable to login using the default username and password. Click
Connue to manually enter the login credenals.
4. In the Approve Switch to Join Unleashed dialog box, enter the
default credenals in the Admin Name and Password elds to
authencate to the AV switch.
5. Click OK. Unleashed immediately aempts to verify and approve the
AV switch. If successful, the AV switch status will change to
Connecng before joining Unleashed.
Copyright
©
2024 CommScope, Inc. All rights reserved. Page 1 of 3
Published October 2024, Part Number 53-1005832-01