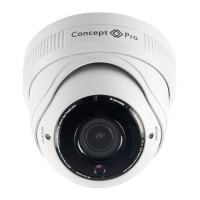
EasyManua.ls Logo

Concept Pro CVP9328DNIR-IP4M - User Manual

Concept Pro CVP9328DNIR-IP4M
12 pages
Print Icon
To Next Page IconTo Next Page
Loading...
CVP9328DNIR-IP4M
IP High Definition IR Eyeball Camera
USER MANUAL
FINDING THE CAMERA’S IP ADDRESS
IP CAMERA RANGE
2. Finding the camera’s IP address Using NVMS
1.Install NVMS from the CD. Now Double-click the NVMS icon on the Desktop.
The log in screen appears.
2.Under User Name and Password, enter the default NVMS user name (admin) and
password (admin). Click Login
3. NVMS opens and scans the local network for connected cameras. Detected camera IP addresses on
the LAN appear in the Device List on the left side of the screen with a icon.
4. Click on a camera IP address in Device List to login.
5. Under User Name, enter the user name for the camera (default: admin)
Under Password, enter the password for the camera (default: admin)
Click Continue.
Enter Camera User
(default: admin)
Enter Camera Password
(default: admin)
Click Continue to login
6. The camera appears under the camera IP address. Click and drag the camera to the display grid to
open it.
Click and drag the
camera to the display
grid to open
it
NOTE: For detailed instructions on using NVMS, see the NVMS manual on the CD.
1. Click Start>Computer>Network. The camera’s IP address appears under Network Infrastructure.
Double- click to open
the camera
Network
2. Double-click the camera to open it in your default browser.
3. Under User Name and Password, enter the camera’s User Name (default: admin) and Password
(default: admin) and click Login.
4. Finding the camera’s IP address using Bonjour® in Mac OS®
NOTE: To use this method, the camera computer must be on the same network. Bonjour® is
enabled by default, and can be enabled/disabled using NVMS (check the NVMS manual for
details)
1. Open Safari® browser and click the Bookmarks button
2. Click Bonjour. The camera’s IP address appears in the Monjour Devices list.
3.Double-click the camera to open it in Safari.
Bookmarks
button
Bonjour
Double-click the camera’s IP address
4. Under User Name and Password, enter the camera’s User Name (default: admin) and Password
(default: admin) and click Login.
Enter admin
Enter admin
Click Login
Found
camera
IP address
1. Finding the camera IP using BNC Test Cable
When the BNC test cable is connected to the camera, the IP address is shown on the test monitor. The
camera must be connected to power to use the BNC test cable.
NOTE: The default IP address of 192.168.0.120 is shown if the camera cannot obtain an IP address
from the router. Check the Ethernet/power connections and router
configuration.
3. Finding the Camera’s IP Address using UPnP in Windows® 7.
NOTE: To use this method, your router must support UPnP and the camera and computer must be on
the same network. UPnP is enabled in the camera by default, and can be enabled/disabled using NVMS
(Check the NVMS manual for details).
Use the steps below to find the camera’s IP address and connect to the camera over the local area
network (LAN) using NVMS, UPnP on Windows®7 or Bonjour in Mac OS®
Remove 2 screws to access
Factory Reset
Micro SD Card Slot*
SVO
*Micro SD card slot max 64GB supported; SanDisk™/Kingstorm
brand memory cards only.
Factory Reset
Enter Camera User Name (default: admin
Enter Camera Password (default: admin
Click
Enter Camera User Name (default: admin
Enter Camera Password (default: admin
Click
Design and specification are subject to change without notice.
Question and Answer IconNeed help?

Do you have a question about the Concept Pro CVP9328DNIR-IP4M and is the answer not in the manual?

Summary

CAUTION

PACKING CONTENTS

FIXING TO A WALL

CONNECTIONS

DIMENSIONS

FINDING THE CAMERAS IP ADDRESS

Finding Camera IP via BNC Test Cable

Using a BNC test cable to display the camera's IP address on a monitor.

Finding Camera IP using NVMS Software

Utilizing NVMS software to scan the network and locate connected cameras by IP address.

Finding Camera IP via UPnP in Windows

Leveraging UPnP on Windows 7 to discover the camera's IP address within the network.

Finding Camera IP via Bonjour on Mac OS

Employing Bonjour on Mac OS for locating the camera's IP address through Safari.

Factory Reset

TROUBLESHOOTING

Troubleshooting IP Address Discovery

Solutions for problems finding or connecting to the camera's IP address.

Troubleshooting Web Browser Connection

Resolving issues connecting to the camera via web browser, including DDNS.

Troubleshooting Video Stream Performance

Addressing poor video quality, bandwidth, and stream selection.

Troubleshooting User Account Lockouts

Procedure to unlock user accounts after multiple failed login attempts.

SPECIFICATION

Overview

The Concept Pro CVP9328DNIR-IP4M is an IP High Definition IR Eyeball Camera designed for CCTV monitoring. This user manual provides essential information for its installation, operation, and maintenance.

Function Description:

The CVP9328DNIR-IP4M is an IP camera capable of capturing high-definition video with infrared capabilities, making it suitable for surveillance in various lighting conditions, including low light and complete darkness. It supports network connectivity for remote monitoring and management, and its "eyeball" design allows for flexible positioning and adjustment of the camera's view.

Important Technical Specifications:

  • Model: CVP9328DNIR-IP4M
  • Sensor: S2LM + OV4689
  • System: PAL/NTSC, Progressive scanning
  • S/N Ratio: 55dB
  • Min. Illumination: Colour: 0.01Lux/F1.2; Black: 0 Lux (IR LED ON)
  • Shutter: Auto/Manual (1/5 – 1/20,000sec)
  • Image Enhancements: DWDR, HLC, Digital zoom, D-fog, DMZ, BLC, DNR (2D/3D), Gain (Auto/Manual 0-100)
  • Day/Night: ADC intelligent switch (Auto/Manual/Timing)
  • BLC: Auto
  • Auto Iris: DC drive
  • Lens: 4MP 3mm - 12mm IR Lens
  • Resolution (Stream1): 2688x1520/2560x1440/2304x1296/1920x1080
  • Resolution (Stream2): 1280x720/D1/VGA/640x360/CIF/QVGA
  • Resolution (Stream3): 2688x1520/2560x1440/2304x1296/1920x1080 /1280x720/D1/VGA/640x360/CIF/QVGA
  • Frame Rate:
    • 2688x1520/2560x1440: up to 15fps
    • 2304x1296: up to 20fps
    • 1920x1080: up to 25fps
  • Video Encode: H.264Base Profile / H.264 Main Profile / H.264 High Profile / MJPEG
  • Audio Encode: G711/G726
  • Stream: Triple stream
  • Bit Rate Control: CBR/VBR
  • Bit Rate: Main stream: 500Kbps – 12Mbps; Sub stream: 200Kbps – 8Mbps
  • IR Distance: 15-20M (49-65 feet)
  • Smart IR: PWM Smart IR
  • Network Protocols: IPv4/v6, RTSP/RTP/RTCP, TCP/UDP, HTTP, DHCP, DNS, FTP, DDNS, PPPoE, SMTP, SIP
  • Storage Protocol: CIFS, NFS
  • Compliance: Onvif v2.2 Profile-S Listed
  • Network Interface: RJ-45, 10/100Base-T
  • Analogue Output: BNC, 75ohm
  • SD Card Support: Support SD, SDHC, SDXC card, 64GB maximum (SanDisk™/Kingstorm brand memory cards only)
  • Alarm: I/O, Disk alarm
  • Storage: FTP, NAS, SD card
  • Masking Area: 5 areas
  • IVS: Yes
  • Power: DC12V/PoE
  • Power Consumption: 3W (IR LED OFF); 5W (IR LED ON)
  • Operating Temperature: -10°C~+55°C
  • Humidity: 90% RH MAX
  • Protection: IP66/IK6
  • Dimensions: Ø120×106mm
  • Weight: 750g

Usage Features:

  • Installation: The camera can be fixed to a wall using the provided mounting template, fitting screws, and wall plugs. The base ring can be unscrewed to separate the camera and middle ring from the base for installation.
  • Connectivity:
    • Power: Connects via a power connector (DC12V) or Power over Ethernet (PoE) via an RJ45 network cable. If using PoE, an external power supply is not required.
    • Network: Connects to a network switch via an RJ45 cable.
    • Video Output: Includes a BNC test cable (SVO) for connecting to a test monitor to verify video feed and IP address during installation.
    • Audio: Features Audio Input (RCA) and Audio Output (RCA).
  • Adjustments:
    • Positioning: The camera allows for Pan 360° and three-axis rotation for flexible viewing angles.
    • Lens Adjustment: Includes a lens adjustment tool, focus adjustment screw, and view angle adjustment screw for fine-tuning the image.
  • IP Address Discovery:
    • BNC Test Cable: The camera's IP address can be displayed on a test monitor when connected via the BNC test cable.
    • NVMS (Network Video Management Software): The camera's IP address can be found by installing NVMS from the provided CD, logging in with default credentials (admin/admin), and scanning the local network.
    • UPnP (Universal Plug and Play) in Windows® 7: If the router supports UPnP and the camera/computer are on the same network, the camera's IP address appears under Network Infrastructure.
    • Bonjour® in Mac OS®: If Bonjour is enabled, the camera's IP address appears in the Monjour Devices list in Safari browser.
  • Web Browser Access: Once the IP address is known, the camera can be accessed via a web browser (e.g., Internet Explorer, Google Chrome, Safari, Mozilla Firefox) by entering the IP address and logging in with default credentials (admin/admin). ActiveX plug-in or Adobe Flash Player may be required for video viewing depending on the browser.
  • Micro SD Card Slot: Supports up to 64GB SanDisk™/Kingstorm brand memory cards for local storage.
  • Factory Reset: A factory reset button is accessible by removing two screws to access the internal components, allowing the camera to be reset to its default settings.

Maintenance Features:

  • Cleaning: The lens cover should be cleaned carefully with a soft, lint-free cloth.
  • Troubleshooting: The manual provides guidance for common issues such as:
    • Camera IP address not found: Check Ethernet/DC power, PoE switch power, network connectivity (ping test), BNC test cable display, and static IP settings (reset to DHCP if necessary).
    • Cannot connect via web browser (local IP): Verify local IP address.
    • Cannot connect via web browser (DDNS): Check port forwarding for HTTP (default 80) and Control (default 30001) ports, and ensure multiple cameras use different ports.
    • Cannot view camera video on web browser: Install ActiveX plug-in or Adobe Flash Player for IE, or ensure the latest version of Flash Player for other browsers.
    • Poor video performance: Select a lower-resolution stream (Stream 2) to conserve bandwidth, or use ActiveX plug-in for smoother performance in IE.
    • User account locked: Unlock the account by logging in as admin, navigating to Privilege Manager > User, selecting the locked account, and clicking Unlock.
  • Cautionary Procedures: Emphasizes the importance of professional installation, avoiding vibration/shocks, operating within temperature/power limits, shutting down power if damage occurs, avoiding unstable lighting, keeping away from gas/oil leaks, not disassembling, protecting the sensor from strong light, replacing covers, avoiding strong electromagnetic fields, and preventing physical shocks. Failure to follow these cautions may invalidate the warranty or cause serious injury.

Concept Pro CVP9328DNIR-IP4M Specifications

General IconGeneral
BrandConcept Pro
ModelCVP9328DNIR-IP4M
CategorySecurity Camera
LanguageEnglish

Related product manuals