This document serves as a user manual for the Concept Pro CVP9324DN-IP4M, CVP9324DNIR-IP4M, CVP9324DNIR-IP4M-G, and CVP9324DNIR-IP4M-Z external dome cameras, which are designed for various surveillance applications. The manual provides essential information regarding installation, connection, operation, troubleshooting, and specific settings for number plate capture.
Function Description
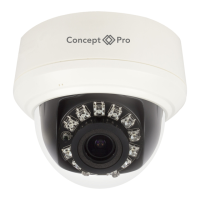
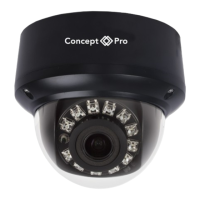
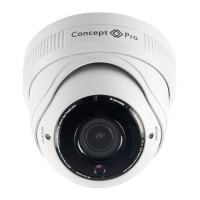
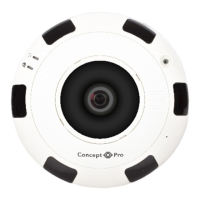
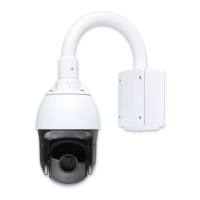
The Concept Pro CVP9324 series cameras are external dome cameras primarily used for surveillance and security purposes. These cameras are capable of capturing high-quality video streams and offer various features to enhance monitoring capabilities. The models include both standard and IR (Infrared) versions, with some variants specifically optimized for challenging lighting conditions or specialized tasks like number plate capture.
The core function of these cameras is to record and transmit video over a network. They support multiple video compression formats (H.264/265, MJPEG) and can deliver different stream resolutions and frame rates, allowing users to balance video quality with bandwidth and storage requirements. Audio input and output capabilities are also integrated, enabling two-way audio communication or audio monitoring, depending on the setup.
Network connectivity is established via an RJ45 Ethernet port, supporting both 10/100 Base-T connections. Power can be supplied either through a DC12V adapter or via Power over Ethernet (PoE), simplifying installation by allowing both power and data to be transmitted over a single cable.
A key feature is the Service Video Out (SVO), which provides a standard definition analogue video output. This is particularly useful during installation for setting up and adjusting the camera using a test monitor, without needing to connect to the network initially.
The cameras are designed with a tri-axis gimbal, allowing for flexible positioning and adjustment of the lens to cover a wide field of view. This mechanical flexibility ensures that the camera can be precisely aimed to monitor specific areas, whether mounted on a ceiling or wall.
For enhanced security and data management, the cameras include an edge storage slot for a Micro SD/SDHC/SDXC card, supporting up to 128GB. This allows for local recording, providing a backup or primary storage solution in case of network interruptions or for specific recording needs.
Advanced image processing features are integrated to optimize video quality in various environments. These include Wide Dynamic Range (WDR) for handling scenes with both very bright and very dark areas, Digital Noise Reduction (2D/3D) to clean up video in low-light conditions, and Highlight Compensation (HLC) to reduce glare from bright lights. Some models also feature a 9:16 Corridor Mode, which is ideal for monitoring narrow vertical spaces, and support for Defog to improve visibility in foggy conditions.
The cameras also incorporate various alarm triggers, such as motion detection, network disconnect, and disk alarm, which can be configured to alert users to potential security events. An alarm input and output are available for integration with external alarm systems.
Usage Features
The CVP9324 series cameras offer a range of features designed for ease of use and flexible deployment:
Installation and Setup:
- Mounting: The cameras come with a mounting template to facilitate precise drilling and installation. They support surface mounting, and the vandal-resistant dome design ensures durability.
- Tri-Axis Gimbal: The tri-axis gimbal allows for 360° rotation, 90° tilt, and 360° pan, providing comprehensive coverage and flexibility in camera positioning. This is crucial for optimizing the field of view after physical installation.
- BNC Test Cable: A BNC test cable can be connected to the camera's SVO port to display the IP address and video feed on a test monitor. This simplifies initial setup and verification of video connections without requiring network access.
- PoE Support: Power over Ethernet (PoE) simplifies wiring by delivering power and data over a single Ethernet cable, reducing installation complexity and cost.
- IP Address Discovery: The manual outlines multiple methods for finding the camera's IP address, including using the BNC test cable, UPnP on Windows® 7, and Bonjour® on Mac OS®. This ensures that users can easily locate and access the camera on their network.
- Web Interface Access: Once the IP address is known, the camera can be accessed via a web browser. The default login credentials (admin/admin) are provided, with a note that some firmware versions may require creating a new unique username and password for enhanced security.
Video and Image Management:
- Multiple Streams: The cameras support multiple video streams (Stream 1 and Stream 2) with different resolutions and compression settings. This allows for simultaneous viewing of high-quality video for recording and lower-resolution video for remote monitoring or bandwidth-constrained environments.
- Image Settings: Users can adjust various image parameters such as Rotate Mode, Saturation, Brightness, Contrast, and Sharpness through the web interface to optimize video quality for specific lighting conditions and preferences.
- Corridor Mode (9:16): This specialized mode is useful for monitoring narrow vertical areas, such as hallways or aisles, by rotating the image to maximize vertical coverage and minimize wasted horizontal space.
- Region of Interest (ROI): This feature allows users to define specific areas within the video frame for higher-quality encoding, saving bandwidth by reducing the quality of less critical areas.
- Defog: Improves image clarity in foggy or hazy conditions, ensuring better visibility and more reliable surveillance.
Network and Security:
- Comprehensive Network Protocols: Support for a wide range of network protocols (HTTP, HTTPS, TCP/IP, UDP/IP, RTSP, DHCP, NTP, PPPoE, Unicast, Multicast) ensures compatibility with various network infrastructures and applications.
- User Security Authentication: The camera incorporates user security authentication, allowing for secure access control to the device.
- Onvif/CGI Compatibility: Compliance with Onvif and CGI standards ensures interoperability with a wide range of Network Video Recorders (NVRs) and Video Management Systems (VMS).
Specialized Features (Number Plate Capture):
- Optimized Settings: The manual provides specific instructions for configuring the camera for Number Plate Capture (NPC) installations. This involves adjusting sensor settings, exposure (manual mode, specific shutter speed, fixed gain, iris settings), and Day/Night settings (Night Mode, fixed IR strength). These adjustments are crucial for capturing clear images of license plates in various lighting conditions.
- Debug Mode: The NPC setup process utilizes a "Debug Mode" in the sensor settings, allowing for fine-tuned adjustments to exposure and other parameters to achieve optimal performance for this specialized application.
Maintenance Features
The manual outlines several important maintenance and troubleshooting guidelines to ensure the longevity and proper functioning of the camera:
General Cautions and Safety:
- Qualified Installation: Emphasizes that installation should be performed by a qualified service person and adhere to all local codes, ensuring safety and correct setup.
- Environmental Considerations: Advises against installation on surfaces subject to frequent vibration or shocks and warns against operating the camera beyond its specified temperature range or power source ratings.
- Power Management: In case of damage or suspected damage, users are instructed to shut down the power source, unplug the camera, and contact their service provider.
- Lighting Conditions: Recommends avoiding installation under unstable lighting conditions, as severe changes or flicker can cause improper camera operation.
- Hazardous Environments: Explicitly states not to use the camera near gas or oil leaks.
- Disassembly Warning: Users are warned not to disassemble the camera, as this can cause damage and void the warranty.
- Strong Light Sources: Advises against pointing the camera directly at strong light sources to prevent damage to the sensor.
- Cover Replacement: Ensures that all removable covers are replaced to protect internal components from environmental factors.
- Electromagnetic Fields: Recommends avoiding installation near devices that emit strong electromagnetic fields, which could interfere with camera operation.
- Cleaning: Specifies using only a dry or damp cloth for cleaning, avoiding harsh chemicals that could damage the camera's surface or components.
- Physical Shocks (Internal CBP Dome): For internal CBP dome models, users are cautioned not to drop the camera or subject it to physical shocks.
Troubleshooting Guide:
- IP Address Issues: Provides detailed steps for troubleshooting scenarios where the camera's IP address cannot be found, including checking Ethernet/DC power connections, PoE switch status, network connectivity (ping test), and router configuration. It also covers situations where the camera might be set to a static IP mode incorrectly and suggests resetting to factory defaults if necessary.
- Web Browser Connection Problems: Offers solutions for issues connecting to the camera via a web browser, such as verifying the local IP address and ensuring proper port forwarding for DDNS access.
- Video Display Problems: Addresses common problems with camera video not displaying in a web browser, advising users to install necessary plugins like ActiveX (for IE) or ensuring the latest version of Adobe Flash Player is installed for other browsers.
- Poor Video Performance: Suggests solutions for poor video performance, such as selecting a lower-resolution stream (Stream 2) to conserve bandwidth or using the ActiveX plug-in for smoother video.
- Locked User Accounts: Explains that user accounts lock after three incorrect password attempts and provides instructions for unlocking them via the admin login in the web interface (Privilege Manager > User > Unlock).
Firmware and Security Updates:
- The manual notes that some firmware versions may have enhanced security enabled, prompting users to create a new unique username and password upon initial login. This is a maintenance feature that enhances the security posture of the device.
By following these guidelines, users can ensure the reliable operation, security, and longevity of their Concept Pro CVP9324 series cameras.