Do you have a question about the CONCORD CNK4242WPA-A and is the answer not in the manual?
Guidelines for power supply usage, device handling, environment, and general care precautions.
Safety measures for operation, ventilation, problem handling, and avoiding environmental hazards.
Detailed description of the NVR's rear panel interfaces and their functions.
Instructions on operating the NVR using the supplied USB mouse for navigation.
Guide to using the on-screen virtual keyboard for entering text and data.
Procedures for setting and managing the administrator password to protect system privacy.
Step-by-step guide to configure the NVR during the initial startup process.
Configuring essential network settings like IP address, subnet mask, and gateway for device operation.
Configuring the system's date, time, date format, time format, and time zone.
Configuring Network Time Protocol to automatically synchronize the NVR's clock.
Settings for managing Daylight Saving Time based on regional observance.
Managing the NVR's internal hard drive, including formatting and overwrite options.
Configuring the video output resolution for optimal display on connected monitors.
Enabling and configuring remote access to the NVR via smartphone or tablet.
Reviewing the summary of configured settings before completing the NVR startup wizard.
Overview of the live viewing screen layout, including status icons and display areas.
Features and operations accessible via the camera quick toolbar during live view.
Utilizing the taskbar for system navigation, status checks, and quick actions.
Accessing core system functions and navigating through the start menu options.
Procedures for securing the NVR interface by locking and unlocking the screen.
Steps for safely shutting down, rebooting, or logging out of the NVR system.
Setting up and managing wireless camera channels, live view, and pairing.
Configuring individual camera parameters and display settings for live viewing.
Fine-tuning camera image quality by adjusting Hue, Brightness, Contrast, and Saturation.
Configuring motion detection sensitivity, areas, and enabling/disabling the feature.
Configuring PIR sensor sensitivity and defining detection areas for motion events.
Setting up alarm functions including buzzer duration, event recording, and email/message alerts.
Setting up FTP to upload captured images when PIR detection is triggered.
Defining and applying privacy zones to mask specific areas within the camera's field of view.
Configuring recording switch, stream mode, and pre-record settings for each channel.
Creating custom schedules for normal, motion, or PIR recording for each channel.
Enabling automatic image capture and setting intervals for normal and alarm events.
Defining schedules for capturing snapshots based on normal intervals or motion detection events.
Setting up system notifications for exceptions like disk errors, video loss, or disk space issues.
Configuring general network parameters including DHCP, IP address, subnet mask, and gateway.
Configuring the NVR to connect to the network using PPPoE, requiring user credentials.
Configuring various ports (Web, Client, RTSP) and UPnP for remote access and streaming.
Setting up Dynamic DNS service for simplified remote connection using a domain name.
Configuring email server details, user credentials, and recipient addresses for alerts.
Defining schedules for email notifications based on motion detection, PIR events, or exceptions.
Configuring FTP client settings to upload captured snapshots to a remote server.
Managing the NVR's hard drive, including initial formatting and setting overwrite policies.
Displaying S.M.A.R.T. information and performing diagnostic tests to evaluate hard drive health.
Configuring Dropbox cloud storage for uploading captured pictures and snapshots.
Configuring system settings like device name, ID, language, and video format.
Configuring the system date, time, date format, time format, and time zone.
Detailed configuration for NTP time synchronization and Daylight Saving Time adjustments.
Configuring video output options, sequence mode, layout, and resolution for the NVR.
Fine-tuning the live output display by adjusting scale, offset, cursor behavior, and transparency.
Managing multiple user accounts, setting levels, and enabling/disabling user access.
Enhancing security with password protection and adding new user accounts to the system.
Defining granular access permissions for each user account to specific menus and functions.
Accessing and managing system logs, including viewing events and creating log backups.
Loading default settings for the entire system or specific menus to restore factory configurations.
Searching system log entries by date, time, and event type to troubleshoot issues.
Steps for upgrading the NVR system firmware via USB drive.
Managing NVR configuration settings by exporting to or importing from a USB flash drive.
Setting up the NVR to automatically reboot on a schedule to maintain operational integrity.
Procedures for upgrading the firmware of connected IP cameras.
Accessing and viewing comprehensive system information, including device ID, network status, and P2P QR code.
Viewing detailed network status attributes like IP address, subnet mask, and connection status.
Searching and playing back recorded videos, events, and snapshots stored on the NVR.
Comprehensive explanation of all playback control bar functions, including speed, zoom, and volume.
Selecting date, time, type, and channels to search and play back specific video recordings.
Creating and saving video clips from playback sessions to a USB flash drive.
Navigating the file system to choose a destination folder for saving backup files.
Locating specific events, playing them back, and backing them up to a USB drive.
Viewing detailed information for each event and locking events to prevent data loss.
Managing the playback of events using the control interface and timeline features.
Playing multiple recording segments or events from a single channel concurrently.
Locating, viewing, and copying snapshot images to a USB flash drive.
Managing the display of snapshots in a slideshow and saving selected images to USB.
Minimum hardware and operating system requirements for using the NVR's web client.
Instructions for downloading and installing the necessary browser plugin for web client access.
Steps to log in to the web client using username and password after plugin installation.
Guide for installing the surveillance client software on Mac OS using Safari browser.
Overview of the web client's live view interface, channel list, and control buttons.
Fine-tuning video appearance in the web client by adjusting Hue, Brightness, Contrast, and Saturation.
Searching and playing back recorded files stored on the NVR's HDD via the web client.
Enabling and controlling synchronous playback of multiple channels in the web client.
Detailed explanation of all playback control functions available in the web client.
Downloading matched record files from the NVR to the local PC and monitoring the download process.
Setting local drive paths for recordings, downloads, snapshots, and selecting file types.
Searching for and installing the Concord Security mobile application on Android or iOS devices.
Adding the NVR to the mobile app, viewing live feeds, and using app features like snapshots.
Navigating the mobile app menu to access live view, playback, recorded files, and settings.
Solutions for common issues like HDD detection, forgotten passwords, and abnormal video signals.
Guidelines for safely shutting down the NVR, maintaining cleanliness, and ensuring adequate ventilation.
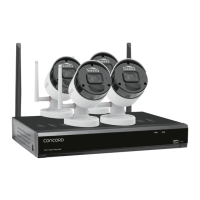
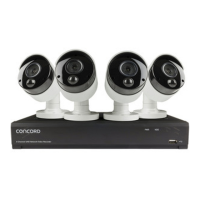
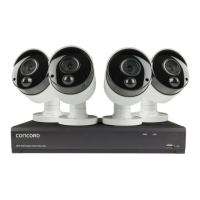
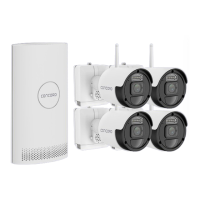
Listing and identifying all accessories included in the NVR package, such as cameras, mouse, and cables.
| Channels | 4 |
|---|---|
| Video Compression | H.264 |
| Recording Resolution | 1080p |
| Remote Viewing | Yes |
| Motion Detection | Yes |
| Operating System | Embedded Linux |
| Power Supply | 12V DC |