40
6.3
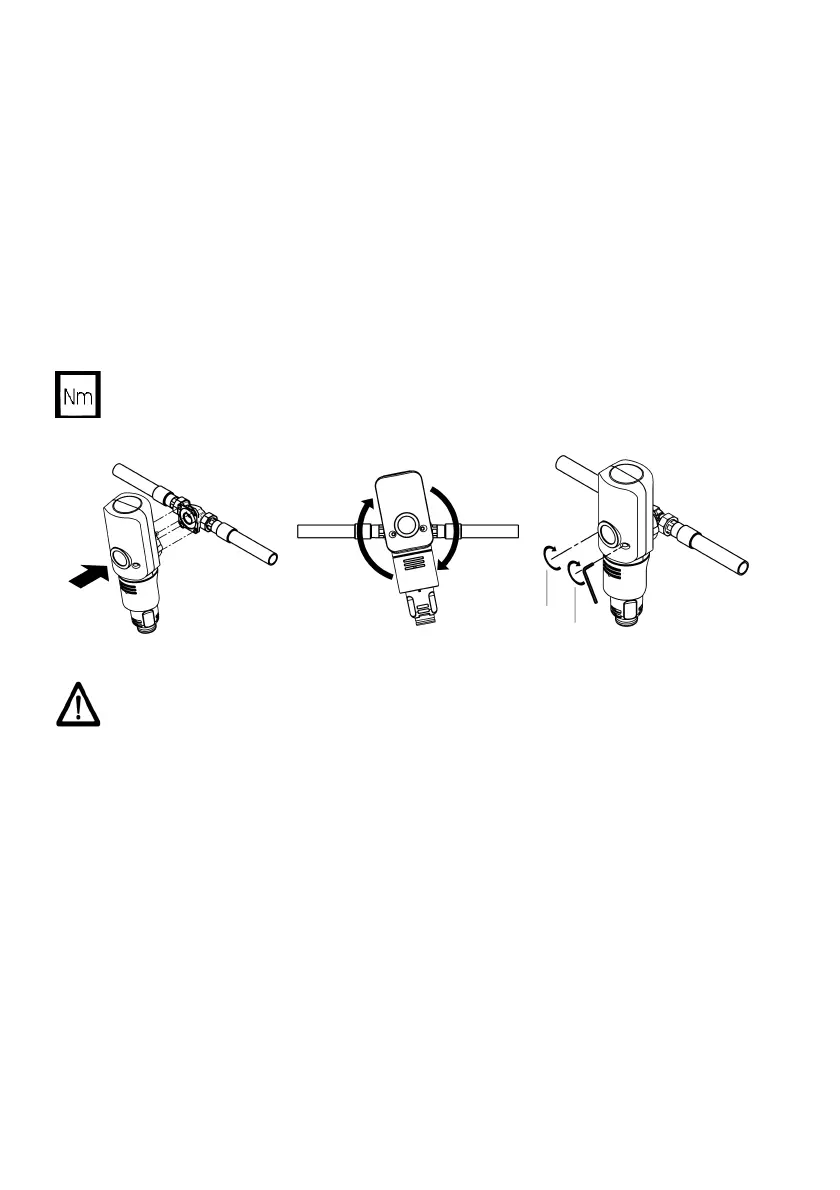
MOUNTING THE BACKWASHING FILTER
The built-in rotary flange for the backwashing filter is supplied with bayonet drill holes. The necessary seals
and screws for this backwashing filter have already been mounted.
Do not unscrew the screws!
/ Insert the four flange screw heads through the bayonet drill holes on the built-in rotary flange (see
fig. 6 I).
/ Turn the backwashing filter in a clockwise direction as far as it will go (see fig. 6 II).
/ Tighten the two screws in the front alternately with an Allen key (see fig. 6 III).
The pipes must be able to safely support the backwashing filter. Otherwise mechanical damage or frac-
tures/bursts can occur in the pipes. This can result in major water damage.
Persons close to the backwashing filter are exposed to a health risk due to the large quantities of water re-
leased.
Therefore, if necessary, the pipes must be additionally fixed or supported.
For convenient operation and maintenance it is absolutely necessary to ensure the given spacings. A space
of at least 250 mm should be maintained above and below the backwashing filter. These distances are nec-
essary to be able to properly carry out the backwashing.
The chapters 6.4 „BACKWASH WATER DISCHARGE OPTIONS“ and 7.3 „BACKWASHING“ must
always be observed!
Select the torque (approx. 6 Nm) so that the gasket closes and the backwashing fil-
ter is not damaged or strained!
Fig. 6: Installing the backwashing filter
The unit may only be installed by skilled personnel. The chapter 4.1 “INTENDED
USE” must always be observed!
 Loading...