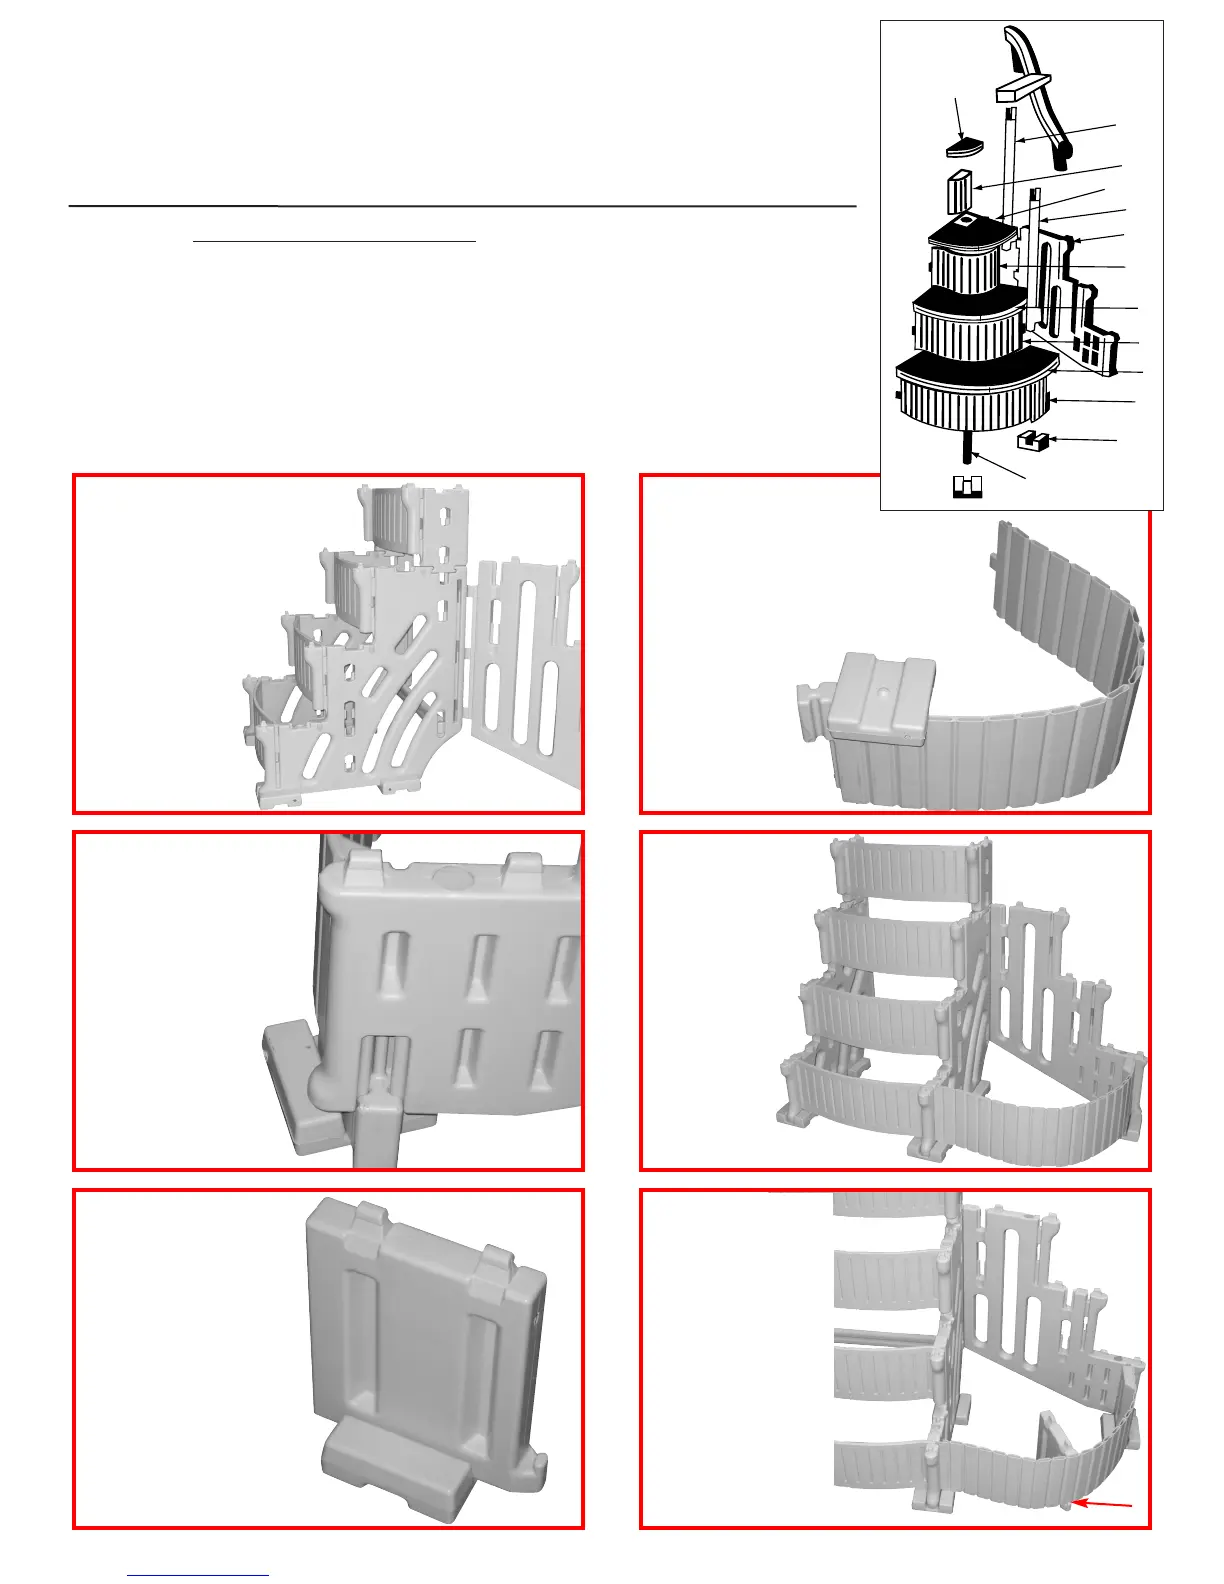
Install the add-on panel [J]
by inserting the three tabs
into the three openings
located towards the back
of step panel [A].
Push the tabs all the
way in, then tap panel
down with a
rubber mallet
until seated
in openings.
Step 19
Next, install one of the foot pads [H]
onto the tab located on the bottom of
the large flex riser [M] by placing over
the raised tab and striking with a rubber
mallet until seated. Foot pad [H]
should be installed in the same
direction as the
front foot pads
on base step.
[Refer to steps
7 & 9].
Step 20
Tilt the step back far
enough to slide the
end of large flex riser
[M] up into the slot
located on the front
bottom edge of the
add-on side panel.
Step 21
Insert the tab on
the other end of
the flex riser [M]
into the opening
on side panel [A].
Step 22
Attach the last foot
pad [H] on to the
bottom of the tread
support [N] by placing
over the raised tab
and striking with a
rubber mallet until
seated. Foot pad [H]
should be installed
in the same position
as the front foot
pads on base step.
Step 23
Locate the notch on
the bottom edge of
the large flex riser
[M]. Slide the step
support [N] under
then rotate up making
sure part is in notch.
Step 24
5
T
S
L
K
J
R
Q
P
M
H
N
O
U
Additional Parts for Step Add-On
2 - Foot pads [Part H]
1 - Add-on panel [Part J]
1 - Short hand rail post [Part K]
1 - Long hand rail post [Part L]
1 - Large flex riser [Part M]
1 - Tread support [Part N]
1 - Large curved tread [Part O]
1 - Medium flex riser [Part P]
1 - Medium curved tread [Part Q]
1 - Small flex riser [Part R]
1 - Small curved tread [Part S]
1 - Tread filler [Part T]
1 - Tread extension [Part U]
2 - Plugs [WG] (installed in add-on panel)
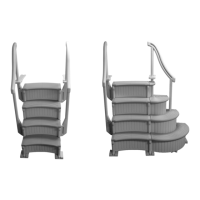
CONFER CURVE STEP
ADD-ON INSTRUCTIONS
The curve add-on can only be installed on the right side of the step as you
are facing it. The add-on requires an additional 30 lbs. of sand.
prpd.Confer-CurveStepAG-USr11:Confer-Step-1_R1 2/19/13 2:55 PM Page 5