Mobile Scanner “Comfort”
Version 01/11
Item no. 88 40 02 with 1 GB microSD card
Item no. 88 40 05 with 4 GB microSD card
Item no. 88 40 08 with 2 GB microSD card
Intended use1.
This product is designed for digitising print documents (such as letters, photos, magazines etc). The scanned
documents can be saved in JPEG format on the microSD card included in delivery and transmitted via the USB
cable to a computer for further processing or archiving purposes. The device is powered by two AA batteries
(not included). The product is only to be used indoors in dry conditions.
Unauthorised conversion and/or modifi cation of the device are inadmissible because of safety and approval
reasons (CE). Any usage other than described above is not permitted and can damage the product and lead to
associated risks such as short-circuit, fi re, electric shock, etc. Please read the operating instructions thoroughly
and keep them for further reference.
Content of delivery 2.
Scanner•
microSD card + adapter•
CD-ROM•
USB cable•
Protective bag•
Calibration card•
Operating instructions•
Safety instructions3.
We do not assume liability for resulting damages to property or personal injury if the
product has been abused in any way or damaged by improper use or failure to observe
these operating instructions. The warranty/ guarantee will then expire!
The icon with exclamation mark indicates important information in the operating
instructions. Carefully read the whole operating instructions before operating the device,
otherwise there is risk of danger.
Persons / Product
The product is not a toy and should be kept out of reach of children!•
When used in conjunction with other devices, observe the operating instructions and safety notices of •
connected devices.
The product must not be subjected to heavy mechanical stress.•
The product must not be exposed it to extreme temperatures, direct sunlight, intense vibration, or •
dampness.
Batteries
Correct polarity must be observed while inserting the batteries.•
Batteries should be removed from the device if it is not used for a long period of time to avoid damage •
through leaking. Leaking or damaged batteries might cause acid burns when in contact with skin, therefore
use suitable protective gloves to handle corrupted batteries.
Batteries must be kept out of reach of children. Do not leave the battery lying around, as there is risk, that •
children or pets swallow it.
All the batteries should be replaced at the same time. Mixing old and new batteries in the device can lead •
to battery leakage and device damage.
Batteries must not be dismantled, short-circuited or thrown into fi re. Never recharge non-rechargeable •
batteries. There is a risk of explosion!
Miscellaneous
Servicing, adjustment or repair works must only be carried out by a specialist/ specialist workshop.•
If any questions arise that are not answered in this operating instruction, contact our Technical Advisory •
Service or other experts.
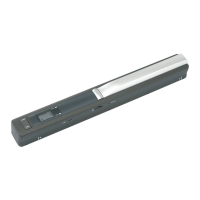
Operating elements4.
1
2
3
5
7
6
4
8
9
10
Battery compartment cover1.
POWER / SCAN button2.
ERR. LED (red)3.
SCAN LED (green)4.
LCD5.
DPI button6.
C / BW button7.
USB connection8.
microSD slot9.
FORMAT button10.
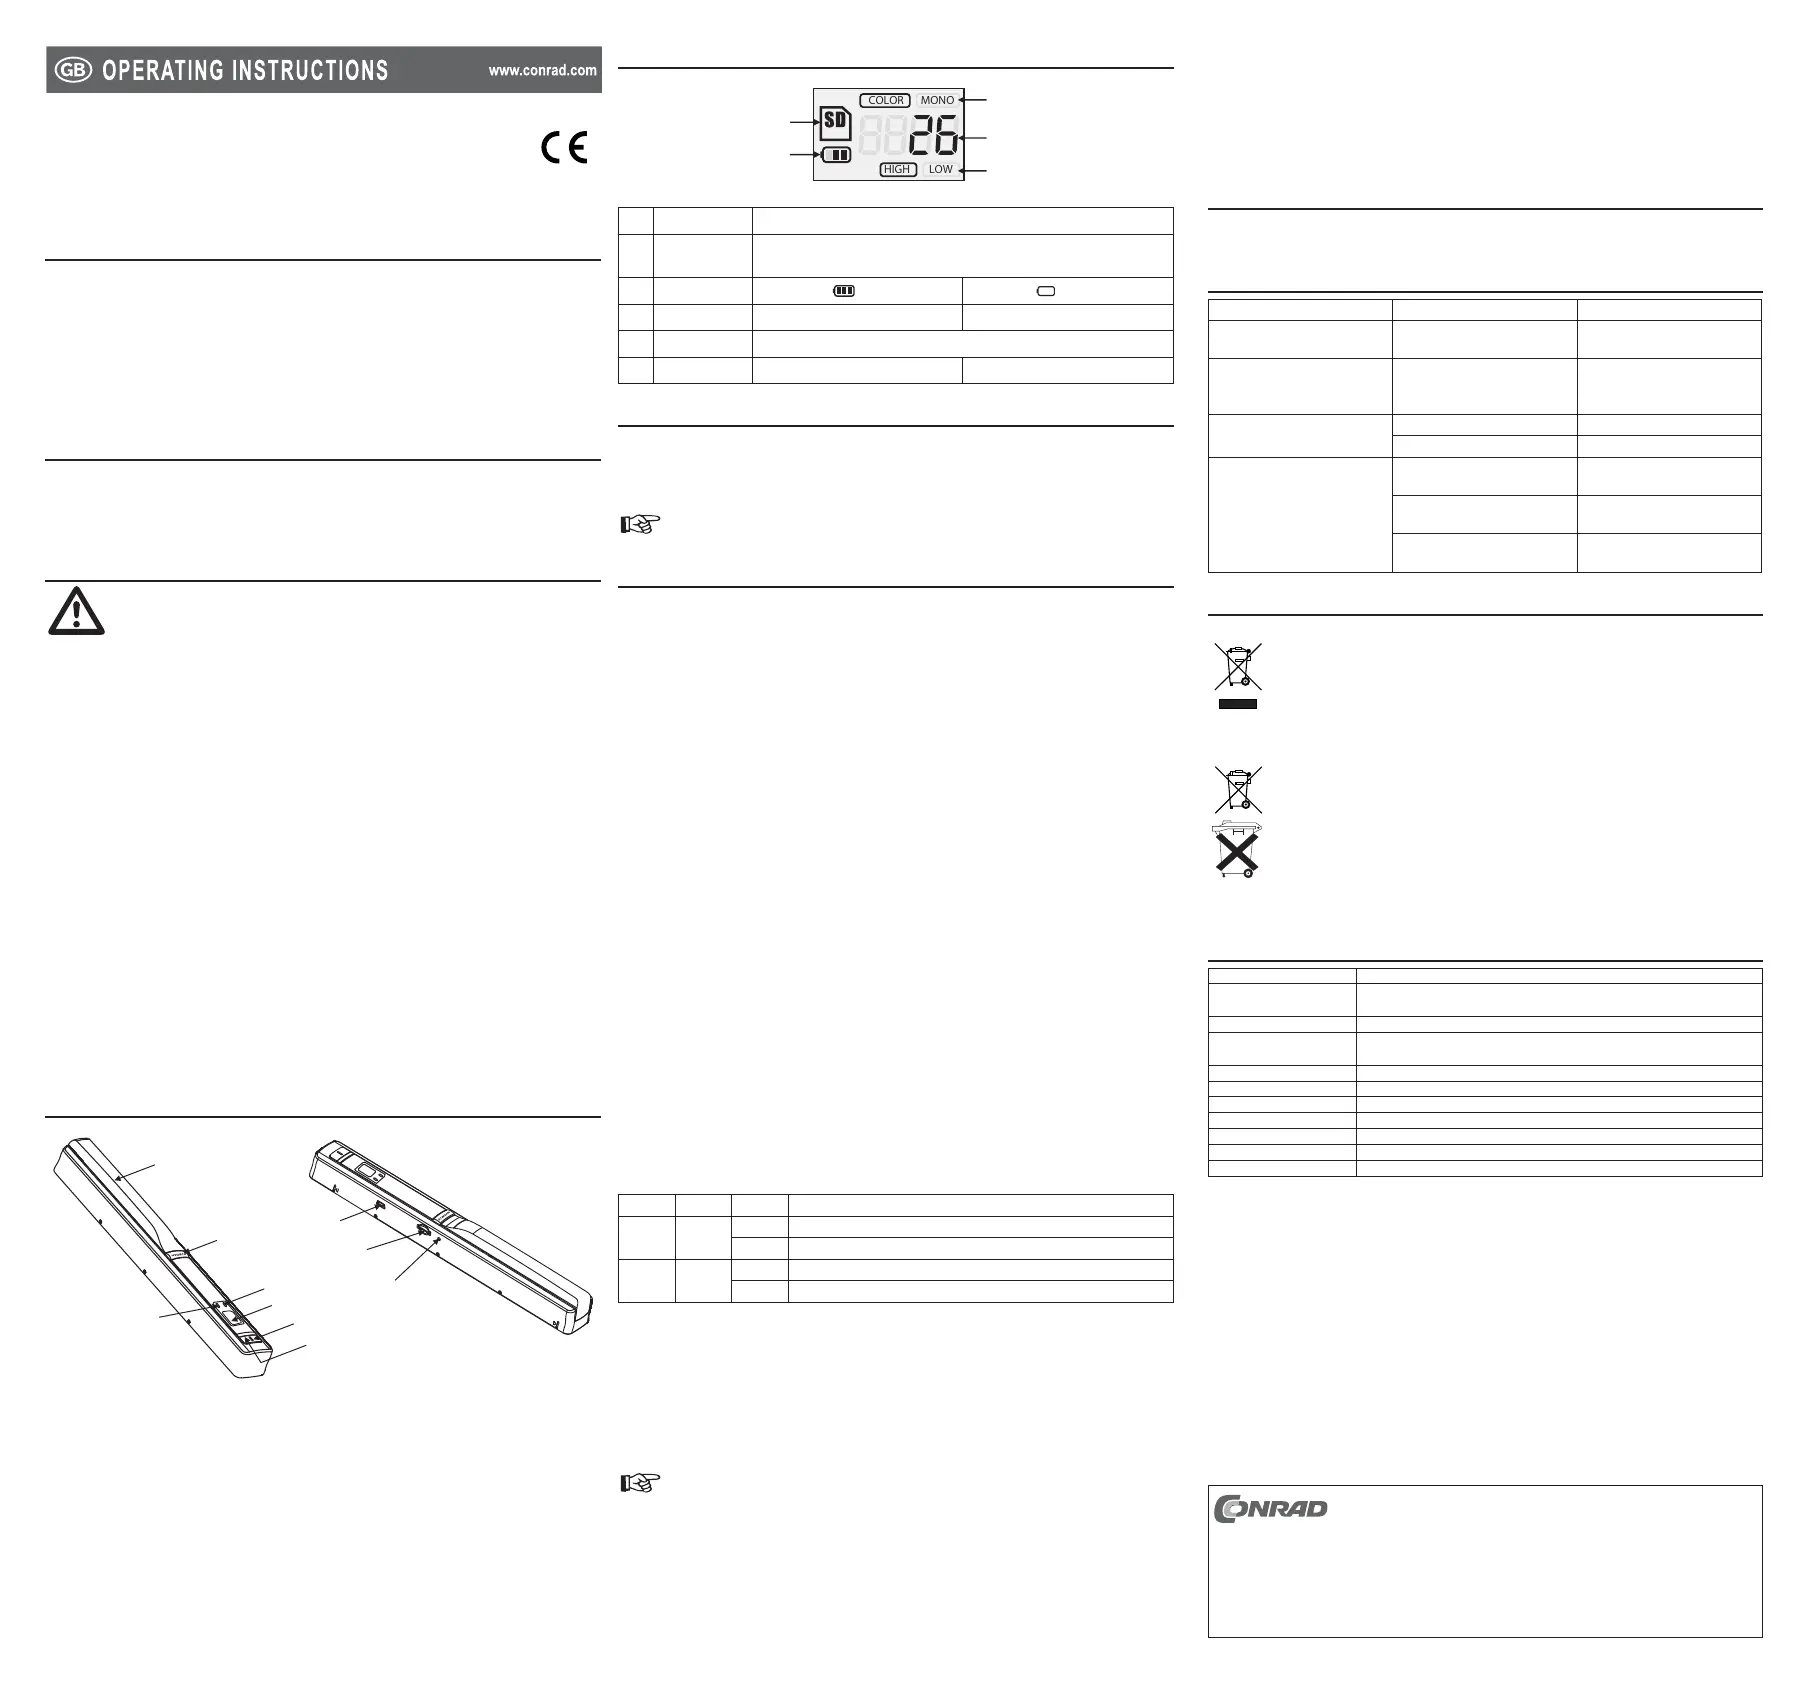
Display elements5.
RESOLUTION
HIGH LOW
COLOR MONO
FULL
EFFECT
1
2
3
4
5
No. Name Function
1 SD indicator
Shows that a microSD card has been inserted. When the card is full, FULL lights
up within this symbol.
2 Battery symbol
= full
= empty
3 Colour indicator COLOR = coloured MONO = black / white
4 Counter Shows the total number of fi les stored on the microSD card.
5 Resolution HIGH = 600 dpi LOW = 300 dpi
Inserting / replacing batteries6.
Slide the battery compartment cover open. 1.
Insert two AA batteries, observing the correct polarity. Take note of the labelling on the inside of the battery 2.
compartment.
Then close the battery compartment again.3.
Replace the batteries when the empty battery icon appears on the display.
Operation7.
Turn scanner on/off
Turn the scanner on/off by pressing and holding the POWER / SCAN button for approx. two seconds. •
After approx. three minutes of inactivity, the device will switch off automatically.•
Insert microSD card
Ensure that the scanner is turned off. 1.
Note the label next to the slot for the correct orientation of the card.2.
Insert the card carefully into the slot until the card clicks into place. 3.
Formatting microSD card
Turn the scanner on.1.
Press the FORMAT button using a sharp object (such as a needle). The display will then show the letter 2.
’F’.
Now press the POWER / SCAN button to start the formatting process. The SD indicator will start fl ashing 3.
on the display.
After the formatting is completed, the counter on the display shows the value ‘0’.4.
Setting resolution and colour
Press the DPI button to set the resolution. The relevant indicator (HIGH = high resolution with 600 dpi, LOW •
= normal resolution with 300 dpi) will appear.
Press the C / BW button to set the colour. The relevant indicator (COLOR = coloured, MONO = black / white) •
will appear on the display.
Scanning
Place the document on a fl at surface and hold it in place with your hand.1.
Place the scanner at the outer edge of the document.2.
Hold the scanner tight and press the POWER / SCAN button.3.
Make sure the scanner is fl at on the document.4.
Move the scanner slowly over the document while keeping your hand as steady as possible to achieve 5.
optimum results.
Press the POWER / SCAN button again to end the scanning process. The counter on the display will 6.
increase by the value ‘1’.
LED indicators
LED Colour Status Description
SCAN Green
On Scan in progress
Off Scanning process stopped
ERR. Red
On Scanner is being moved too quickly
Off Scanner is being moved at the right speed
Connecting to a Computer
Ensure that the scanner is turned on.1.
Connect the USB cable to the scanner’s USB port and to an available USB port on a computer. The 2.
scanner’s display will show ‘USB’.
The microSD card is automatically recognised as a drive.3.
Open the fi le directly from the microSD card or copy the fi les onto your hard drive. 4.
Disconnect the scanner via the operating system before removing the USB cable from the scanner or the 5.
computer.
Software for the processing of desktop pictures is included in delivery. Insert the CD-ROM into
the drive of your computer and follow the instructions. Further instructions can be found in the
program’s help menu or on the website of the manufacturer:
http://www.abbyy.com/screenshot_reader/
Calibrating the sensor (white balance)
Turn the scanner on and place it on the calibration card.1.
Press and hold the C / BW button. While doing this, press the POWER / SCAN key. 2.
The SD symbol will blink. Then the red and green LEDs will blink. Do not move the scanner.3.
Wait until the red LED goes off, then move the scanner across the calibration card until the green LED goes 4.
off as well. Move the scanner slowly back and forth while doing this.
When the green LED goes off, the white balancing is completed.5.
Cleaning and maintenance8.
The product requires no servicing on your part aside from occasional cleaning. Use only a dry, soft cloth for
cleaning.
Troubleshooting9.
Problem Cause Solution
Pictures are blurred. The lens on the lower side is dirty.
Clean the lens with a dry, soft
cloth.
The red LED lights up during
scanning.
Scanner is being moved too
quickly
Scan the document again moving
the scanner more slowly than
before.
Computer does not recognise the
scanner.
Scanner is turned off. Turn the scanner on.
Cable is not connected correctly. Check the cable connections.
Pictures cannot be saved.
microSD card has not been
inserted.
Insert a microSD card as
described above.
Memory is full.
Delete pictures from the microSD
card.
microSD card has not been
formatted.
Format the microSD card as
described above.
Disposal10.
General
In order to preserve, protect and improve the quality of environment, protect human health and
utilise natural resources prudently and rationally, the user should return unserviceable product to
relevant facilities in accordance with statutory regulations.
The crossed-out wheeled bin indicates the product needs to be disposed separately and not as
municipal waste.
Batteries / rechargeable batteries
The user is legally obliged (battery regulation) to return used batteries and rechargeable batteries.
Disposing used batteries in the household waste is prohibited! Batteries/ rechargeable
batteries containing hazardous substances are marked with the crossed-out wheeled bin. The
symbol indicates that the product is forbidden to be disposed via the domestic refuse. The
chemical symbols for the respective hazardous substances are Cd = Cadmium, Hg = Mercury,
Pb = Lead.
You can return used batteries/ rechargeable batteries free of charge to any collecting point of your
local authority, our stores or where batteries/ rechargeable batteries are sold.
Consequently you comply with your legal obligations and contribute to environmental protection!
Technical data11.
Operating voltage: 2 x 1.5 V/DC AA batteries (not included)
System requirements: Microsoft® Windows XP SP2, 7 (32-bit), Windows Vista™
Mac OS 10.4 and higher
Scanning width: 210 mm
Scanning length: max. 1250 mm (300 dpi)
max. 620 mm (600 dpi)
Storage format: JPEG (300/600 dpi)
Memory card format: microSD (max. 32 GB)
USB standard: 1.1
Operating temperature: 0 to +40 ºC
Cable length: 1 m
Dimensions (W x H x D): 257 x 31 x 30 mm
Weight: 158 g
These operating instructions are published by Conrad Electronic SE,
Klaus-Conrad-Straße 1, D-92240 Hirschau/Germany.
All rights including translation reserved. Reproduction by any method, e.g.
photocopy, microfi lming, or the capture in electronic data processing systems
require the prior written approval by the editor. Reprinting, also in part, is prohibited.
The operating instructions refl ect the current technical specifi cations at time of print.
We reserve the right to change the technical or physical specifi cations.
© 2011 by Conrad Electronic SE.
V3_0111_02-SB
 Loading...