This document is a user guide for the Verve Home Phone Base, a device designed to allow users to utilize their home phone anywhere by connecting it to a cellular network. The device acts as a base station for traditional home phones, enabling them to make and receive calls over a mobile network rather than a landline.
Device Overview:
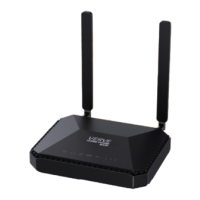
The Verve Home Phone Base features a compact design with two external antennas for signal reception.
- Top View: Includes two antennas, a power indicator, a voicemail indicator, a battery indicator, a signal strength indicator, and an information indicator.
- Back View: Features two telephone ports (PHONE 1 and PHONE 2), a power switch, a reset button, and a charging port.
Technical Specifications (Inferred from indicators and usage):
- Power: Operates on an internal battery, which can be charged via a standard power outlet.
- Network Connectivity: Connects to a wireless service provider's cellular network.
- Telephone Ports: Two RJ11 telephone ports for connecting standard home phones or cordless base stations.
- Antennas: Two external antennas for optimizing signal reception.
- Battery: Rechargeable battery, with indicators for normal, low, and charging status. The battery is user-installable but non-user replaceable by unauthorized personnel.
- FCC Compliance: FCC ID: 2AWF6-SD3000, compliant with part 15 of FCC rules, indicating it operates without causing harmful interference and accepts received interference.
Usage Features:
- Installation:
- Battery Installation: The battery is inserted by removing the back cover, aligning golden contacts, and pushing until it clicks. The back cover is then replaced.
- Charging: Connect the charging cable to the charging port and plug it into a standard power outlet. The device should not be left without the battery for extended periods.
- Antenna Installation: Two antennas are attached to gold ports on the back of the device and tightened clockwise. They should be folded vertically for optimal performance.
- Phone Connection: Connect a phone line to either PHONE 1 or PHONE 2 port. The device should be placed in an area with strong cellular signal, typically near a window or wall.
- Powering On/Off: Press and hold the Power Button for more than 3 seconds to turn on or off the device.
- Making Calls: Pick up the handset of the connected home phone, dial the 10-digit number (even for local calls), and wait 4-8 seconds for the call to connect.
- Answering Calls: Pick up the handset when the phone rings. If the phone has a hands-free function, the call can be answered by pressing the hands-free button.
- Ending Calls: Hang up the home phone by pressing the hands-free button or returning the receiver to its base.
- Adjusting Volume: While on a call, quickly press
** or ## to enter Volume Setting Mode. Press * to decrease volume and # to increase volume. There are four volume levels (1-4), with level 4 being the default. An indication sound is heard at the highest or lowest levels.
- Voicemail:
- Notification: A flashing voicemail indicator and intermittent dial tone on connected phones signal a new message.
- Checking Messages: Dial
1# on the connected phone, wait 4-8 seconds, enter the voicemail password if prompted, and follow prompts to listen and manage messages.
- Setting Voicemail Number: Use the engineering command
*955*866*xxx# to set the voicemail number to xxx.
- Conference Calls:
- Initiating: Place the first call, press Flash (or Talk) key, dial the second number, and once connected, press
3 and Flash (or Talk) key to complete the three-way connection.
- Ending: Hang up the home phone or return the receiver to its base. If the initiator hangs up first, all callers are disconnected.
- Call Waiting:
- Enable/Disable: Press
*43# or #43#.
- Managing Calls: When a second call comes in, press Flash (or Talk) to hold the current call and accept the waiting call (toggle between calls by pressing again). Press
1 and Flash (or Talk) to end the current call and accept the waiting call. Press 0 and Flash (or Talk) to reject the waiting call.
- Call Forwarding:
- Always Forward: Press
**21*, dial the 10-digit forwarding number, and press #. Wait 3 seconds for confirmation. To un-forward, press ##21#.
- Forward When Busy: Press
**67*, dial the 10-digit forwarding number, and press #. Wait 3 seconds for confirmation. To un-forward, press ##67#.
- Forward When Unanswered: Press
**61*, dial the 10-digit forwarding number, and press # (or **[DelaySec]# to specify delay in seconds). Wait 3 seconds for confirmation. To un-forward, press ##61#.
- Forward When Unreachable: Press
**62*, dial the 10-digit forwarding number, and press #. Wait 3 seconds for confirmation. To un-forward, press ##62#.
Maintenance Features:
- Battery Safety: Do not disassemble, crush, bend, deform, puncture, shred, modify, or remanufacture the battery. Avoid inserting foreign objects, immersing in liquids, or exposing to fire/explosion. Only use batteries and charging systems qualified per CTIA Certification Requirements to IEEE 1725. Replace batteries only with those qualified to IEEE-Std-1725. Only authorized service providers can replace the battery.
- Device Safety: Avoid dropping the device or battery, especially on hard surfaces. If damage is suspected, take it to a service center.
- Interference Troubleshooting (FCC): If the device causes harmful interference to radio or TV reception, try reorienting/relocating the receiving antenna, increasing separation between equipment and receiver, connecting to a different circuit, or consulting a dealer/technician.
- RF Exposure: Maintain a distance of 20cm from the body when using the product to ensure compliance with RF exposure requirements.
Status Indicators:
- Power:
- Green solid: Powered on.
- Green blinking: Shutting down.
- Off: Powered off.
- Voicemail:
- Green blinking: New voicemail message.
- Off: No new voicemail message.
- Information:
- Green solid: Software update in process.
- Green blinking rapidly (1s interval): Ready to update.
- Green blinking slowly (3s interval): Software update successful.
- Red blinking (2s): Software update failed.
- Battery:
- Green solid: Normal battery level (≥ 20%).
- Green blinking: Normal battery level (charging).
- Red solid: Low battery level (< 20%).
- Red blinking: Low battery level (charging).
- Off: No battery installed.
- Wireless Service:
- Network icon and 4 bars on Green: Connected to the network.
- Network icon on Red and bars off: Need PUK/PIN code or other account issue.
- Network icon red blinking and bars off: Limited or no service, searching for service, IMS registration failed, etc.
The Verve Home Phone Base is covered by a limited warranty from the mobile operator, with specific restrictions. Consumer Cellular or START are not liable for indirect, special, incidental, or consequential damages. Consumer Cellular is a registered trademark.