Connect the extension lead to the plug of the grinder. The power required is 230 V, 26 A, 3
phase.
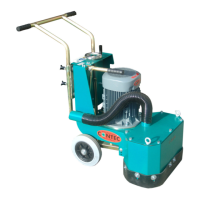
Lift the tools from the floor using the lift bar (Appendix diagram No. 63 and 65).
!
If you start the machine with the grinding tools placed on the floor you may damage the
discs and/or parts of the grinder.
Make sure the Star-Delta-Switch (Appendix diagram No. 225) is in the “0” position. Turn the
motor switch (Appendix diagram No. 211) to position “ON”. Turn the “Star-Delta-Switch” in
the “Star” position. The motor begins to turn. Make sure that the ventilator on the topside
of the motor is turning in the correct direction as indicated by the arrow. If the motor rotates
in the wrong direction, turn the switch back to the “0” position. Press the emergency STOP
button (Appendix diagram No. 223) and disconnect the plug (Appendix diagram No. 219).
Switch the motor on. Make sure the motor is spinning in the correct direction. If not, two
phases of the power supply have to be swapped with each other. The correct direction is
indicated by an arrow on the motor fan.
Attention: Operating the machine with the motor spinning in the wrong direction can cause
serious damage to the machine.
Restart the machine again and turn the “Star-Delta-Switch” (Appendix diagram No. 225) to
position “Star”. The motor begins to turn. Wait until the motor is on full speed and then turn
to position “Delta”. Now lower the grinding tools slowly and carefully on to the floor using
the lifting device. Grinding is now possible.
5 Adjustments and Maintenance
5.1 Lifting Device
The Lifting device must be adjusted according to the type and individual wear and tear of
the tools. The machine is lifted using a screw under the motor. The lift of the lifting device
is approximately 5 cm. When the grinding tools are placed on the floor, the distance
between the screw and the floor should be 2 cm. Adjust it by turning the screw in or out.
5.2 Height Adjustment of the Rear Wheel Wing
The rear wheel wing can be adjusted in two different ways to accommodate the different
tools. The wing is secured to three points. Two on the frame itself and the other one to the
Spindle nut. The actual height adjustment - fine and standard settings - of the grinding
discs can be achieved by turning the hand wheel of the spindle. By turning the wheel the
height can be set lengthways. Therefore avoiding uneven wear on the discs.
5.3 Shifting the rear wheel axis and thereby regulating the load on the discs and tools.
 Loading...