EasyManua.ls Logo

Control 4 C4-WALL7-WH User Manual

Control 4 C4-WALL7-WH
8 pages
To Next Page IconTo Next Page
Page #1 background imageLoading...
Page #1 background image
11
Supported models
C4-WALL7-BL 7" T3-7 In-Wall Touch Screen, Black
C4-WALL7-WH 7" T3-7 In-Wall Touch Screen, White
C4-WALL10-BL 10" T3-10 In-Wall Touch Screen, Black
C4-WALL10-WH 10" T3-10 In-Wall Touch Screen, White
Introduction
The Control4® T3-7 (7") and T3-10 (10") In-Wall Touch Screens
oer complete system control in an elegant and compact design.
The touch screens are equipped with a full capacitive screen,
audio and video Intercom (with the built-in camera) using SIP,
and more.
This touch screen works great in either new construction or
retrofit installations. For power and network connectivity, choose
from three options:
Ethernet with PoEThe Ethernet network connection is
provided through the PoE Injector. No additional wiring is
needed.
Ethernet with AC—Connect the touch screen to one of the
RJ-45 LAN ports on the gateway/router using the RJ-45
Ethernet cable. AC power is used to power the touch screen.
WiFi with ACThe internal WiFi will communicate with the
LAN’s WAP. If the LAN has a WAP set up, no additional
network wiring is needed. AC power is used to power the
touch screen.
Note: 802.11b is not recommended for Video Intercom.
We recommend using Wireless-N. See “Specifications”
and “Power and Network Installation Options” for more
information.
Box contents
7" or 10" T3-7/T3-10 In-Wall Touch Screen
Power box (to power the touch screen) (005-00065)
Two screws (to attach the power box)
Touch Screen removal tool
Four adhesive-backed foam pads
Warranty card
Accessories available for purchase
PoE. Control4 Power over Ethernet Injector, sold separately
(AC-POE1-B).
Wall box options (sold separately)—Metal and plastic, for
new construction or retrofit installations.
7" and 10" In-Wall Touch Screen Wall Box Kits - New
Construction
7" and 10" In-Wall Touch Screens Wall Box, New
Construction, Plastic (C4-NWB57C-P)
7" and 10" In-Wall Touch Screens Wall Box, New
Construction, Metal (C4-NWB57C-M)
7" and 10" In-Wall Touch Screen Wall Box Kits - Retrofit
7" and 10” In-Wall Touch Screens Wall Box, Retrofit,
Plastic (C4-RWB57C-P)
7" and 10" In-Wall Touch Screens Wall Box, Retrofit,
Metal (C4-RWB57C-M)
For wall box installation details, see:
7" or 10" In-Wall Touch Screen Wall Box Installation
Guide-New Construction
7", or 10" In-Wall Touch Screen Wall Box Installation
Guide-Retrofit
7" and 10" T3 Series In-Wall Touch Screen
Installation Guide
Question and Answer IconNeed help?

Do you have a question about the Control 4 C4-WALL7-WH and is the answer not in the manual?

Control 4 C4-WALL7-WH Specifications

General IconGeneral
BrandControl 4
ModelC4-WALL7-WH
CategoryTouch Panel
LanguageEnglish

Summary

7" and 10" T3 Series In-Wall Touch Screen Installation Guide

Introduction

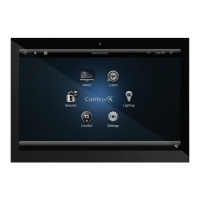
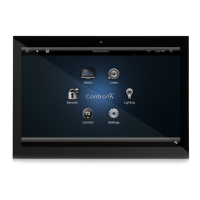
Overview of the Control4 T3 In-Wall Touch Screens and their features.

Safety, Specifications, and Requirements

General Safety Warnings

Instructions on electrical protection, avoiding rain, humidity, heat, sunlight, grounding, and usage.

Specifications and Requirements

Details on model numbers, screen, network, power, dimensions, and system prerequisites.

Hardware Overview and Installation Basics

Hardware Components and Placement

Description of front, back, top view components and recommended touch screen placement.

Installation Precautions and Power/Network Options

Safety during installation, wall box, power/network choices, and PoE/AC power caution.

Connection and Power Setup

Ethernet with PoE

Procedure for connecting via Ethernet using PoE, including setup steps and limitations.

Ethernet with AC Power

Procedure for connecting via Ethernet using AC power.

WiFi with AC Power

Procedure for connecting via WiFi using AC power, including network notes.

Wiring and Physical Installation

Ethernet and AC Power Wiring

Detailed steps for wiring Ethernet and AC power connections to the touch screen.

Optional Foam Pads

Instructions for applying optional foam pads to stabilize the touch screen.

Final Assembly and Configuration

Attaching Power Box and Touch Screen

Steps for physically attaching the power box, ribbon cable, and touch screen to the wall.

Device Configuration

Steps for configuring wireless and Ethernet network settings on the touch screen.

Software Integration and Troubleshooting

Composer Pro Configuration

Adding and configuring the touch screen driver, properties, and advanced settings in Composer Pro.

Troubleshooting Common Issues

Guidance on boot time, unresponsive screens, power cycling, and factory resets.

Removal and Resources

Removing the Touch Screen

Procedure for safely removing the touch screen from the wall using the removal tool.

Additional Support and Resources

Links to support, regulatory information, warranty, and document updates.

Related product manuals