16
Install the CR123A (3V) battery (included) in the Thermostat faceplate according to the
polarity labels—POS (+) and NEG (-)—on the Thermostat’s circuit board.
IMPORTANT! Do not install the battery with the wrong polarity.
IMPORTANT! If the battery was already in place and you changed the slide switch
settings, remove the battery and re-install it. This forces the Thermostat to reboot to the
new configuration.
17
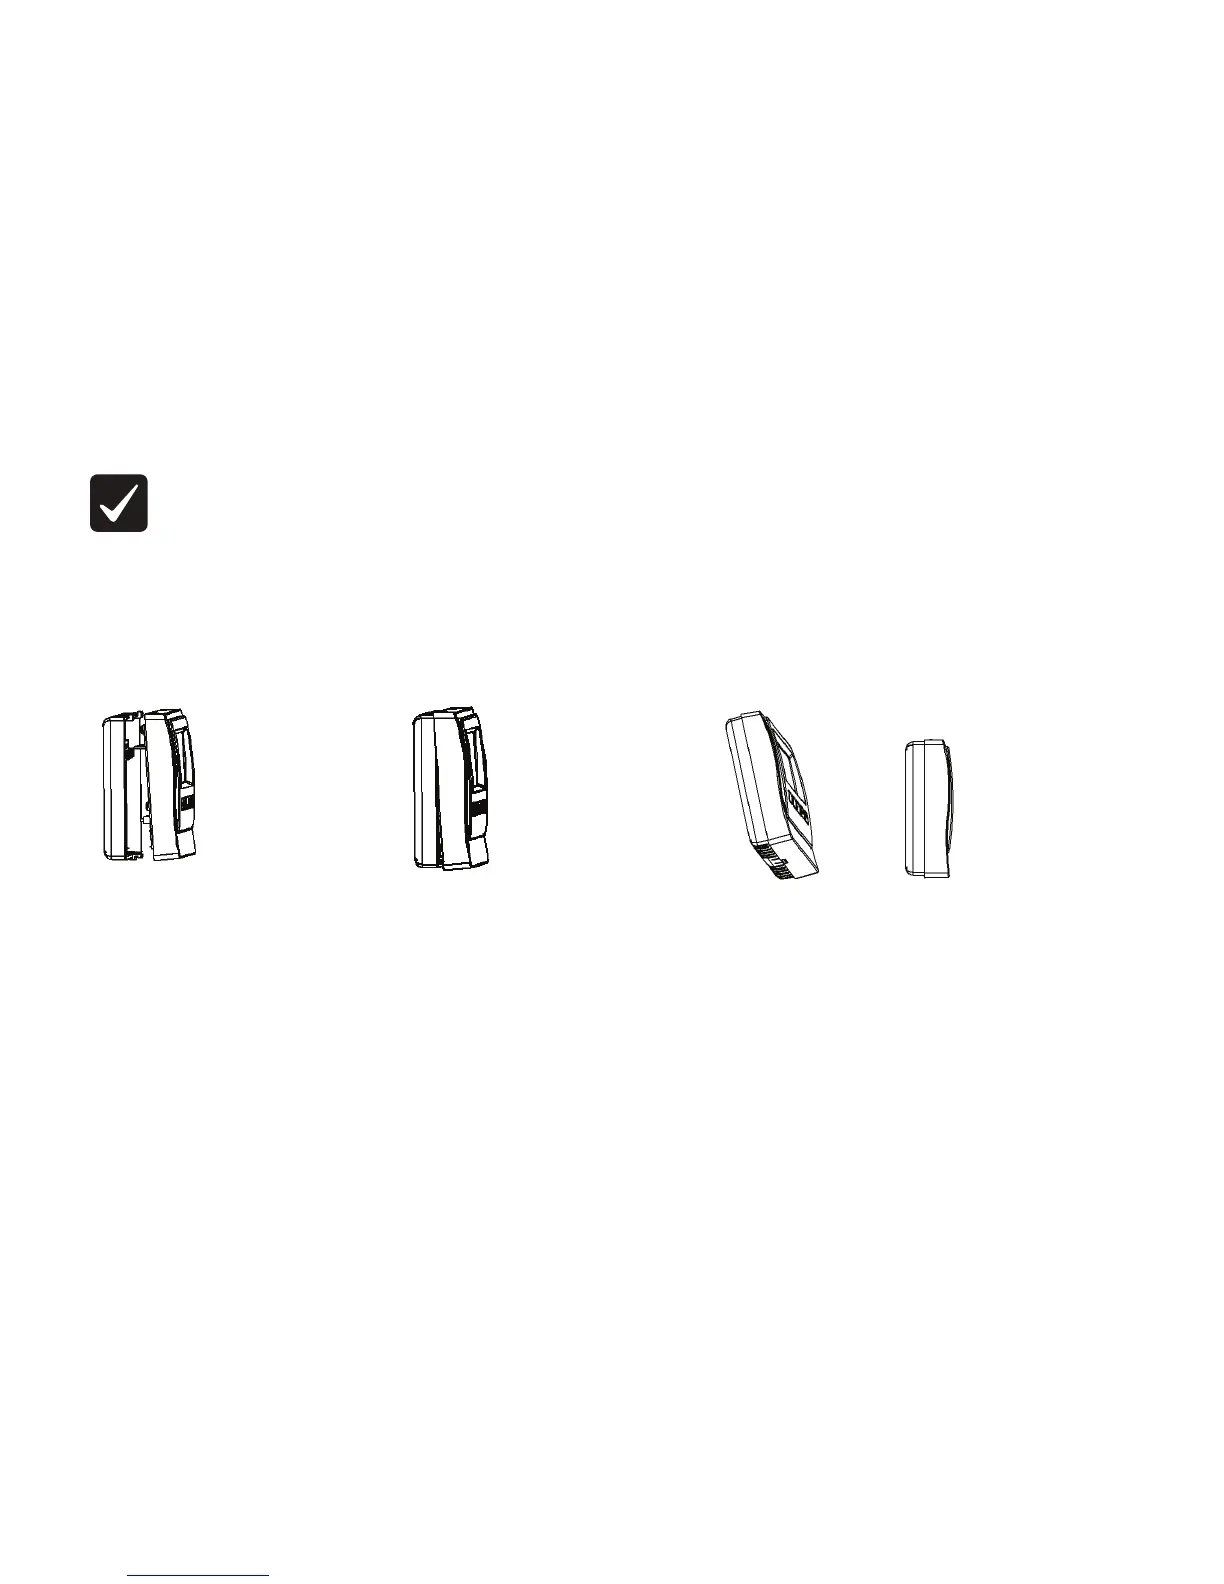
Attach the faceplate to the Thermostat’s rear plate:
18
19
Turn ON the power supply for the HVAC system.
Test the Thermostat in both the Auto and Manual modes to confirm that both the furnace
and air conditioner cycle on and o at the appropriate settings. To operate the Thermostat,
see the Control4 Wireless Thermostat User Guide on the Documentation page of the Con-
trol4 website at http://www.control4.com/residential/products/resources/ for Thermostat
programming instructions.
1. Align the
faceplate with the
rear plate, and push
the straight pins
to the back of the
Thermostat.
2. With the faceplate
slightly above the rear
plate, slide the top edge
of the faceplate onto
the rear plate, engaging
the plastic hooks with
the corresponding holes.
3. Press firmly
on the bottom
center edge of the
faceplace to snap
it. Lock the bottom
hook in place.
10
Figure 5. Faceplace Installation
 Loading...
