Do you have a question about the ConvaTec Esteem and is the answer not in the manual?
The moldable disc and pouch are provided attached and ready for separation.
Remove the disc from the pouch, peel liner #1, and mold to stoma size without stretching.
Peel off liner #2, which is the side designed for skin application.
Separate pouch sides to allow air entry for proper function.
Apply the disc to clean, dry skin, centering adhesive towards the stoma for a close fit.
Remove pouch release liner and place the pouch onto the moldable disc, holding for adhesion.
Fold the pouch tail three times, align closures, and pinch to secure, retaining some air.
Turn the Lock-it-Pocket inside-out to conceal the pouch tail for enhanced discretion.
Tilt tail upwards, peel open closure, and unravel tail to empty the pouch.
When changing, the disc and pouch can be removed together as a single unit.
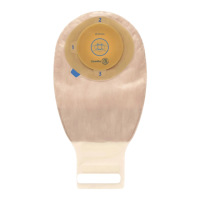
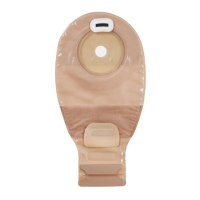
The Esteem™ One-Piece Pouch with ConvaTec Moldable Technology™ is a medical device designed for ostomy care, providing a secure and discreet solution for managing stoma output. This device integrates a moldable disc with an attached pouch, offering ease of application and removal, along with features for hygiene and comfort.
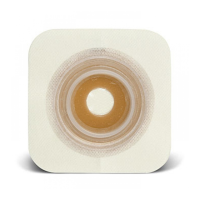
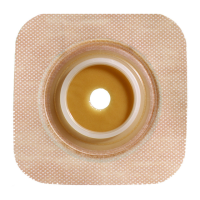
The primary function of the Esteem™ One-Piece Pouch is to collect waste from a stoma while maintaining a secure seal against the skin to prevent leakage and protect the surrounding skin. The "One-Piece" design signifies that the skin barrier (moldable disc) and the collection pouch are integrated into a single unit, simplifying the application process compared to two-piece systems where the barrier and pouch are separate. The "Moldable Technology™" refers to the unique characteristic of the skin barrier, which can be custom-molded by the user to fit the exact size and shape of their stoma without the need for cutting. This personalized fit is crucial for preventing leakage and skin irritation, as it minimizes gaps between the stoma and the barrier. The device is designed to be drainable, meaning it can be emptied of its contents without requiring a full pouch change, which is particularly useful for individuals with higher output stomas.
The core technical specification lies in the moldable disc. Unlike traditional skin barriers that require precise cutting with scissors, this disc is designed to be rolled and molded by hand. The material of the disc is formulated to be pliable enough to conform to the stoma's contours yet robust enough to maintain its shape and provide a secure, long-lasting seal. The instructions emphasize "Do not stretch, pull or cut," indicating that the material achieves its custom fit through molding rather than physical deformation or removal of material. The adhesive properties of the disc are critical for skin adherence and protection. The pouch itself is designed with an "InvisiClose™ Tail Closure," which is a discreet, integrated closure system. This system involves folding the end of the pouch multiple times until interlocking closures align, securing the contents. For added discretion, the pouch features a "Lock-it-Pocket™" that allows the tail closure to be turned inside-out and hidden within the pouch. The materials used for both the disc and the pouch are chosen to be skin-friendly, odor-resistant, and durable enough for daily wear.
The Esteem™ One-Piece Pouch with ConvaTec Moldable Technology™ is designed to empower individuals with ostomies by providing a user-friendly, secure, and discreet solution that prioritizes comfort and skin integrity.
| Brand | ConvaTec |
|---|---|
| Model | Esteem |
| Category | Personal Care Products |
| Language | English |