REMOVAL/INSTALLATION
OF THE GRINDING SYSTEM
Note: Turn off the power before installing or removing parts to fully cool the machine down.
Removal of protective cover bracket assembly
1. Remove the protective cover support by turning it counterclockwise.
2. The protective cover bracket assembly and the bean box are set with switches, and the
two parts must be correctly installed in place to work.
Note: If the protective cover bracket assembly is not fully installed, the machine can be set
up, but it cannot start working.
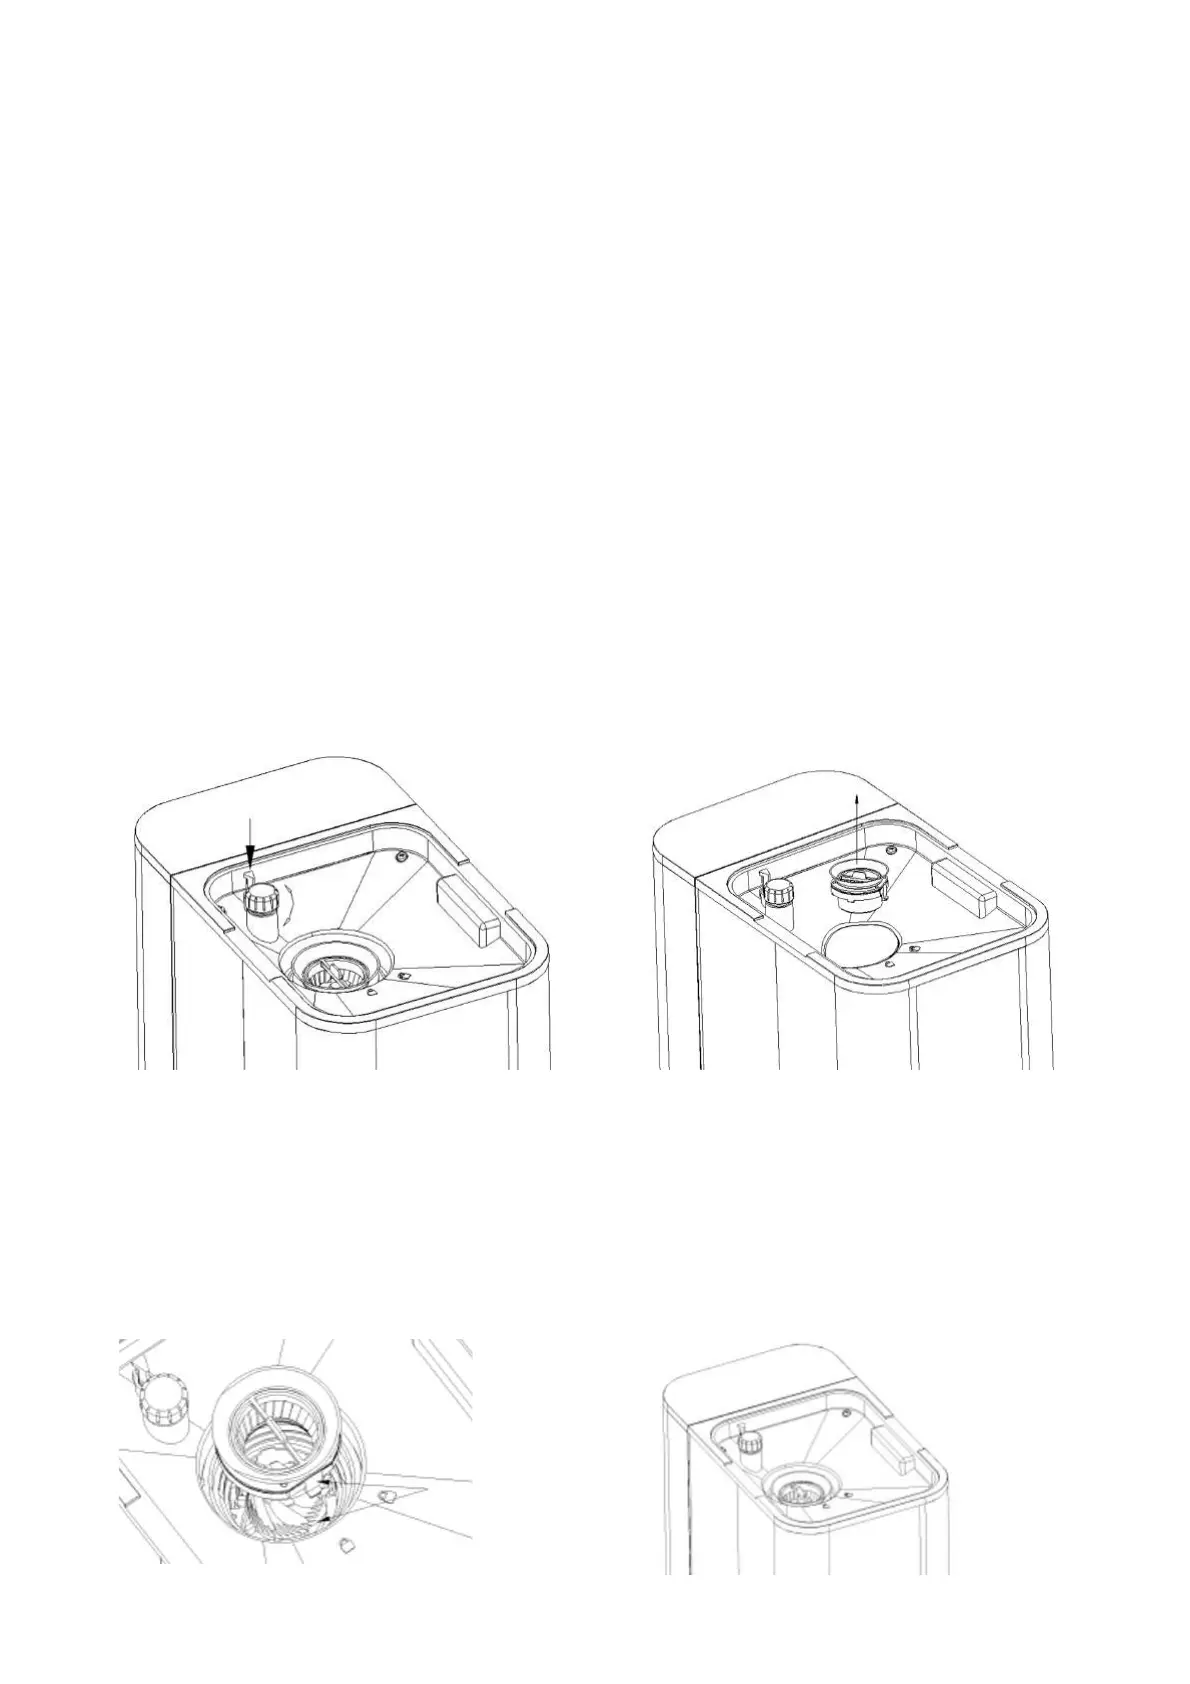
Remove the grinding knife(top)assembly
Take out the protective cover bracket assembly according to the above steps, then adjust
the knob clockwise to the thickest position, press the latch on the side of the knob, then
continue to turn clockwise to the blocking position (as shown in figure 1), and take out the
assembly with the coffee knife (top) (as shown in Figure 2).
Grinding knife(top) assembly
1. Put the buckle of the grinding knife (top) assembly in alignment with the gap of the
support (as shown in Figure 3).
2. Turn the knob counterclockwise to hear the sound then install it in right place (as shown in
Figure 4).
FIG. 1 FIG. 2
FIG. 3 FIG. 4