2GI/GR IO&M B51116-002
To attach the base and hood sections: set the assem-
bled hood on the assembled base, aligning the mounting
bracket holes with the holes in the section rails. Units with
support angles require the support angles to be bolted to
the base, using the bolts and nuts provided.
Figure 1
C
A
B
Section RailHood Panel
Throat
Maintenance
Hood Access
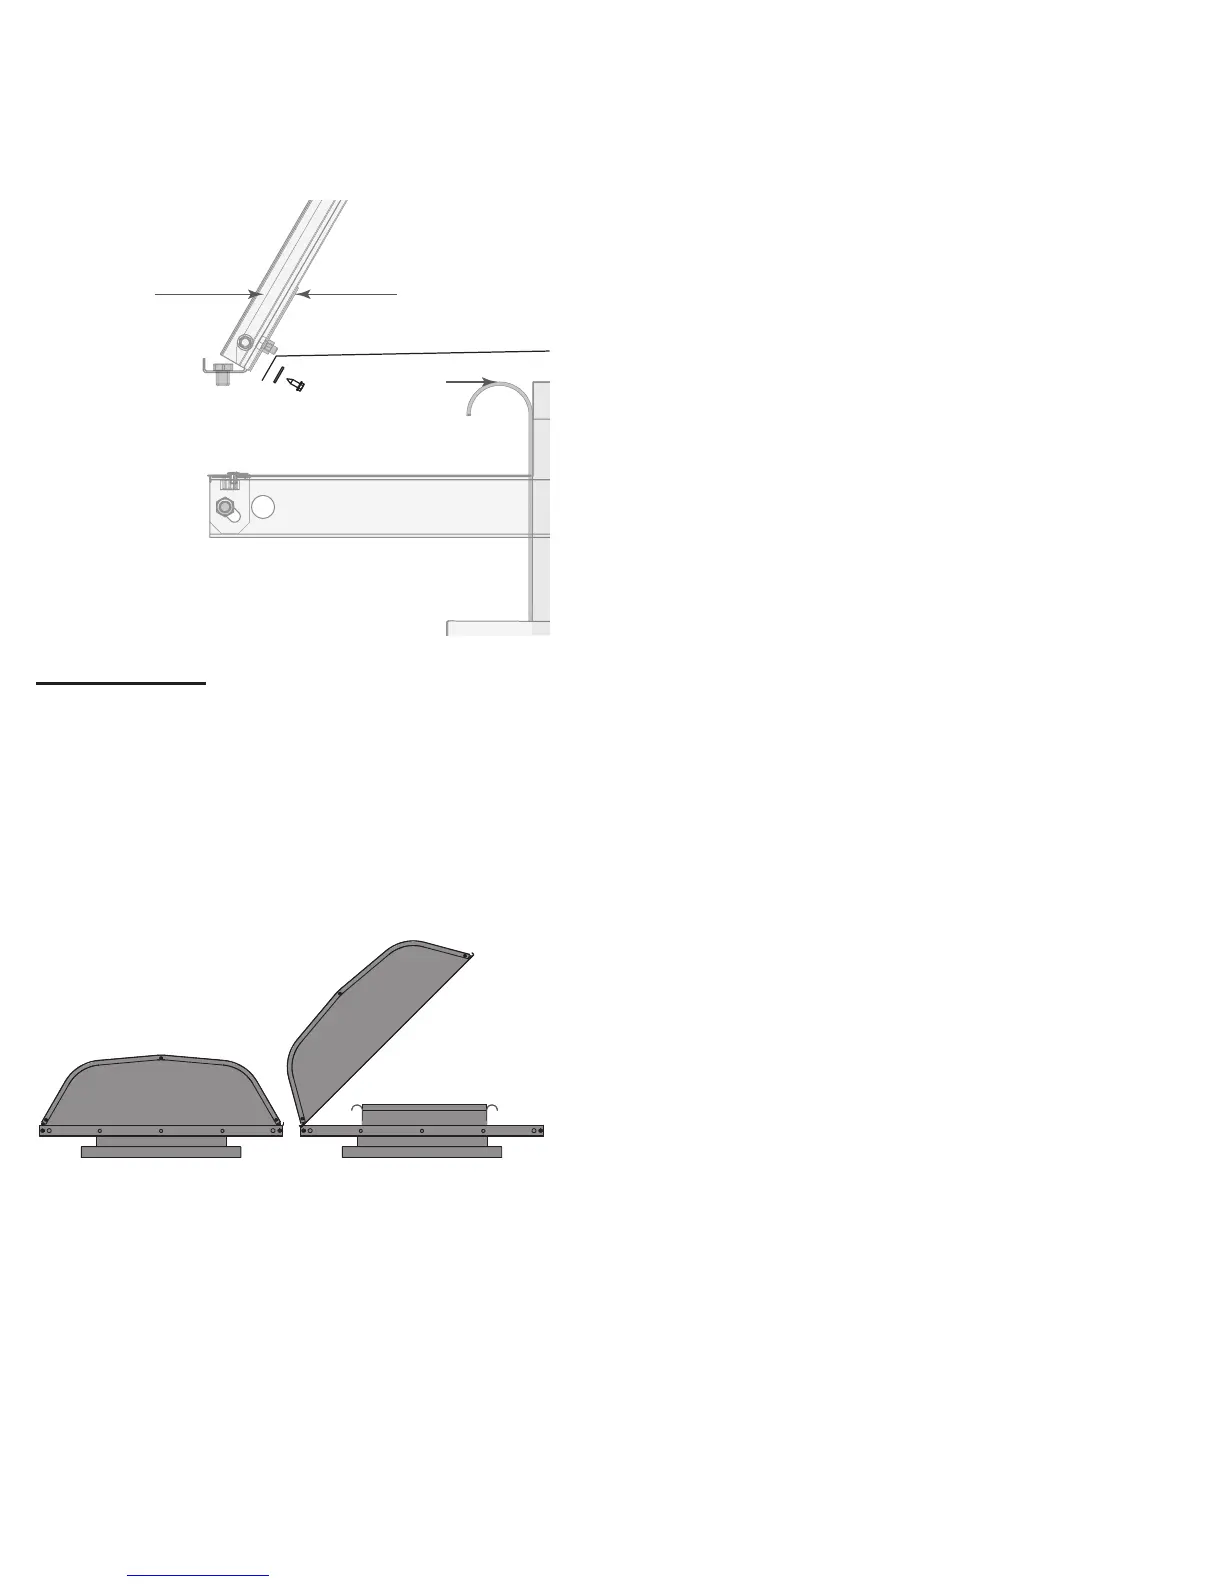
To access the throat of the unit, take the entire hood off
by removing the bolts and attaching the mounting bracket
to the mounting channels (see Figure 4). GR units with
less than a 73” throat length and GI units with less than a
61” throat length can be hinged. Hinging is accomplished
by removing the bolts on one side and loosening the two
bolts (refer to Figure 2) on the other side. Care should be
taken when hinging the hood, especially in high wind con-
ditions.
Figure 2
Filters
Filters are installed between the base and the hood pan-
els (see Figure 4). The lters should come in two sizes.
One size ts between the end panel and the base. The
other size is mounted between the base and the section
rail. Filter inspection and cleaning intervals can vary from
once a week to twice per year depending on contaminant
present and acceptable pressure drops across the lter.
Under most conditions lters may be cleaned with hot wa-
ter and a mild soap solution (such as dish washing liquid)
or steam. Some caustic cleaners will damage the lter. If
in doubt, please consult the factory for a compatibility list.
High pressure spray washers should be limited to 2,000
PSI operating pressure. Every attempt should be made to
remove the contaminants from the lter in a “backwash”
ow (NOTE: airow arrow on the lter frame). Once the
lter is dry, it may be returned to the appropriate lter racks
in the same orientation (airow direction) as they were re-
moved.