(*Some parts not shown for clarity.)
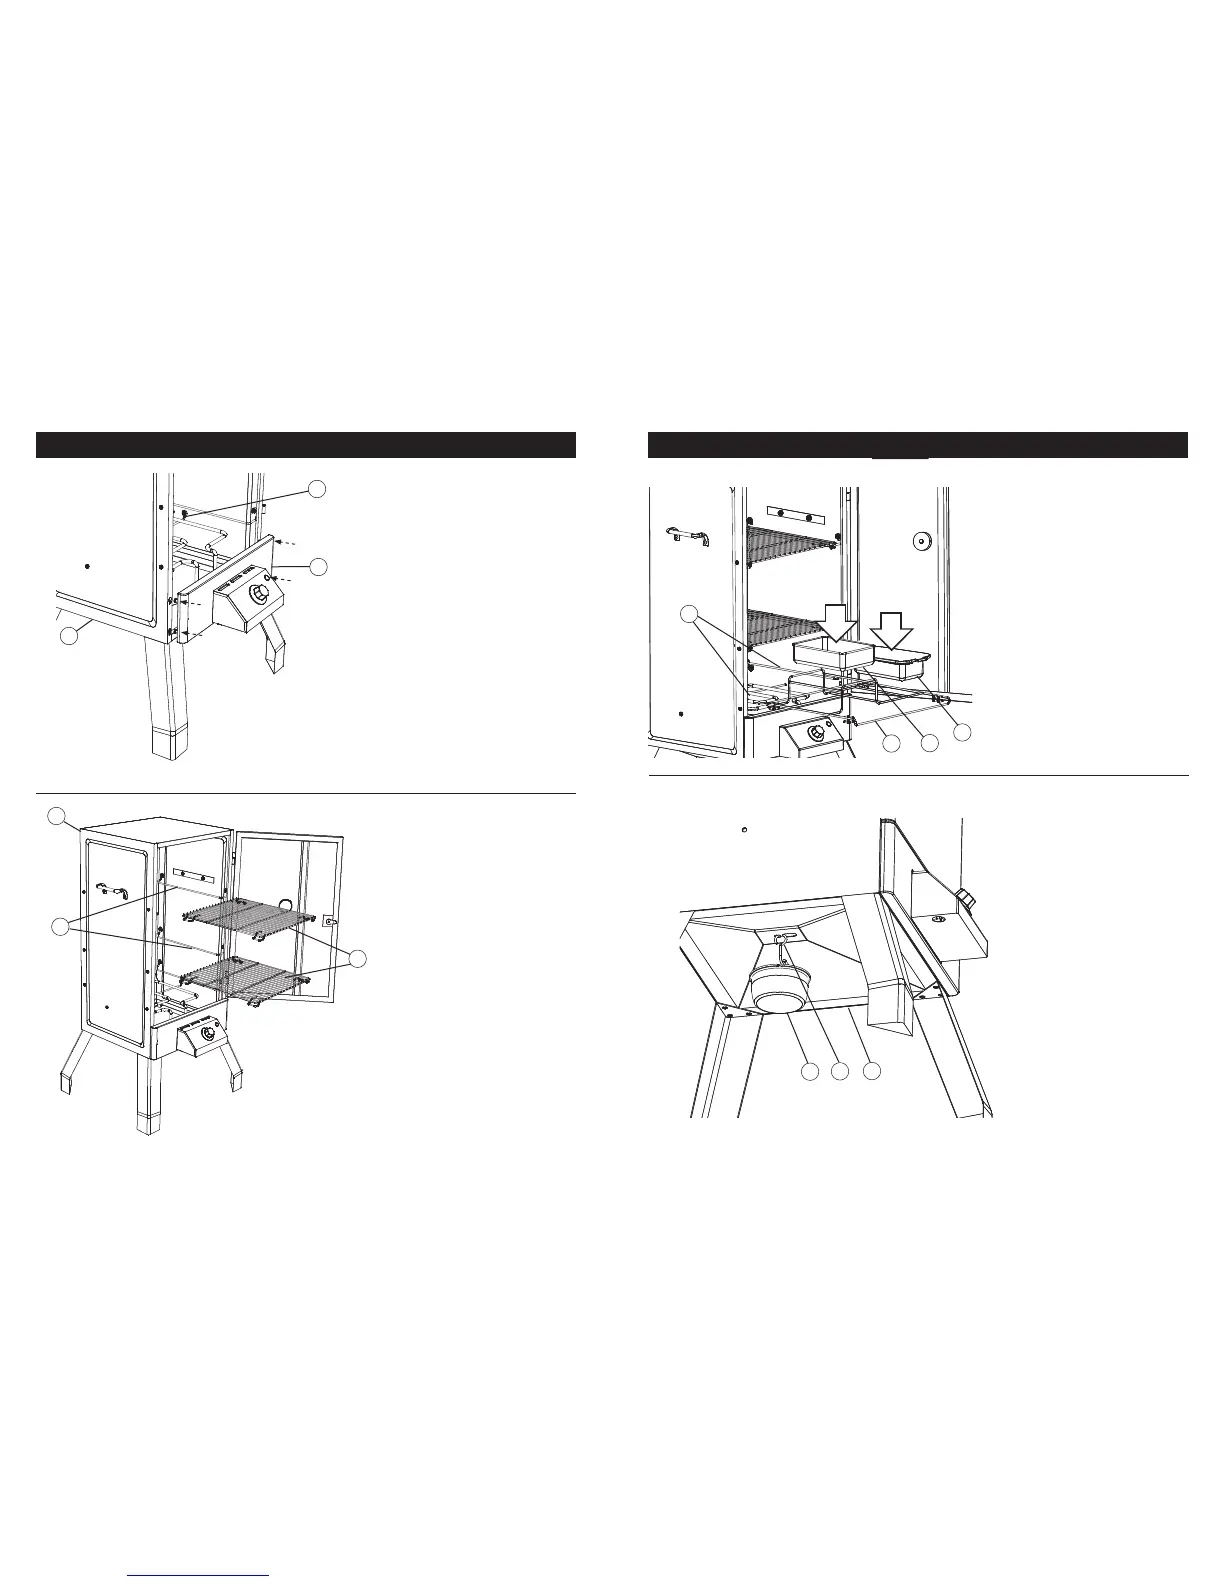
Step 5
Align
control panel (7)
with smoker
body (1), rest element of control
panel (7) onto element support (8).
Insert phillips head screws located on
rear side of control panel (7) into hole
slots of smoker body (1) as shown.
Tighten screws once nested securely
into place.
(*Some parts not shown for clarity.)
Step 6
Slide cooking grates (15) onto cooking
grate supports (14) inside smoker body (1).
1
14
15
ASSEMBLY INSTRUCTIONS
7
1
7
8
Step 8
Insert grease clip (10) with drip cup (9)
into grooves under smoker body (1).
SOME PARTS NOT SHOWN FOR
CLARITY
.
Step 7
Set wood chip tray (12) and water
bowl (13) into wood chip grate (11)
and slide onto grate support (14) as
shown.
Note: Wood chip tray and water bowl
MUST be in place when using smoker
.
This minimizes the chance of wood
flare ups.
13
12
9
10
1
14
11
ASSEMBLY INSTRUCTIONS
8