EasyManua.ls Logo

Cookology FOD60SS - User Manual

Cookology FOD60SS
27 pages
Print Icon
To Next Page IconTo Next Page
Loading...
Instruction Manual
BUILT-IN OVEN
MODEL:
FOD60SS
FOD60BK
Question and Answer IconNeed help?

Do you have a question about the Cookology FOD60SS and is the answer not in the manual?

Summary

Safety Warnings

General Safety Precautions

Covers warnings about hot parts, child supervision, and general user safety during operation.

Electrical and Installation Safety

Details safety requirements for electrical connections, wiring, and installation behind decorative doors.

Cleaning and Maintenance Safety

Advises against abrasive cleaners, steam cleaners, and improper floor covering during cleaning.

Safety Instructions

General Safety and User Conduct

Provides notes on grounding, dedicated circuits, and general user conduct during operation.

Operational Hazards and Warnings

Highlights risks like touching hot parts, unattended cooking, flammable materials, and using faulty appliances.

Installation and Electrical Safety

Covers heat-resistant materials, ventilation, power cord safety, and avoiding extension cords.

Environmental and Handling Safety

Details safe handling during transport, storage, and precautions for using the oven with cold water.

How to Save Energy

Efficient Cooking Practices

Tips include not opening the door often, using residual heat, and cooking larger dishes.

Installation for Energy Efficiency

Advises against installing the cooker near refrigerators or freezers to prevent increased energy consumption.

Unpacking

Disposal of the Appliance

Appliance Specifications

Installation

Electrical Connection

Details the process of connecting the oven to the mains supply, including safety warnings for electricians.

Operation

Before First Use

Instructions for initial cleaning, heating, and preparing the oven for first use.

Main Body Overview

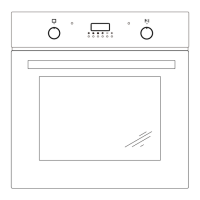
Identifies and describes the main components of the oven, including knobs and indicators.

Control Panel Overview

Details the functions of buttons, knobs, and the LED display on the control panel.

Manual Operation Mode

Guides on selecting manual operation and setting the clock for time-of-day functions.

Setting the Clock

Explains how to set the time of day using the manual operation controls.

Minute Minder Function

Instructions for using the minute minder to set timed cooking periods with an audible alarm.

Setting the Duration Function

Details how to set a countdown timer that automatically switches the oven off.

Setting the End Cook Function

Explains how to set a specific time of day for the oven to automatically switch off.

Setting Start and End Time

Guides on programming the oven to start and end cooking at specific times.

Natural Convection Oven

Describes the conventional oven mode using bottom and top heaters and grill.

Oven On and Off Control

Instructions on how to switch the oven on and off by setting control knobs.

Oven Functions Overview

Details various oven functions like lighting, defrosting, fan cooking, and grilling modes.

Fast Oven Heat-Up

Explains the function for rapidly preheating the oven using a fan and heater.

Using the Grill

Instructions for operating the grill function, including temperature settings and safety precautions.

Cleaning and Maintenance

Replacing the Oven Light Bulb

Step-by-step guide for safely replacing the oven's internal light bulb.

Removing Oven Doors

Detailed instructions for safely removing and reinstalling the oven doors.

Removing Inner Glass Panel

Procedure for detaching and cleaning the inner glass panel of the oven door.

Installing Inner Glass

Steps for correctly reinstalling the inner glass panel and heat sink after cleaning.

Operation in Case of Emergency

Appliance Not Working

Troubleshooting steps for when the appliance does not power on, checking fuses and power supply.

Oven Lighting Not Working

Guidance on fixing the oven lighting, involving checking bulb tightness or replacement.

Technical Data

Overview

The Cookology Built-In Oven, models FOD60SS and FOD60BK, is a household electrical appliance designed for cooking and baking. This manual provides essential safety instructions, installation guidelines, operational procedures, and maintenance tips to ensure safe and efficient use.

Function Description:

The oven is designed for various cooking functions, including natural convection (conventional baking with top and bottom heaters), defrosting, central element with fan operation for homogenous heat distribution, grill heating, and grill with fan for spit-roasted dishes and roasts. It features a control panel with knobs for function selection and temperature control, a digital display for cooking time, and indicator lights for power and oven operation. The oven also includes timer functions such as a minute minder, duration setting (automatic switch-off after a set period), and end cook function (automatic switch-off at a specified time of day). A combined start and end time function allows for delayed cooking.

Important Technical Specifications:

  • Voltage Rating: 220-240V~ 50/60 Hz
  • Power Rating: Max. 1.8kW
  • Cooker Dimensions (H/W/D): 59.5 / 59.5 / 53.0 mm
  • Usable Capacity of the Oven: 60 L
  • Weight: Approx. 26kg
  • Built-in Dimensions (H/W/D): 600mm / 560mm / 560mm (min)
  • Electrical Connection: Single-phase alternating current, requiring a properly grounded 220-240V electrical outlet and a safety switch with a minimum 3mm contact distance.

Usage Features:

  • Control Panel:
    • Oven function selection knob (1): To choose desired cooking modes.
    • Temperature control knob (2): To set the oven temperature.
    • Oven door handle (3): For opening and closing the oven door.
    • Yellow function operation signal light (4): Indicates the oven is working.
    • Red temperature regulator signal light (5): Indicates the oven is heating; turns off when the set temperature is reached.
    • Keep-press (6): Not explicitly defined but likely a button for specific timer interactions.
    • Display (7): Digital display for time and timer functions.
  • Cooking Time Control Panel:
    • Minute minder button (3): To set a countdown alarm.
    • Duration button (4): To set a cooking duration after which the oven switches off.
    • End cook button (5): To set a specific time of day for the oven to switch off.
    • Manual operation button (6): To switch the oven to manual mode.
    • Minus button (7) and Plus button (8): For adjusting time and settings.
    • LED display (9): Shows time, symbols for auto function (10), minute minder (11), and manual operation (12).
  • First Use: Before initial use, remove packaging, clean the interior and fittings, ventilate the room, and heat the oven to 250°C for approximately 30 minutes to burn off manufacturing residues. Clean the interior with warm water and mild washing-up liquid.
  • Timer Functions:
    • Minute Minder: Sets an alarm for a specified period without affecting oven operation.
    • Duration: Sets a cooking time, after which the oven automatically switches off.
    • End Cook: Sets a specific time for the oven to switch off.
    • Start and End Time: Allows scheduling a future start time and an end time for cooking.
  • Fast Oven Heat-up: For ovens with automatic air circulation, a fan, and an ultra-fan heater, this function can heat the oven to 150°C in approximately 4 minutes. Not recommended for use with the programmer set or when a baking tray with dough is already inside.
  • Grill Usage: The grill operates via infrared rays. To use, set the oven knob to the grill position, preheat for approximately 5 minutes (with the oven door shut), and insert the dish. For grilling and combined grill, the temperature must be set to 250°C; for grill function with fan, it must be set to a maximum of 200°C.

Maintenance Features:

  • General Cleaning: Ensure the cooker is switched off and cooled before cleaning. Use appropriate light cleaning or washing products, such as liquids or emulsions for fat removal. Avoid harsh abrasive cleaners or sharp metal scrapers on the oven door glass. Do not use steam cleaning equipment.
  • Oven Light Bulb Replacement: To replace the G9, 230V, 25W high-temperature bulb, switch off the appliance, disconnect the mains plug, unscrew the lamp cover, and replace the bulb. Ensure the bulb is properly inserted and the lamp cover is screwed back on.
  • Removing the Doors: The oven door can be removed for cleaning. Fully open the door, lift the latch hinges, gently close the door until a clamping position is reached, then push and pull up to remove the hinge bolt.
  • Removing the Inner Glass Panel: The inner glass panel can be removed for cleaning. Use a slotted screwdriver to pry open the plastic fixed blocks, remove the fixed block and top ends of the plastic ventilation grid, then pull out the inner glass. After cleaning, insert the inner glass and reassemble the fixed blocks and ventilation grid.
  • Troubleshooting: The manual includes a table for common issues like the appliance not working (check fuse) or oven lighting not working (check/replace bulb). For other faults, contact a service centre.

Safety Warnings:

  • The appliance is not to be used by persons with reduced physical, sensory, or mental capabilities, or lack of experience and knowledge, unless supervised or instructed. Children must be supervised and kept away from the appliance during use.
  • Accessible parts become hot during use. Avoid touching heating elements.
  • Do not use harsh abrasive cleaners or sharp metal scrapers on the oven door glass.
  • The oven must be switched off before removing guards for cleaning.
  • Ensure the appliance is switched off before replacing the lamp.
  • Do not install the appliance behind a decorative door to avoid overheating.
  • The appliance must be disconnected from the power supply after installation via an accessible plug or switch.
  • Damaged supply cords must be replaced by the manufacturer or a qualified person.
  • The appliance should be connected to a circuit with an isolating switch accessible to the user.
  • If using alcohol in recipes, be aware that high temperatures can cause vaporization and ignition.
  • Avoid covering the oven floor with aluminum foil or placing dishes directly on it, as this can cause heat concentrations and damage.
  • Do not add cold water to hot food or trays in a hot oven to prevent steam burns and enamel damage.
  • Do not lift the oven by the handle.
  • Installation must be performed by a qualified person.
  • Ensure proper ventilation in the kitchen area.
  • Cabinets adjacent to the oven must be made of heat-resistant material.
  • Keep combustible materials away from the heater.
  • Avoid using extension cords.
  • Do not operate the oven with a damaged cord or plug.

Cookology FOD60SS Specifications

General IconGeneral
BrandCookology
ModelFOD60SS
CategoryOven
LanguageEnglish

Related product manuals