After Operation-Maintenance
OPERATIONOPERATION
For Best Results
- Chill meats thoroughly before
slicing.
- Slice meats thinly.
- Meats should be boneless.
- Fish and thin steaks will slice better
if partially frozen.
- When slicing warm roasts, make
certain to remove all string before
slicing.
2. To reinsert the Blade Assembly
G, line up the tabs on the Blade
Assembly G with the slots in the
Small Gear. Once the Blade
Assembly is seated with the Small
Gear, turn the Blade Lock M
anticlockwise to lock it in position.
See fig. 10.
CAUTION: Before first use and
after every use, clean the Blade
and Assembly.
1. Make certain that the Food Slicer
is OFF and UNPLUGGED. Turn
the Blade Lock M clockwise to
unlock it. Pull out the Blade
Assembly G.
See fig. 9.
CAUTION: Take care when
removing or replacing the blade
as the edge may be very sharp.
G
STORAGE:
- Remove the Protective Guide L
and Food Tray K, Fold up the
Platform H against the Main Body.
Wrap up the Cord J and store it
under the Food Slicer. The Food
Slicer should be stored in a
location that is out of reach of
children in a clean dry enviroment.
See fig. 12.
2. Ensure the unit is hygienically
clean. Before assembling the Food
Slicer, and with the unit unplugged,
thoroughly wipe off all parts with a
clean cloth using warm soapy water
and a mild anti-bacterial detergent.
In addition, the following parts
should be removed and cleaned in
hot soapy water: Protective Guide
L
, Blade Assembly G, and Food
Tray K. Clean the Food Slicer after
every use.
See fig. 11.
1. Never use Steel Wool or scouring
powder on any part of the Food
Slicer.
M
NOTE: Only use this appliance to
cut soft foods, Do not use to
cut frozen foods, bones or other
solid food types.
A
H
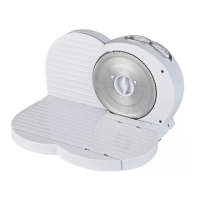
Removing and Replacing the Blade
fig. 9
fig. 11
Small Gear
fig. 10
fig. 12
CLEANING
G
L
K
G
M
NOTE: Failure to follow all cleaning
instructions could allow harmful
bacteria to grow and
contaminate food, creating a
serious health risk.