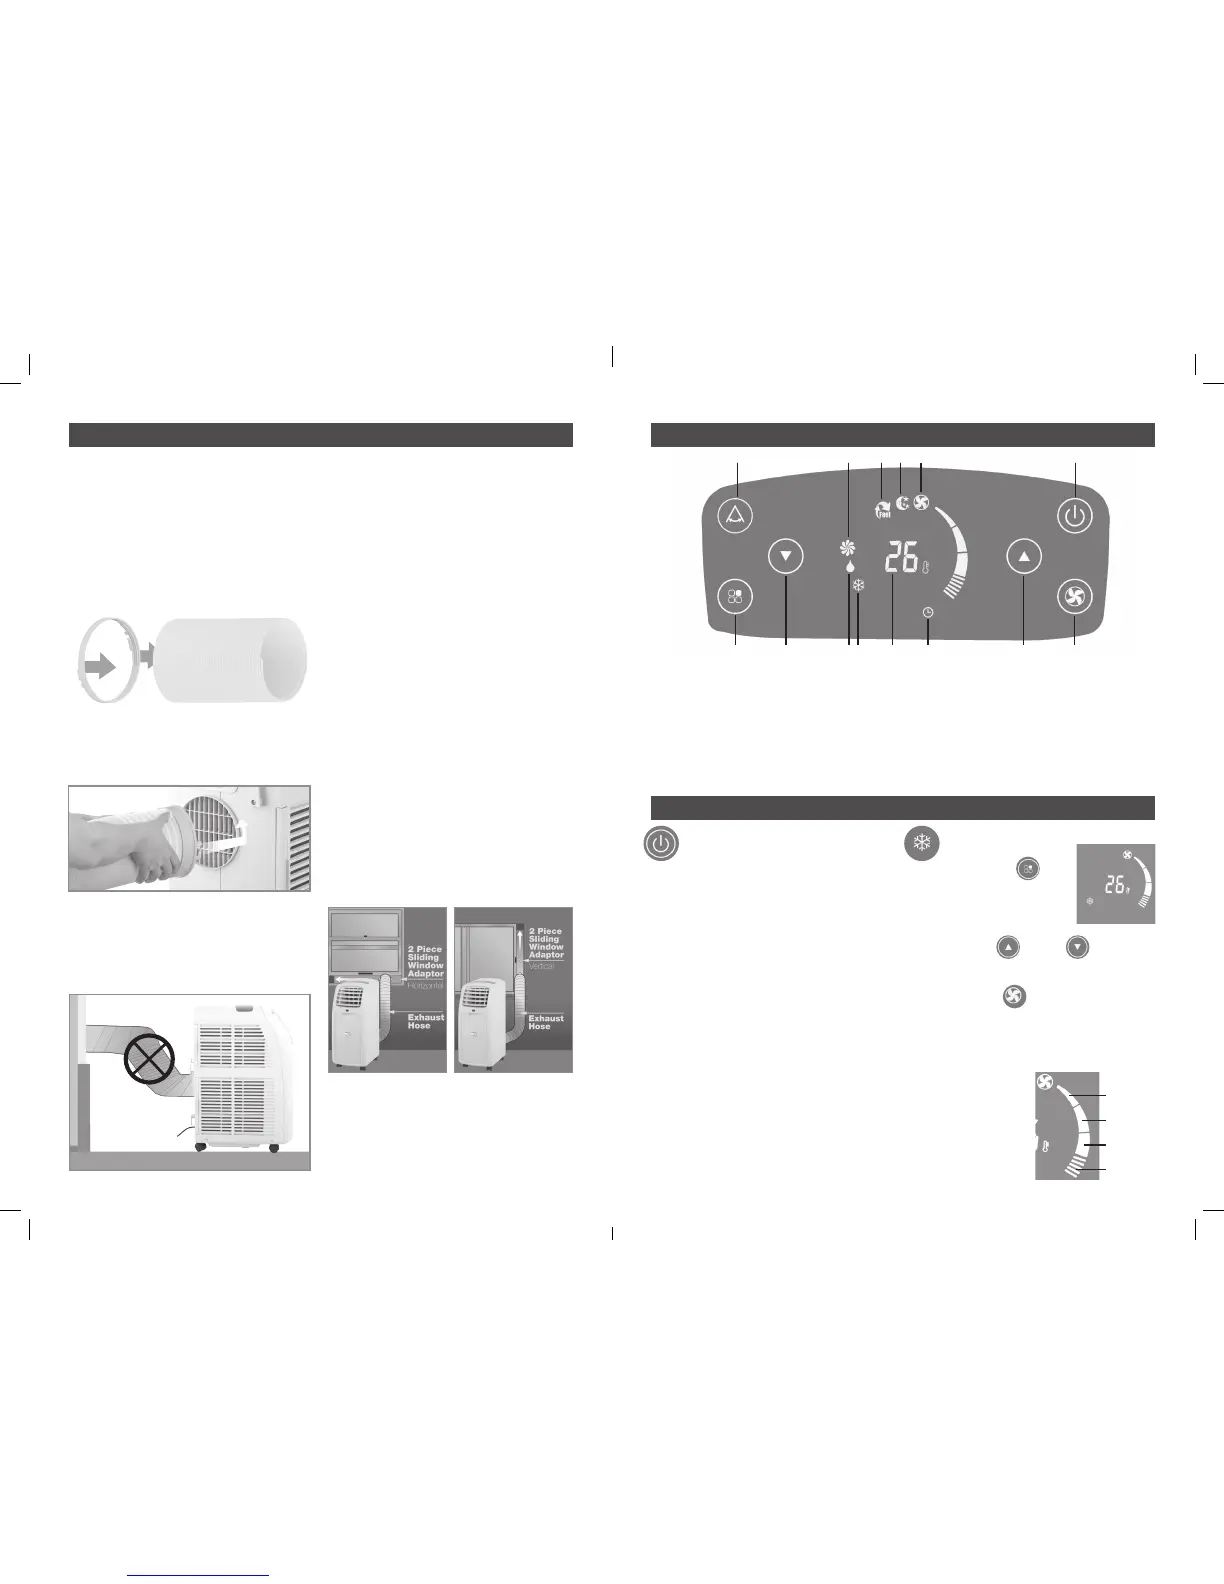
FITTING THE EXHAUST HOSE
This air conditioner is required to have the
hose fitted to an external opening to exhaust
the hot air.
The hose can be extended from 390mm to
1500mm long, however it is recommended
to use the shortest possible length. Pull
the end of the air outlet duct apart by
several turns.
Attach the hose inlet to the pulled apart end
of the hose. Place the hose inlet over the
exhaust outlet and turn it in anti clockwise
direction to lock it in.
Prevent any bow or bend in the middle of
the hose, as this will trap hot exhaust air,
which will radiate into the room and cause
the unit to shut off automatically (due to
overheating)
IMPORTANT! The hose length has
been specifically designed for this
product. Do not replace or lengthen
the hose with attachments. If the
venting of the exhaust air is inhibited
in any way the unit may over heat and
shut off.
TO ATTACH
1 Slide window open
2 Insert sliding window adaptor into opening,
telescope window adaptor to fit window.
3 Insert screw into closest available hole in
edge of kit to hold it in position.
4 Attach the hose outlet onto flexible hose.
5 Insert hose outlet into window adaptor and
clip into place.
6 Partially close window to secure window
kit.
7 If you have a double window use the
suction cups provided to hold the windows
in place.
8 Your appliance is ready for use.
HORIZONTAL VERTICAL
APPLICATION APPLICATION
CASTER LOCKS
Two caster locks are supplied with the unit.
Place the locks underneath the rear casters
to lock-in the unit in place.
ASSEMBLY DESCRIPTION OF CONTROL PANEL
OPERATION
TURNING ON /OFF
To power the unit ensure that the power
plug is plugged into an appropriate 240Vac
receptacle and switch power
on at the wall outlet.
Once the power is applied the unit will beep
three times and the display will come up
with two lines, the unit will be in a standby
mode.
Press the Power ON touch key and the unit will
start operating in the last selected settings.
IMPORTANT! To prolong the life of
the compressor, wait for at least 3
minutes before turning on the unit,
after it has been switched off.
Never turn the air conditioner off by
unplugging from the mains wall outlet.
Always use the Power ON button to turn off
the unit and then wait for few minutes before
unplugging the mains power cord.
COOL Mode
• Press the MODE Key
repeatedly until the COOL
symbol appears on the
display. This indicates the
unit is set in cool mode.
• Press the UP DOWN key to
set room temperature as desired between
18˚C to 32˚C.
• Press the FAN key to change the fan
speed from Low to Medium to High to Auto
and the speed indicator will change on the
display panel to the selected fan speed
settings as shown below.
When the fan speed is
set to AUTO the unit
will select the most
suitable fan speed
from Low, Medium
and High as per the
set temperature.
Low
Medium
High
AUTO
1 COOL Mode
2 DRY Mode
3 FAN Mode
4 SMART Mode
5 SLEEP Mode
6 Fan speed indicator
7 Temperature indicator
8 Timer indicator
9 Power ON / OFF touch key
10 Fan speed adjustment key
11 SWING FUNCTION touch key
12 Mode selection touch key
13 Down temperature touch key
14 Up temperature touch key
43
2 1 7 8 14 101312
5 6 911
4 5
CPIN002908

 Loading...