DRY Mode
• Press the MODE key
repeatedly until the DRY
mode symbol appears on
the display.
• In Dry mode fan speed is preset. Speed
button is not available. The temperature
can’t be set either.
• Dry mode cannot be used to cool the
room, it is ideal to reduce room humidity.
*See water drainage section to drain
the condensate (water) in the unit.
FAN Mode
• Press the MODE key
repeatedly until the FAN
mode symbol appears on
the display.
• Press the FAN key to change the fan
speed from Low to Medium to High and
the speed indicator will change on the
display panel to the selected fan speed
settings.
In this mode Fan speed cannot be set
to AUTO
SMART Mode
• Press the MODE key
repeatedly until the SMART
mode symbol appears on
the display.
• In this mode unit will enter into a preset
algorithm which will decide which mode
to activate (cool or fan ) according to the
room temperature.
• To set this mode press the MODE button
repeatedly until the SMART symbol
appears on the display.
• Fan speed is set to AUTO in this mode and
cannot be adjusted.
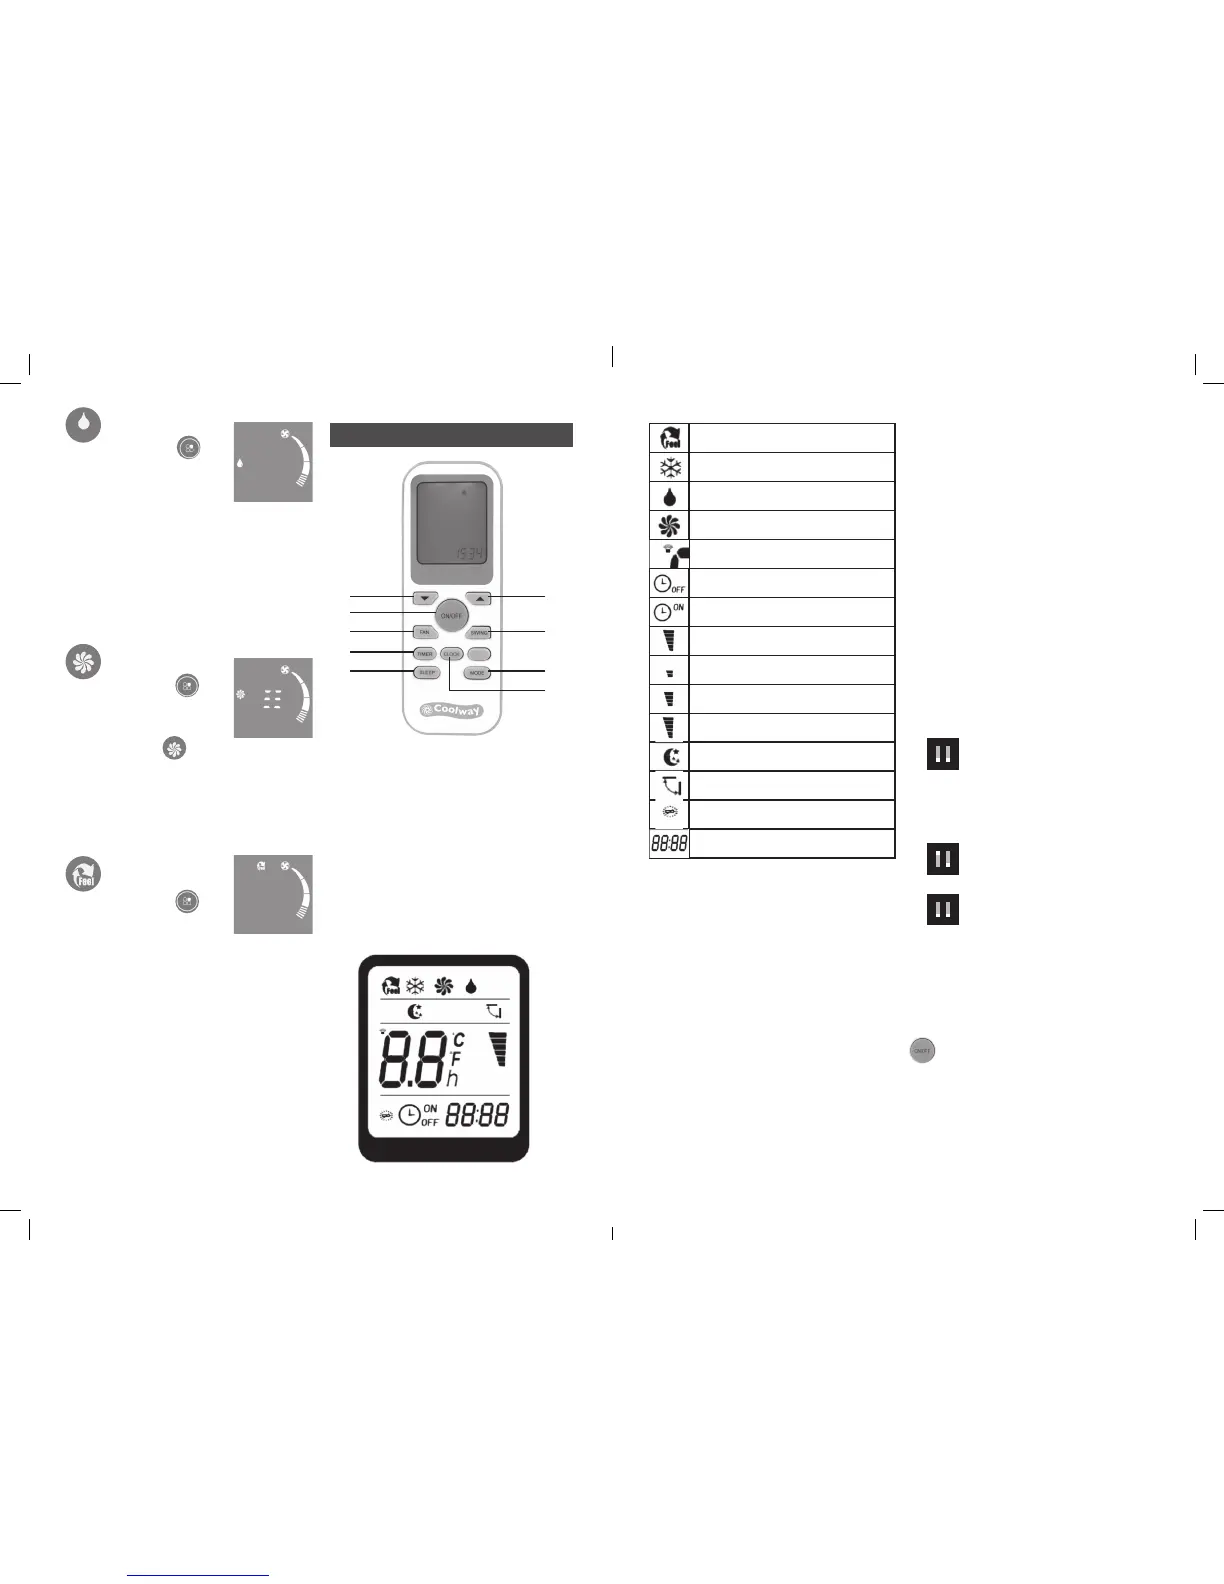
1. Time & temperature increment button
2. Time & temperature decrement button
3. Power on /off button
4. Fan speed button
5. Timer button
6. Sleep function button
7. Clock button
8. Mode selection button
9. Swing on/off button
REMOTE DISPLAY
REMOTE CONTROL
REMOTE CONTROL OPERATION:
• For the remote control to operate correctly
the remote handset has to be in line of
sight of receiver (attached to the front of
unit below the air vents). There will be
no change in the function of the unit if
the remote transmitter handset is not in
line of sight of the unit or if there are any
obstacles between the remote control and
receiver.
• Each time when there is a change in the
function of the unit it will beep which indicates
that the receiver attached to the unit has
sensed the button press of the remote.
• If the remote transmitter is not in line of
sight of the receiver and button is pressed
the display on the remote LCD will change
according to the button pressed but there
will be no change in the function of the unit.
• The remote has a backlight option, to turn on
the backlight press any button for 4 secs.
BATTERY REPLACEMENT
• Slide the battery cover out.
• Insert two AAA size 1.5V batteries into the
battery compartment making sure the
polarities are correct, alkaline batteries
recommended
• Refit the battery cover
• When the batteries go low the remote
display will come up with the battery low
indicator, replace both the batteries with
fresh alkaline batteries.
DIP SWITCH POSITION
Before you refit the battery housing cover
ensure the DIP switch is set to correct
position as described below.
Cooling: The remote control is set for
COOLING MODE ONLY. If slide
the switch UP to ON position the
remote will have both Cool and
Heat mode. This unit has no HEAT mode so
there will not change in function when the
HEAT mode is selected.
Fahrenheit: The temperature display on
the remote LCD display will be in
degree fahrenheit.
Celsius: The temperature display on the
remote LCD display will be in
degree Celsius
Note: To change the settings the
switch position must be adjusted
first and then the batteries must
be inserted. By DEFAULT the
temperature on the unit will be
displayed in Degree Celsius.
ON/OFF Button
Press the ON/OFF button to turn the unit ON
or OFF.
Each time the unit is turned ON it will start
operation in last selected mode
1
9
8
7
2
4
5
6
3
SMART Mode Indicator
COOLING Indicator
DEHUMIDIFYING Indicator
FAN ONLY OPERATION Indicator
SIGNAL RECEPTION Indicator
TIMER OFF Indicator
TIMER ON Indicator
AUTO FAN Indicator
LOW FAN SPEED Indicator
MEDIUM FAN SPEED Indicator
HIGH FAN SPEED Indicator
SLEEP Indicator
LOUVRES SWING Indicator
BATTERY Indicator
CLOCK Indicator
1 2
1 2
1 2
ON
ON
ON
CPIN002908
6 7

 Loading...