This document describes the Coonara Settler 600 Series MKII wood heater, available in both freestanding and inbuilt models. It covers installation, operation, maintenance, and warranty information for these solid fuel appliances manufactured by Shamic Sheetmetal (Aust) Pty Ltd.
Function Description
The Coonara Settler 600 Series MKII is a solid fuel appliance designed for heating residential spaces. It operates by burning hardwood to generate heat, which is then distributed into the room. The heater is equipped with an air control slide to regulate combustion and a fan (for freestanding models) to aid in heat distribution. The design aims for efficient burning and includes features to minimize carbon, soot, and creosote deposits on the door glass.
Important Technical Specifications
General:
- Model: Coonara Settler C600 SERIES 5, MKII (Freestanding and Inbuilt)
- Fuel Type: Solid fuel (hardwood only)
- Flue Kit: Wildcat 6" triple flue kit with 8" decromesh casing (tested in accordance with AS/NZS 2918:2018)
- Manufacturer: Shamic Sheetmetal (Aust) Pty Ltd
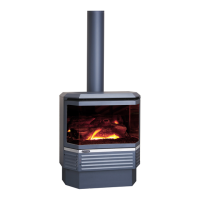
Freestanding Model (C600 MKII Ranch - Freestanding):
- Floor Protector/Hearth: Minimum 1060mm deep x 1000mm wide x 16mm thick compressed board.
- Extends 500mm in front of the fuel loading door.
- Placed centrally in the 1000mm width.
- Thermal conductivity: 0.08m².K/W for 8mm thick sheets.
- Clearances to Combustible Surfaces (Dimensions in mm):
- Parallel Position:
- Rear wall: 375mm (100mm if installed with 180-degree stainless steel rear flue shield to a height of 1570mm above the appliance)
- Side walls: 325mm
- Front (hearth extension): 500mm
- Corner Position:
- Side walls: 150mm
- Front (hearth extension): 500mm
- Fan: 3-speed fan for efficient distribution of warmth.
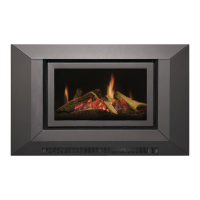
Inbuilt Model (I600 MKII - Inbuilt):
- Installation: Must be installed in either a sound concrete or masonry fireplace, connected to a chimney, or within an approved Shamic Zero Clearance Box.
- Floor Protector (Hearth): Minimum 470mm deep x 695mm wide x 36mm thick compressed board (or 470mm deep x 695mm wide x 16mm thick if bricks are acceptable).
- Extends 500mm in front of the appliance base.
- Placed centrally in the 1000mm width.
- Thermal conductivity: 0.08m².K/W for 8mm thick sheets.
- Clearances to Combustible Surfaces (Dimensions in mm):
- Mantel:
- 600mm from the underside mantel shelf to the top of the appliance hot air outlet.
- 550mm from the underside mantel key to the appliance hot air outlet.
- Mantel uprights should be no closer than 20mm from the side of the appliance fascia.
- Shamic Zero Clearance Box Installation:
- Minimum 575mm deep x 745mm wide x 18mm thick floor protector (compressed board).
- Extends 500mm in front of the fuel loading door.
- Placed centrally in the 1000mm width.
- Thermal conductivity: 0.08m².K/W for 8mm thick sheets.
- Venting in ceiling: Minimum 283,150mm² evenly spaced around the outer casing.
- Outer casing of flue (10"): Must be vented into the zero-clearance box outer skin and be sealed to prevent venting into the enclosure.
- Inner galvanised casing of the flue (8¾"): Must be vented into the zero-clearance box inner skins and be sealed to prevent venting into the enclosure.
- Front wall of enclosure: Must be made of non-combustible material to a height of 220mm above the zero box and extend 100mm either side of the zero box.
- Noggin: 220mm from the top of the Zero Clearance box to the first internal wall noggin, the noggin must be a minimum of 130mm from the flue outer casing.
- Rear combustible wall: Must be no closer than 25mm from the rear of the appliance zero clearance box.
- Side combustible wall: Must be no closer than 25mm from the side of the appliance zero clearance box.
Firebox Internal Components:
- Baffle Plate: Top baffle plate with ribs facing down.
- Secondary Air Tube: Sits in a channel with holes facing down.
- Liners: Rear and side liners (600 models have a 2-piece rear liner, 500 models have a 1-piece rear liner). Smooth side against the firebox, ribs facing into the firebox horizontally.
- Firebricks: 4 bottom firebricks installed horizontally.
Usage Features
Installation:
- Professional Installation: Heaters must be installed by a registered or licensed installer.
- Flue Location: Correct positioning of the hearth and heater ensures proper alignment of the flue spigot with the ceiling location.
- Safety Clearances: Strict adherence to specified clearances from combustible materials is crucial for safety and compliance with AS/NZS 2918:2018.
Operation (First Fire & General Use):
- Curing Paint: The first fire cures the high-temperature paint. This involves gradually increasing heat over four to six hours to prevent the door seal from sticking and to reduce paint odour.
- Lighting a Fire:
- Fully open the air slide.
- Open the door slowly.
- Place firelighters or crumpled newspaper in the firebox.
- Half fill the firebox with dry kindling (10-20mm diameter).
- Light the fire and close the door.
- Once kindling is well alight, add start-up wood (30-75mm diameter).
- Switch on the fan after the firebox has heated up (up to 30 minutes).
- Loading:
- Use dry hardwood only.
- Load 2-3 smaller diameter pieces of wood front to back with a minimum spacing of 20mm, then larger pieces across these.
- Avoid placing large logs across the width of the firebox to ensure proper primary burn air flow.
- Adjust air control to the desired level once logs are alight.
- Fan Operation: The fan should be operating whenever a fire is burning (except on start-up) to prevent overheating and voiding the warranty.
- Door Operation:
- Do not operate with the door open for extended periods.
- Always operate with the door closed except when lighting or refuelling.
- Maintain all door seals in good condition.
- Open air slide and turn fan off before opening door.
- Overnight Burn: For extended low burns, load a maximum amount of fuel, leave the air inlet fully open until the load is alight, then turn down to the low setting. The fan should remain on low setting.
- Self-Cleaning (High Firing): To clean door glass and minimize soot/creosote, operate the heater with the air inlet control on high for at least 90 minutes daily, especially in the morning.
Safety Warnings:
- Heater door glass is extremely hot when in operation.
- Do not use flammable liquids (petrol, kerosene, engine oil) to start or rekindle the fire.
- Burn only hardwood.
- Do not modify the heater in any way.
- Do not store fuel within heater installation clearances or in the space required for fuel charging/ash removal.
- Do not throw wood into the firebox; this can damage the baffle plate and ignite combustible materials.
- Do not slam the door closed; this can diminish the longevity of the door seal.
Maintenance Features
General Maintenance:
- Ash Removal: Leave an inch of ash over the top of the firebricks when cleaning out ash.
- Paint Surfaces: The high-temperature paint may be touched up with matching spray cans. Consult a Coonara dealer for touch-up paint. Do not respray the heater whilst it is in operation.
- Door Glass:
- Regular high firing helps keep the glass clean.
- For cleaning, use a non-abrasive household cleaner (vinegar or wet newspaper dipped in fine ash).
- Do not operate the heater if the door glass is cracked.
- Consult a Coonara dealer for door glass replacement.
- Door Adjustment: If the door becomes misaligned, consult a Coonara dealer. Adjustment involves removing the door, loosening hinge screws, and repositioning the hinge.
- Flue System:
- Annual flue maintenance is recommended prior to the heating season.
- The flue pipe must be kept clean and in good condition.
- Accumulation of soot, creosote, and ash can restrict gas exit.
- In case of a soot or creosote fire in the flue, immediately close the air inlet control and call the fire brigade. Have the flue inspected by a qualified installer afterwards.
- Flue brushes are available from Coonara dealers, or a chimney sweep can be engaged.
- Fan Maintenance (Console Model):
- Turn off mains power and disconnect from the wall socket.
- Access the fan by removing two screws on the left-hand side of the pedestal cover.
- Remove the pedestal cover.
- Clean the fan and surrounding components with a vacuum cleaner with a soft brush fitting.
- Replace the pedestal cover and tighten screws.
- Plug the power lead back into the mains wall socket.
- Fan Maintenance (Inbuilt Models):
- Clean the fan and fan tray at the end of the heating season using a vacuum cleaner.
- A qualified service agent is recommended for inbuilt models. Accessing the fan involves removal of the door and the fascia surround.
- Contact Shamic Sheetmetal for detailed instructions.
Component Replacement:
- Baffle Plate Removal:
- Allow the heater to cool.
- Lift the front of the baffle up and pull forward over the supports until it clears the locating slots in the back wall.
- Lower the rear of the baffle to rest on the firebox floor.
- Lower the front of the baffle until it clears the support brackets and remove it.
- Do not use the heater if the top baffle is damaged.
- Firebox Liners: Install rear and side liners with the smooth side against the firebox and ribs facing inwards horizontally.
- Firebricks: Install 4 bottom firebricks horizontally.
- Replacement Parts: Consult a Coonara Dealer for normally replaceable components such as handle, baffle plate, door glass, fans, door seal, and bricks.
Warranty:
- The full Warranty Statement is provided in the manual.
- To make a claim, check warranty details, confirm coverage, have proof of purchase, and contact the retailer who sold the heater.
- Provide heater model, serial number, and installation compliance certificate (if applicable).
- Shamic Sheetmetal (Aust) Pty Ltd manufactures the heaters and handles claims.