S225-12-1
23
!
SAFETY
FOR LIFE
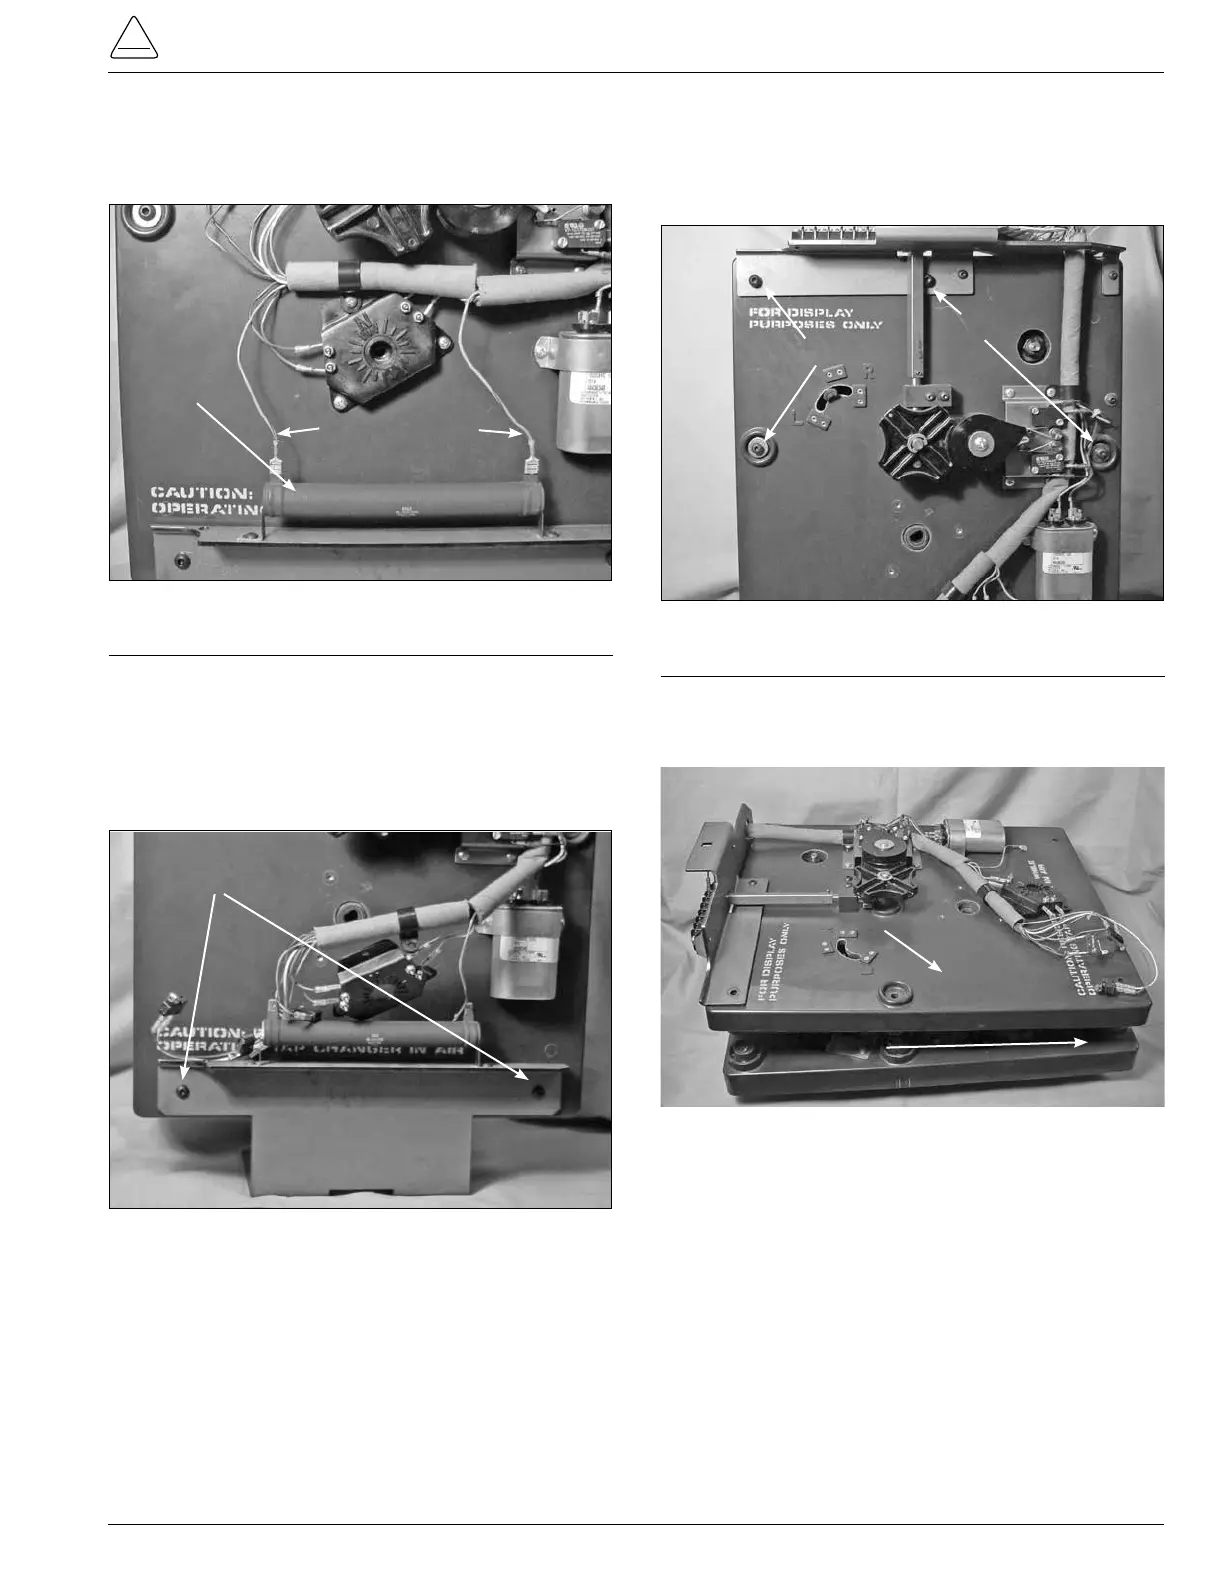
4. Disconnect and remove the blue and red strip leads
from the 40-ohm resistor. These connections are
push-on connections. (See Figure 47.)
5. Lay the tap-changer assembly flat on a work surface
with the tap contact studs down on the surface.
6. Usinga5/32Allenwrenchloosenandremovethetwo
pan head Allen screws from the tap-changer-mounting
bracket. (See Figure 48.)
Figure 47.
40-Ohm resistor connections.
40Ohm Resistor
Blue/Red Leads
Figure 48.
Tap-changer bracket mounting.
Bracket Fastening Screws
7. Usinga5/32Allenwrench,loosenandremovethepan
head Allen screws fastening the front drive assembly
section and the contact panel assembly section
together. (See Figure 49.)
8. Lift the front drive assembly off of the contact assembly
and set aside. (See Figure 50.)
Figure 49.
Drive panel and contact panel fastening.
Screws
Screws
Figure 50.
Tap-changer sections.
Drive Assembly
Contact Panel