S225-12-1
27
!
SAFETY
FOR LIFE
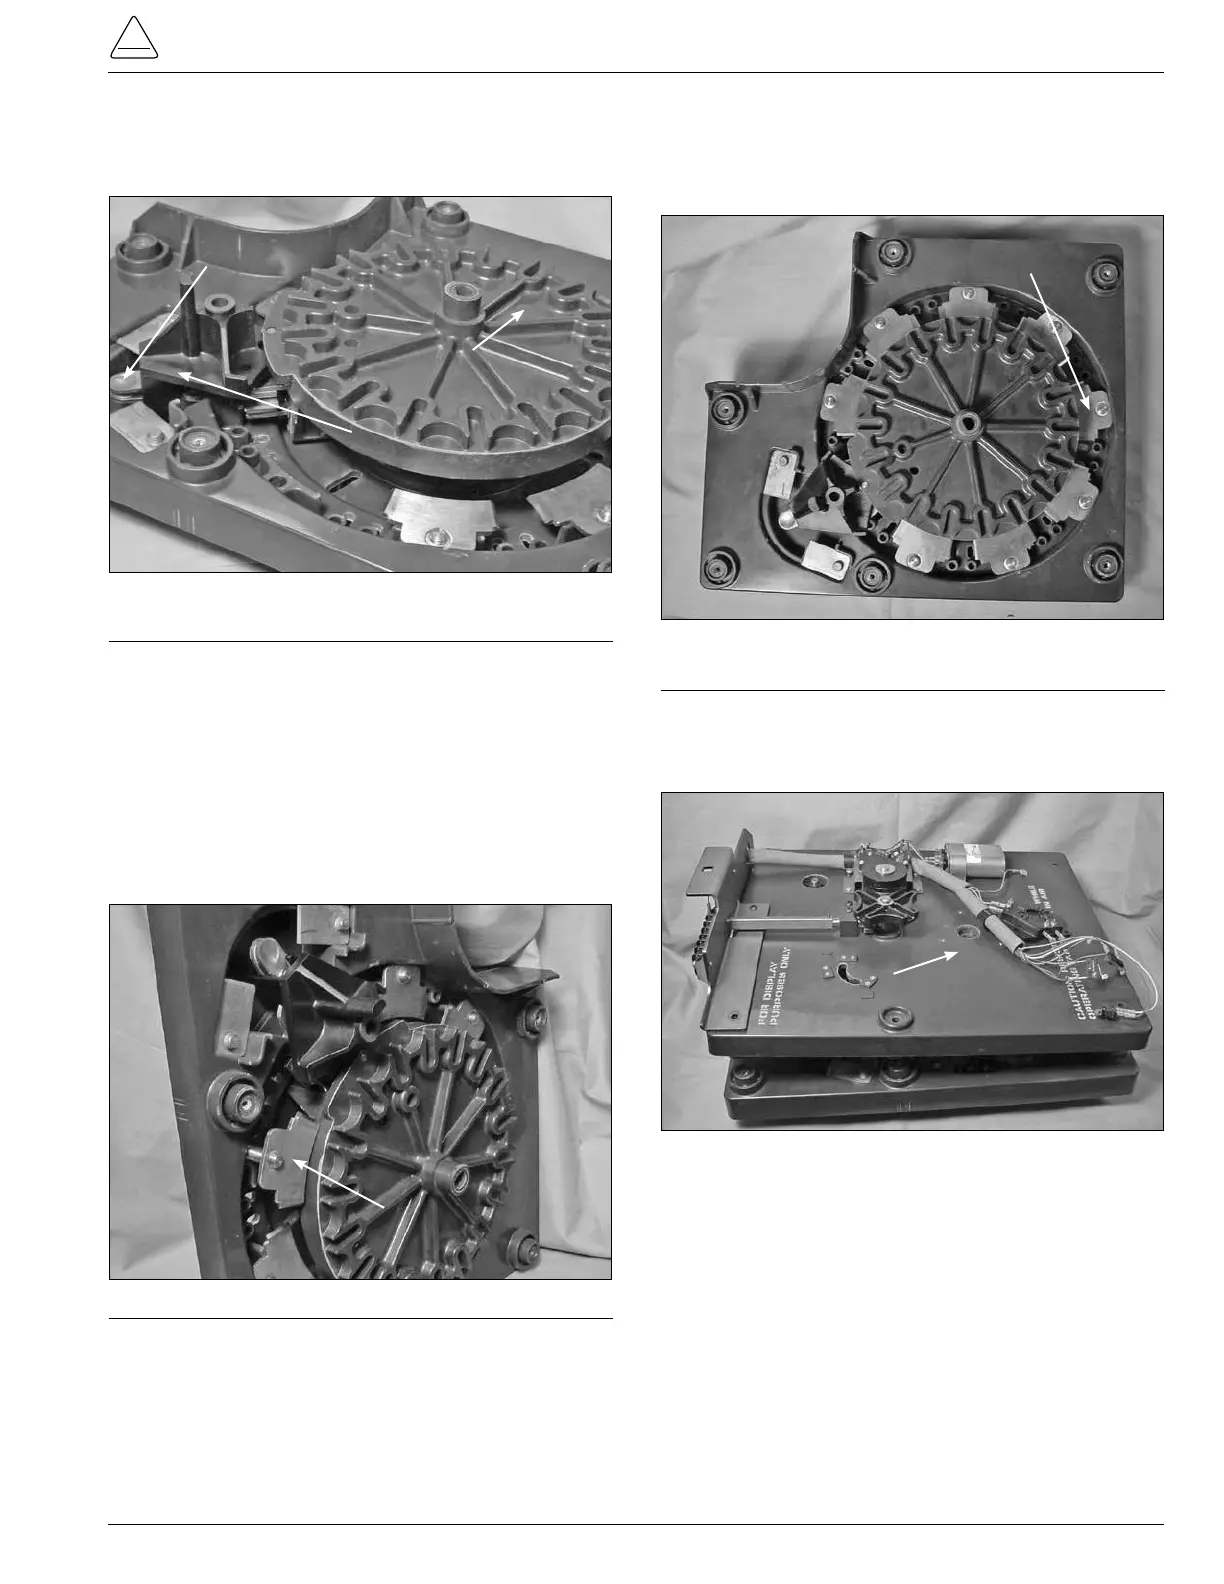
14. Rotate the main moveable contact Geneva gear
assembly onto the neutral stationary contact located
under the reversing switch assembly. (See Figure 63.)
15. Place a flat brass flat washer, external tooth lock
washer, and 3/8 nut on each of the P1 and P2 slip ring
studs and tighten with a 9/16 wrench or socket and
ratchet. Torque the nut on the studs to 60-70 pound-
inch (6.779-7.908 Nm).
16. Replace the number 1 stationary contact by inserting
the contact stud into the contact-mounting hole in the
contact panel. The contact position number is located
on the contact panel. (See Figure 64.)
17. Place a brass flat washer, external tooth lock washer,
and nut on the number 1 stationary contact stud.
Tighten and torque the hardware 60-70 pound-inch
(6.779-7.908 Nm).
Figure 63.
Neutral position.
Moveable Contact
Assembly
Neutral Position
Reversing Moveable Contact Assembly
Figure 64.
Stationary contact one assembly.
Stationary Contact One
Tap-changer Re-Assembly
1. Lay the contact panel assembly section flat on a table
surface. (See Figure 65.)
2. Place and align the tap-changer drive assembly
section on top of the contact panel assembly. (See
Figure 66.)
Figure 65.
Stationary contact panel assembly.
Stationary Contact
Panel Assembly
Figure 66.
Tap-changer Sections.
Drive Panel Assembly