QD3 Quik-Drive Voltage Regulator Tap-Changer Manual
34
CAUTION:
Do not remove lead ties from lead bundles hold-
ing the tap leads in a certain position. Try to keep
from moving the lead bundles from normal position.
Doing so can result, possibly, in de-electric failures.
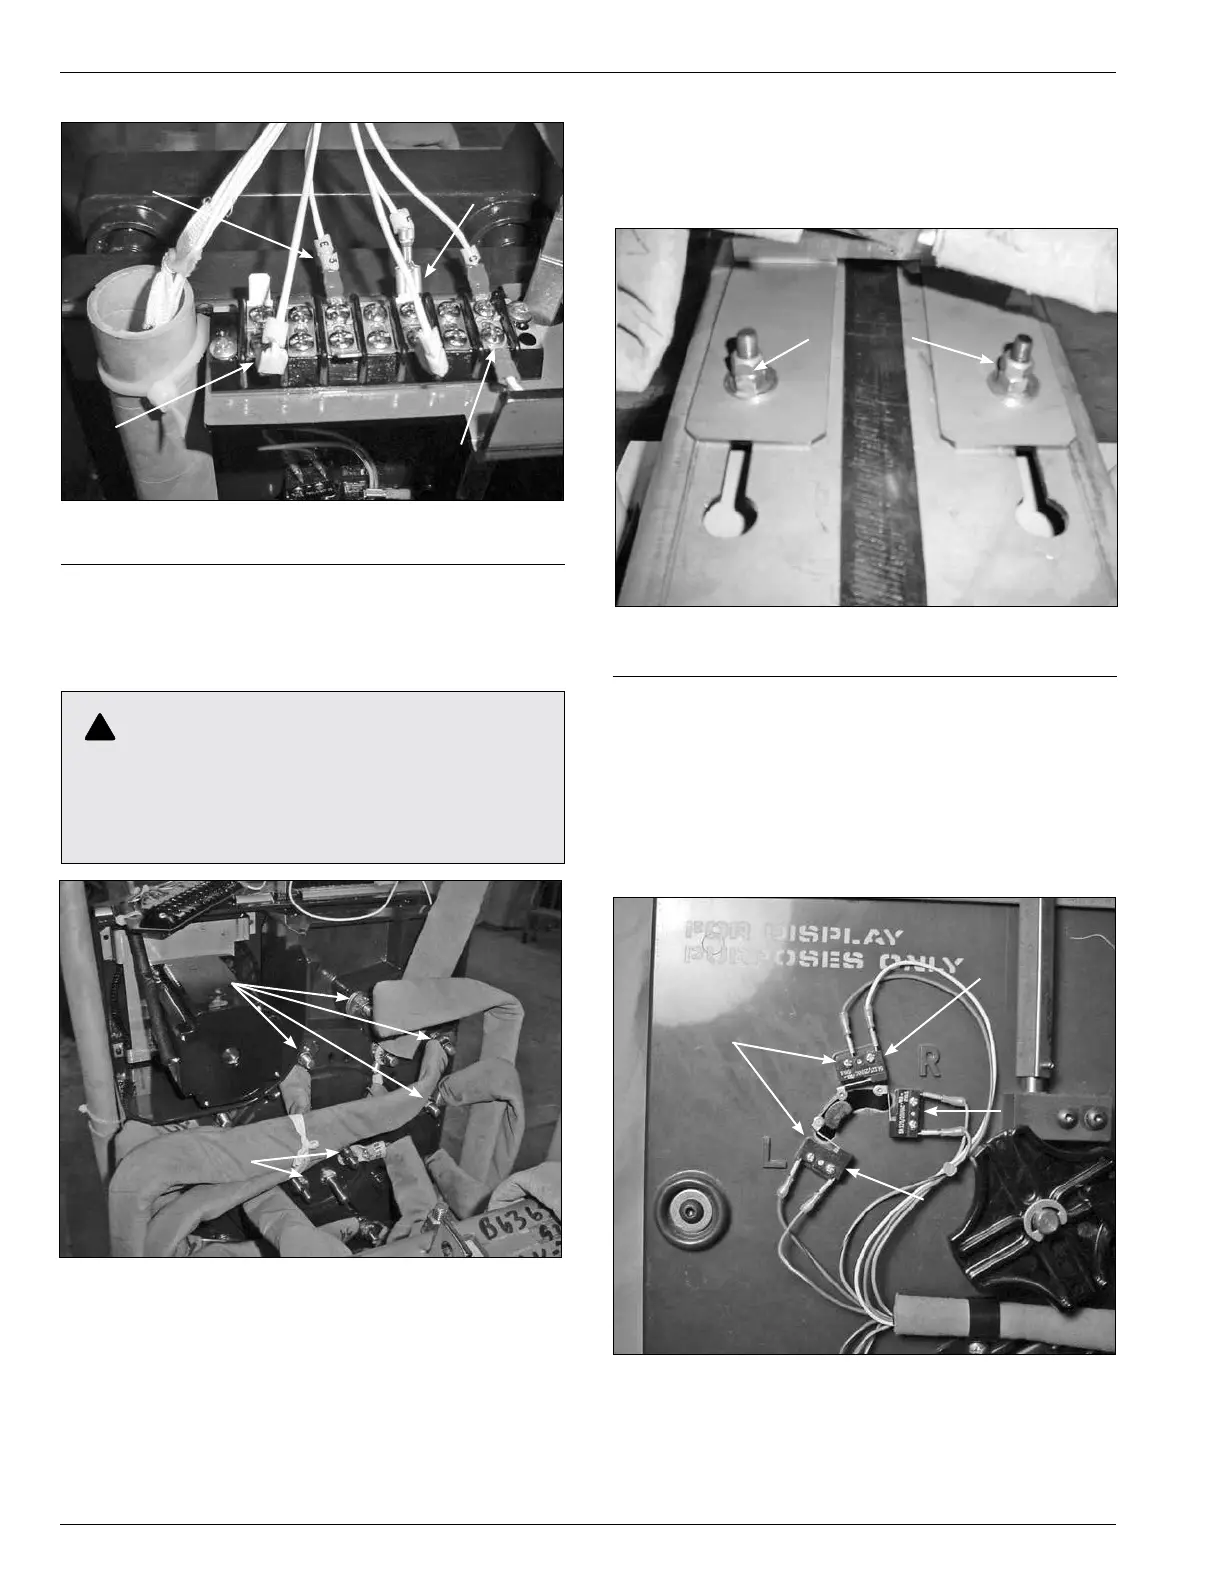
6. Use a deep well 9/16 inch socket with ratchet or
a 9/16 inch wrench to loosen and remove all lead
connections from the back of the tapchanger contact
board. (See Figure 85.)
Tap Lead
Connections
Reactor P1 & P2
Connections
Figure 85.
Tap leads and reactor connections.
7. Remove the mounting bolts fastening the tapchanger
mounting bracket to the top core clamp. See (Figure
86.) Remove the tapchanger from the regulator and
place on a work surface.
Mounting
Hardware
Figure 86.
Tap-changer to core clamp fastening hardware.
QD3/T350 Tap-Changer Assembly
Separation
1. After removing the tapchanger from the regulator
assembly, use a Phillips one point screwdriver to
loosen and remove the six screws mounting the
Reversing Lower, Raise and Neutral switch located
in the upper left corner of the tapchanger assembly.
(See Figure 87.)
Figure 87.
Lower, raise, and neutral logic switches.
Screws
Neutral
Raise
Lower
Figure 84.
E & P lead connections.
E3
E2
E1
G