QD3 Quik-Drive Voltage Regulator Tap-Changer Manual
36
Main Stationary Contact Removal
and Re-Assembly.
1. Use a 9/16 wrench or a deep well 9/16 socket and
ratchet, loosen and remove the brass nut on the station-
ary contact that is to be removed, remove the external
tooth lock washer and brass at washer. (See Figure 94.)
3. Remove the stationary contact from the contact panel.
4. Insert the new stationary contact stud through the
mounting hole for that number of stationary contact.
Make sure that the stationary contact is aligned for
proper tting in the contact board assembly. (See Figure
96.)
5. Place a brass at washer, external tooth lock washer,
and nut onto the stationary contact stud. Tighten and
torque the hardware to 6070 poundinch (6.7797.908
Nm) torque.
6. The above process is used for each of the eight station-
ary contacts on the QD3 contact panel.
QD3 has eight main stationary contacts all labeled with
the tap number on the contact panel.
Tap-Changer Re-Assembly
1. Lay the contact panel assembly section at on a table
surface. (See Figure 96.)
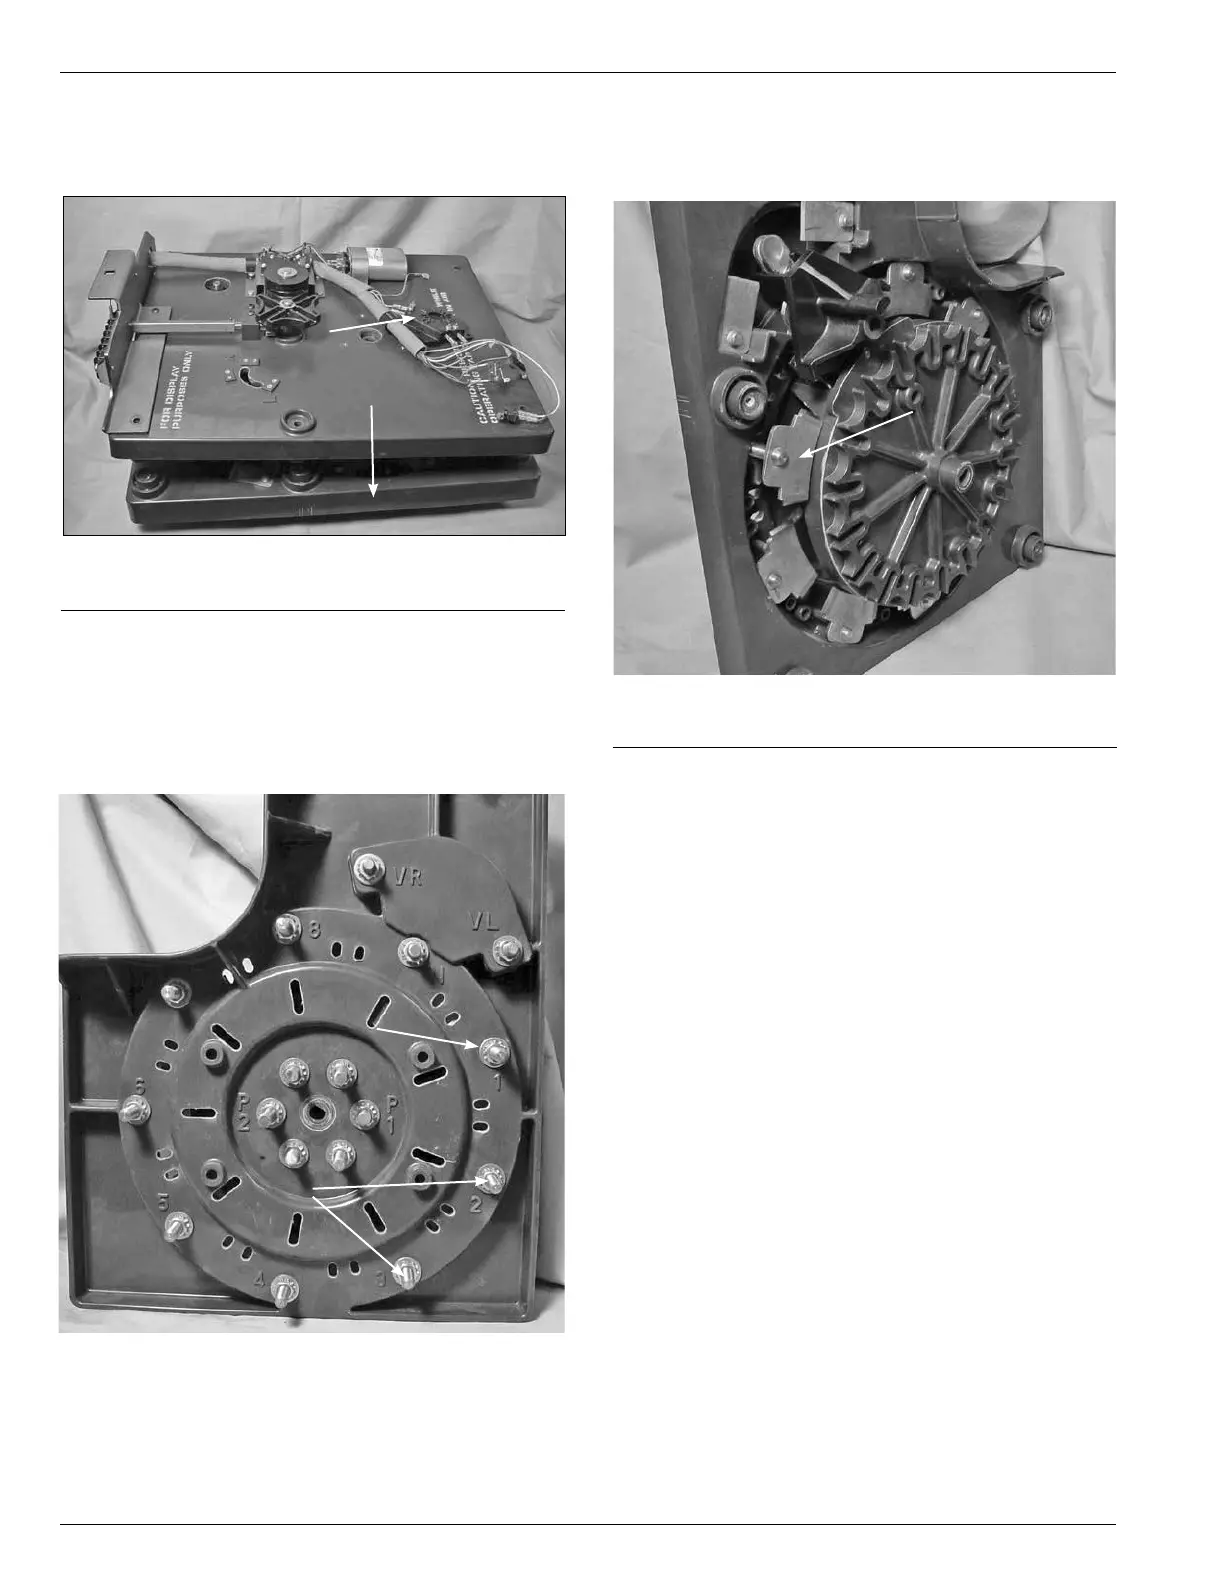
Figure 94.
Stationary contact fasteners.
Flat Washer
External Tooth Lock
Washer Nut
Stationary
Contacts
Figure 95.
Stationary contacts.
Stationary
Contacts
2. Push the contact stud through the mounting hole in the
contact panel. (See Figure 95.)
Figure 93.
Driver panel and contact panel fastening.
8. Lift the front drive assembly off of the contact assembly
and set aside. (See Figure 93.)
Drive Assembly
Contact Panel