QD3 Quik-Drive Voltage Regulator Tap-Changer Manual
42
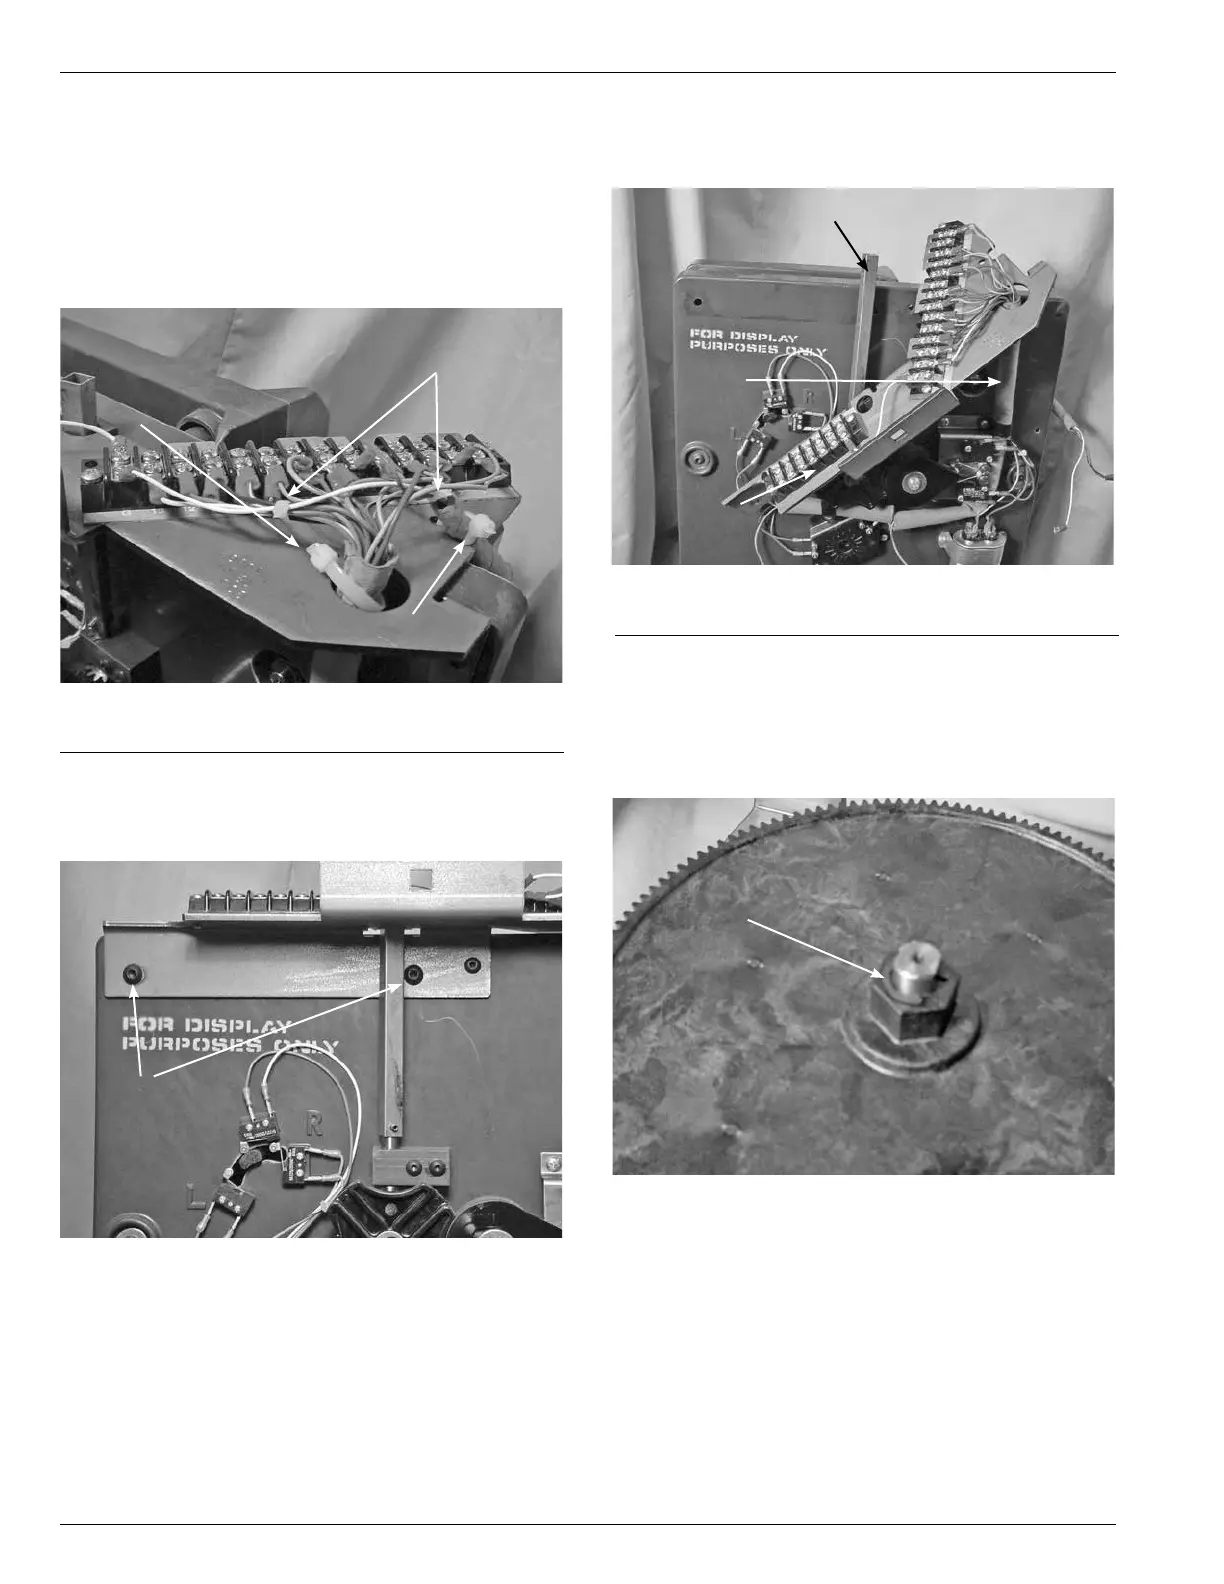
6. Using a pair of diagonal side cutters, cut and remove
the two cable ties fastening the motor wires to the main
harness. (See Figure 117.)
7. Using a pair of diagonal side cutters, cut and remove
the two medium cable ties fastening the motor harness
and main wiring harness to the tapchanger top terminal
board. (See Figure 117.)
8. Use a 5/32 inch Allen wrench and remove the two
button Allen head screws mounting the top tapchanger
bracket to the tapchanger. See Figure 118.
Figure 117.
Motor wiring cable ties.
Main Wiring Harness
Cable Tie
Motor Wiring Insulation Cable Tie
Motor Wiring Cable Ties
5/32 inch
Allen Head
Screws
Figure 118.
Tap-changer bracket fastening.
9. Lift the top bracket clearing the position indicator tube
and the main wiring harness. (See Figure 119.)
10. Lift the motor and gear assembly out of the tapchang-
er assembly and place on a work surface.
11. Use a pair of needle nose pliers and remove the "E" clip
fastening the motor gear to the motor shaft. (See Figure
120.)
Position Indicator Drive Tube
Tapchanger
Main
Wiring
Harness
Figure 119.
Tap-changer top bracket.
EClip
Figure 120.
Motor gears and retaining clip.