Do you have a question about the Core Innovations CLT2156 and is the answer not in the manual?
Captures photos and videos for various applications.
Controls device power states: on, off, sleep, and wake.
Allows cursor movement and interaction with the device interface.
Built-in audio output for sound playback without external devices.
Connect external USB devices for data transfer or peripherals.
Connects the AC adapter to charge the device's battery.
Connects to external displays or TVs via HDMI cable.
Audio output for headphones or external speakers.
Reads MicroSD cards up to 128GB for expanded storage.
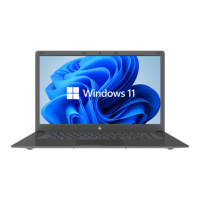
This document is a user manual for the CLT2156 15.6" Laptop with Windows™ 11, providing comprehensive guidance on its functions, usage, and maintenance.
The CLT2156 is a 15.6-inch laptop designed for general computing tasks, running on the Windows™ 11 operating system. It features a built-in camera for taking photos and videos, and integrated speakers for audio playback without external devices. The laptop includes a touchpad for cursor control and a power button for turning the device on/off and managing sleep mode. Connectivity options include USB inputs for external devices, a Mini-HDMI® output for connecting to external monitors or TVs, a headphone jack for audio output, and a Micro SD card slot supporting up to 128 GB for memory expansion. The device is Wi-Fi® Ready for internet connectivity and Bluetooth® compatible for connecting to various wireless devices like mice, keyboards, pens, and audio devices.
The manual guides users through the initial setup process, including fully charging the laptop for at least six hours before first use and configuring the device upon its first boot-up. It emphasizes the importance of completing all on-screen steps during initialization, recommending connection to a power supply to prevent interruptions.
Getting Started with Windows™ 11: The manual advises users to consult the "Get Started" guide in the Start menu to quickly master the features of Windows™ 11.
Charging and Power Management: The laptop provides a low battery warning when power is running low, prompting users to charge the device. It automatically goes to sleep if not charged in time. The charging indicator light confirms when the device is charging, and the battery charges faster when the computer is shut down or in sleep mode. Users can check the battery level by clicking the battery icon in the taskbar.
Connecting to a Wi-Fi® Network: To connect to Wi-Fi, users click the Network button in the taskbar, select the right arrow in the pop-up menu, scroll to find their Wi-Fi® network, click "Connect," enter the security password if required, and then click "Next." Once verified, the network will display as "Connected."
Connecting to a Bluetooth® Device: Users can connect Bluetooth® devices by clicking the arrow icon in the bottom right of the desktop, then the Bluetooth® icon. Right-clicking the Bluetooth® icon opens a menu where users can select "Add a Bluetooth® Device." In the pop-up settings page, "Add device" is selected, and then "Bluetooth®" from the new pop-up window. The system searches for nearby devices, and users select their desired device from the list. If a pairing code is needed, it should be entered as prompted. Once connected, "Done" is clicked to finish.
Touchpad Gestures: The manual details various touchpad gestures for efficient navigation:
User Accounts: Users can create, modify, or remove accounts on the device, choosing between a Microsoft™ account or a local account. A Microsoft™ account allows sign-in to Windows™ and the Windows™ Store, with files saved to OneDrive™ for access from any device. A local account is limited to the laptop and cannot connect to the cloud. Accounts can be added or modified by clicking the Start icon and then the account icon in the bottom left of the window.
Sleep, Shut Down, and Restarting Your Device: The Power button in the Start menu allows users to set the device to sleep, shut it down, or restart it. "Sleep" puts the device in an idle state, "Shut down" turns it off, and "Restart" turns it off and then back on automatically.
Search: Windows™ 11 allows users to search across their device, cloud storage (OneDrive), and the web simultaneously. This can be done by opening the Start menu and typing in the search box, or by clicking the "Search" icon in the taskbar.
Task View: The Task View button in the taskbar enables quick switching between open apps and programs. Clicking it displays all running applications, and users can select any item to open it.
Multiple Desktops: For better organization, users can add multiple desktops. By selecting "Task View" and then "Add a desktop," a blank thumbnail appears at the bottom of the Task View page, which can be clicked to open a clean desktop. Desktops can be switched by clicking "Task View" and choosing from the bottom of the page.
Snap Windows: Windows™ 11 allows users to snap windows to the sides or corners of the screen for a split view. This is achieved by clicking and holding the top of a window and dragging it to the desired side or corner, then releasing it when a shadow of where the window will snap appears.
Action Center: Clicking the [Status Bar] in the lower right corner of the screen displays and allows adjustment of brightness, volume, Wi-Fi®, Bluetooth®, Battery, Cast, and other functions.
Notifications: Clicking the time and notification bar in the lower right corner of the screen displays current notification information and the date/time.
The New Microsoft™ Edge Browser: The manual highlights the new Microsoft™ Edge browser for internet surfing, emphasizing its search suggestions, instant web results, and browsing history features.
Downloading Applications: Applications can be downloaded from the Microsoft™ Store, accessible from the Desktop taskbar. A Microsoft™ account is required for downloading apps, and users can create one by logging on to account.microsoft.com/account.
Settings: Windows™ 11 features an overhauled Settings app with a new sidebar interface, colorful icons, improved navigation, Bing integration for search, and optimization for darker modes.
Factory Reset: For system recovery, users can perform a factory reset, which reverts the laptop to its original state. This is done by entering the [Start] menu, clicking [Settings], then selecting [System] and clicking [Recovery] on the right. Finally, "Reset PC" is selected, and the on-screen prompts are followed.
The manual provides crucial information regarding the care and maintenance of the device to ensure its longevity and preserve the warranty.
Liquid Contact: If the device comes into contact with water or any other liquid, it must be powered off immediately and allowed to dry completely before turning it on again.
Cleaning: Do not use cleaning products containing chemicals, as this can cause corrosion and dampness. When cleaning is necessary, use a dry, soft cloth.
Data Backup: Users are advised to regularly back up important data and files to prevent loss. The company is not responsible for data loss or deletion caused by abnormal software/hardware operation, maintenance, or other accidents.
Disassembly: Users should not disassemble the device themselves, as doing so will void the warranty.
Customer Support: For customer support, users should submit a request by emailing support@dpaudiovideo.zendesk.com to receive a ticket number. Alternatively, customer service can be reached by calling 1-833-909-CORE (1-833-909-2673) Monday-Friday, 9am-5pm PST, excluding major holidays. It is strongly recommended to email inquiries prior to calling for better assistance. When contacting support, users should provide the model number and a description of their inquiry.
| Display Size | 15.6 inches |
|---|---|
| RAM | 4GB |
| Processor | Intel Celeron N3350 |
| Display | HD (1366 x 768) |
| Battery Life | Up to 6 hours |
| Storage | 64GB |
| Operating System | Windows 10 Home |