7ASSEMBLY INSTRUCTIONS |
IV. ASSEMBLY INSTRUCTIONS
IMPORTANT:
1. The washer should be placed at both ends of the bolt (anti-bolt head and nut), unless otherwise specified.
2. During the preliminary assembly tighten all bolts and nuts by hand, and then tighten with wrench for complete assembly.
3. Some parts from the list are pre-assembled on the equipment.
4. This product is recommended to be installed with 2 or more people.
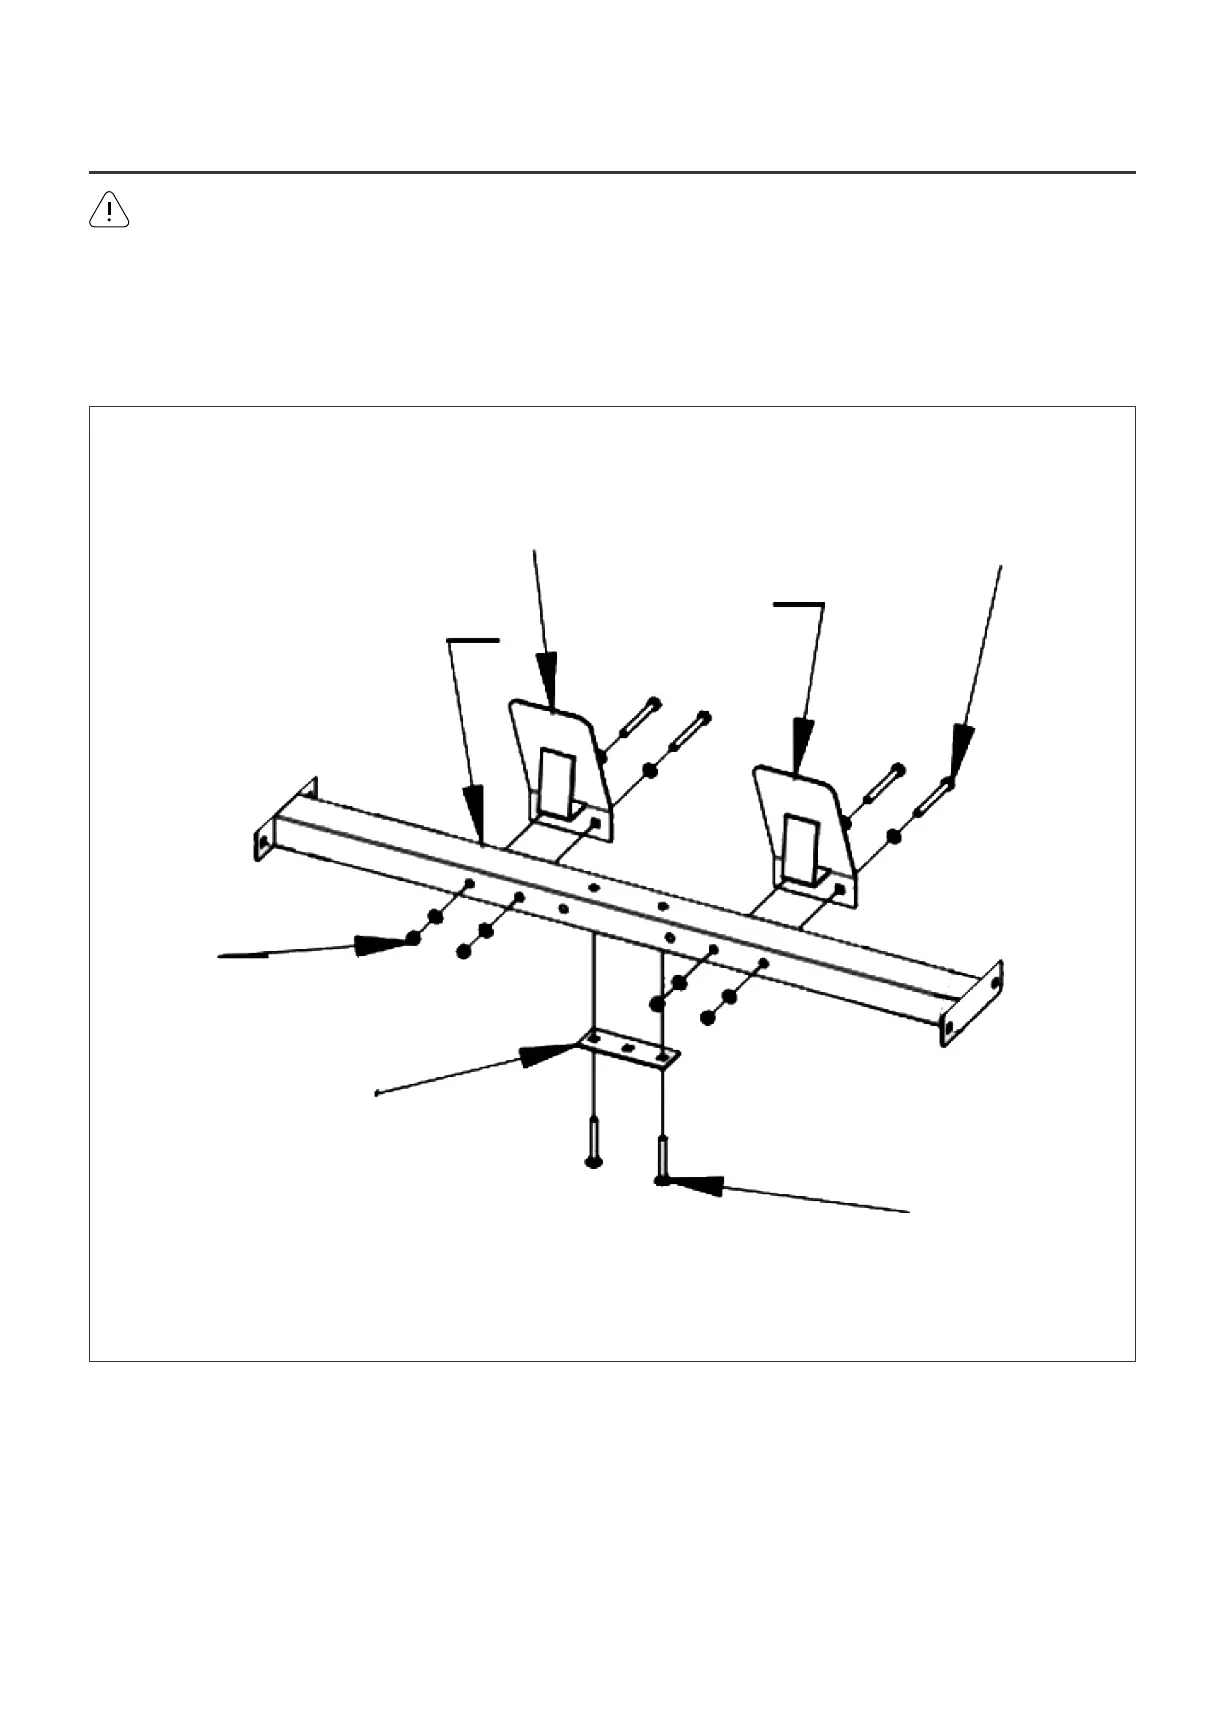
STEP 1
1. According to the diagram, the bolts (#31) and the flat connector (#29) are pre-installed on part (#A).
2. Place (#7) onto part (#A) side as shown in the drawing, and use the bolts (#30), flat spacers (#38), nut
(#40) to secure.
7
7
A
30
40
29
31