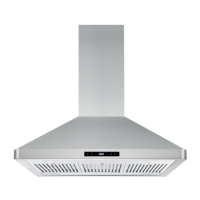
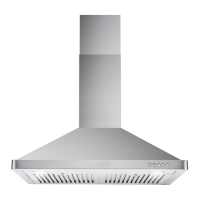
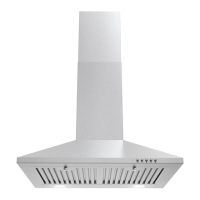
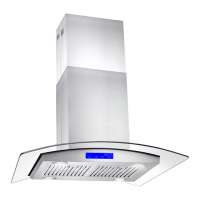
This document is an installation and user manual for the Cosmo 63ISS Series Island Range Hood.
Function Description:
The Cosmo 63ISS Series Island Range Hood is designed to remove smoke, vapors, and odors from the kitchen. It can be configured for either ducted (extraction) or ductless (recirculating) operation. In ducted mode, cooking fumes and vapors are vented to the outside. In ductless mode, the hood uses a carbon filter to purify the air, which is then recycled through the top grille back into the kitchen. For optimal performance, it is recommended to start the hood before cooking and allow it to run for several minutes after cooking is complete to clear the kitchen air.
Important Technical Specifications:
- Ventilation:
- Venting Method: Factory set for through the roof or wall.
- Duct Size: Requires a 6" (15.2 cm) round vent system. The hood exhaust opening is 6" (15.2 cm) round.
- Ducting Efficiency: Exhaust ducting with a diameter less than 5.91" (150 mm) or flat ducting will increase noise and reduce extraction efficiency.
- Ductless Operation: Requires a carbon filter (Part CFK1-TM, sold separately) for recirculating installations.
- Recommended Vent Length: Maximum equivalent vent length is 35 ft.
- Elbows: Use no more than three 90° elbows. Maintain a minimum of 24" (61 cm) of straight duct between elbows if more than one is used. Do not install two elbows together.
- Electrical Requirements:
- Power Supply: 120 volt, 60 Hz, AC only, 10-amp, fused electrical circuit.
- Wiring: Installation and wiring must conform to National Electrical Codes (ANSI/NFPA 70), CSA Standards C22.1-94, and local codes. Wire sizes and connections must match the appliance's rating plate.
- Installation Clearances:
- Minimum Height (Electric Cooktop): 24" (61.0 cm) above the cooking surface.
- Minimum Height (Gas Cooktop): 27" (68.6 cm) above the cooking surface.
- Suggested Maximum Height: 36" (91.4 cm) above the cooking surface.
- Ceiling Support: Mounting holes for the upper horizontal support should be into a ceiling support structure capable of holding 80 lbs (36.6 kg).
- Lighting: LED light (max. 1.5w).
- Dimensions:
- COS-63ISS75: 29.33 inches wide, 23.19 inches deep, and adjustable height from 23.5 to 42.4 inches. Vent hole diameter is 6 inches.
- COS-63ISS90: 35.23 inches wide, 23.19 inches deep, and adjustable height from 23.5 to 42.4 inches. Vent hole diameter is 6 inches.
Usage Features:
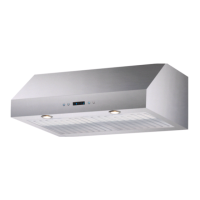
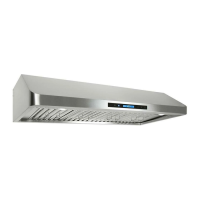
- Control Panel Operation:
- Light Button (A): Press to turn the light on/off.
- Timer Button (B): Used to set the clock and the timer duration for automatic fan shut-off.
- Minus Button (C): Decreases fan speed.
- Plus Button (D): Increases fan speed.
- Fan Power Button (E): Starts the fan at maximum speed.
- Power Button (F): Turns the unit on/off.
- Clock Setting: Hold the Timer Button for 3 seconds, use the Light Button (A) to set minutes, and the Fan Speed Button (E) to set hours. Press the Timer button to complete. The unit saves changes after 5 seconds.
- Timer Setting: Turn the fan on and set the desired speed. Press the Timer Button (B) repeatedly to set the time duration. The unit saves changes after 5 seconds, and the timer starts counting down.
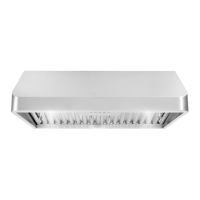
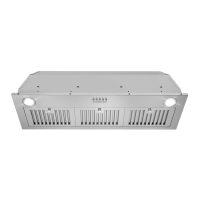
- Baffle Filters: Stainless steel baffle filters are designed to efficiently trap grease by forcing grease-filled air to change direction, causing grease to collect on metal blades and in the filter tray. They are reusable and dishwasher safe.
- Oil Cup: The hood includes an oil cup for collecting grease.
Maintenance Features:
- Exterior Surfaces: Clean with liquid detergent soap and water or an all-purpose cleanser. Wipe with a damp soft cloth or non-abrasive sponge, then rinse and wipe dry. Avoid steel wool or soap-filled scouring pads.
- Metal Baffle/Grease Filters:
- Removal: Pull the spring release handle and pull down the filter.
- Cleaning: Wash as needed in a dishwasher or hot detergent solution.
- Reinstallation: Ensure spring release handles face the front. Insert the filter into the upper track, push the spring release handle, push up on the filter, and release the handle to latch into place.
- Charcoal Filters (Ductless Models Only):
- Replacement: Recommended every 4-6 months. Replacements are available at www.cosmoappliances.com (Part# CFK1-TM).
- Installation: Remove ARC-FLOW Baffle Filters. Locate the motor and align one filter with the right side of the motor, then twist and lock it into place. Repeat for the left side. Reinstall baffle filters. Ensure chimney vent holes are open for filtered air recirculation.
- LED Light Replacement:
- Switch off and unplug the unit.
- Remove the lamp cover by unscrewing the 2 screws.
- Unscrew the LED light.
- Replace with the same type and rated light.
- Always read and obey safety messages, indicated by the safety alert symbol and the words "DANGER" or "WARNING."
- Installation and electrical wiring must be performed by qualified professionals according to all applicable codes.
- Do not operate with damaged cords or plugs.
- Ensure sufficient air for proper combustion to prevent backdraft from fuel-burning equipment.
- Do not vent exhaust air into attics, crawl spaces, garages, or within walls/ceilings.
- For general ventilation use only; do not exhaust hazardous or explosive materials.
- Never leave surface units unattended at high settings.
- Always turn the hood ON when cooking at high heat or flambéing.
- Clean ventilation fans frequently to prevent grease accumulation.
- Use proper pan sizes.
- In case of a range top grease fire, smother flames with a lid, cookie sheet, or metal tray, then turn off the burner. Do not use water. Evacuate and call the fire department if flames do not extinguish immediately.
- Use two or more people for installation to avoid injury due to excessive weight.