Page 10 Page 19
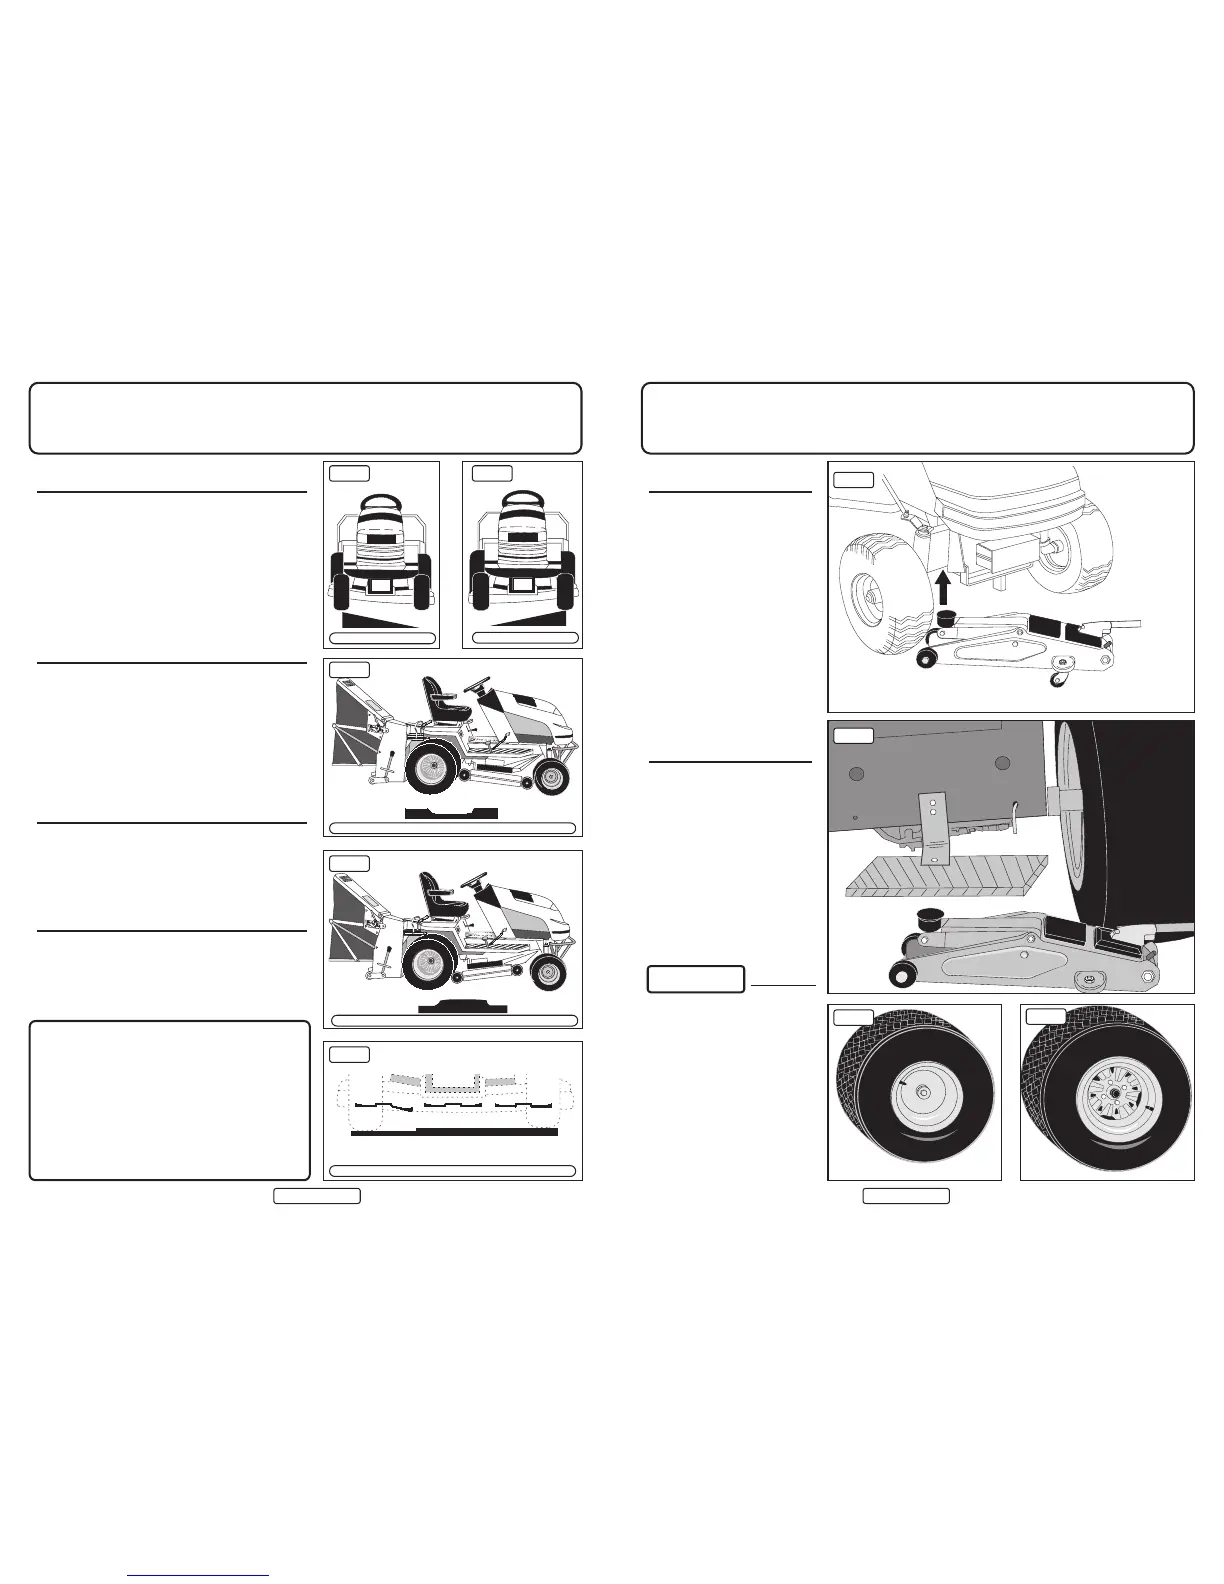
Tyres - Removal of WheelsCutter Deck - Check List
CUTTER FAILS TO START OR CUTS OUT
WHEN SWITCHED ON
Check:
* Are you on the Tractor? – Unless you sit on the seat the safety
switch cuts out the Cutter Deck.
* Is the battery low? – The Clutch Engage Switch will only
operate if the battery is well charged.
* Does the 10Amp-blade fuse on the printed circuit board need
replacing? (see page 22)
* That either the cutter switch or the safety switch on the seat is not
faulty – if so, call your dealer.
UNEVEN CUT (CUTS SHORTER ONE SIDE
THAN THE OTHER)
Check:
* That the tyres are all inflated to the correct pressure (see back
page).
* That the front axle is pivoting freely.
* That the deck suspension brackets are moving freely and not
hitching up.
* That the side to side deck level adjustment is correct
(see page 12).
CUT IS UNEVEN OR UNTIDY IN ONE OR MORE
SECTORS
Check:
* That Cutter Deck is levelled correctly front to back (see page 11).
* That one or more of the blades are not worn or damaged – if so,
call your dealer.
THE CUTTER SEEMS TO LOSE POWER AND
THE BELT SLIPS AND OVERHEATS
Check:
* That the Tensioner Rod is correctly applied.
* That the Cutter Belt Tension is correct (page 13).
* That the Cutter Deck is not clogged with wet cuttings.
* That the Cutter Drive Belt is not worn.
We do not recommend that customers attempt to
change cutting blades themselves - Remember
that it is never worthwhile to have blades
reground - It is cheaper and better to replace.
Re-grinding is likely to affect the hardening of the
blade and its balance.
fig 1
fig 3
fig 4
fig 5
fig 2
REMOVAL OF FRONT
WHEEL
• Apply the Parking Brake.
• Place chocks under all wheels that are
to remain on the ground.
• Remove the Hub Cap.
• Use 19mm (3/4") socket spanner and
ratchet to slacken off the wheel nut -
do not remove.
• Place jack under the front axle (fig 1)
and jack up until the wheel to be
removed is well clear of the ground.
• Remove the nut and washers and keep
safe.
• Pull off the wheel carefully TAKING
CARE NOT TO DISLODGE THE
TRACTOR FROM THE JACK.
When the tyre is repaired replace the
wheel preferably using a new 12mm
Nyloc nut, Part No.049381100.
REMOVAL OF REAR WHEEL
* Apply the Parking Brake.
* Place chocks under wheels that are to
remain on ground.
* Place the jack under the transaxle (see
fig 2) and raise until the wheel is well
off the ground.
* Undo the four 19mm nuts using socket
and wrench.
* Pull off the wheel carefully TAKING
CARE NOT TO DISLODGE THE
TRACTOR FROM THE JACK.
* Reverse instructions to complete the
job making sure to tighten wheel nuts
(to torque = 68NM/50ftlbs)
NEVER JACK THE TRACTOR UP BY
JACKING UNDER THE RUNNING
BOARD.
WE DO NOT ADVISE OWNERS TO
REPAIR PUNCTURES. IT IS BEST TO
TAKE THE WHEEL TO YOUR LOCAL
TYRE SPECIALIST OR USE
SEALANT.
fig 1
fig 2
fig 3
fig 4
WARNING
Cutter is not level side to side
Cutter is not level side to side
Cutter is not level front to back (Tipped forward)
Cutter is not level front to back (Tipped back)
Individual cutter blades damaged or bent