Powered Grass Collector Installation
Page 36
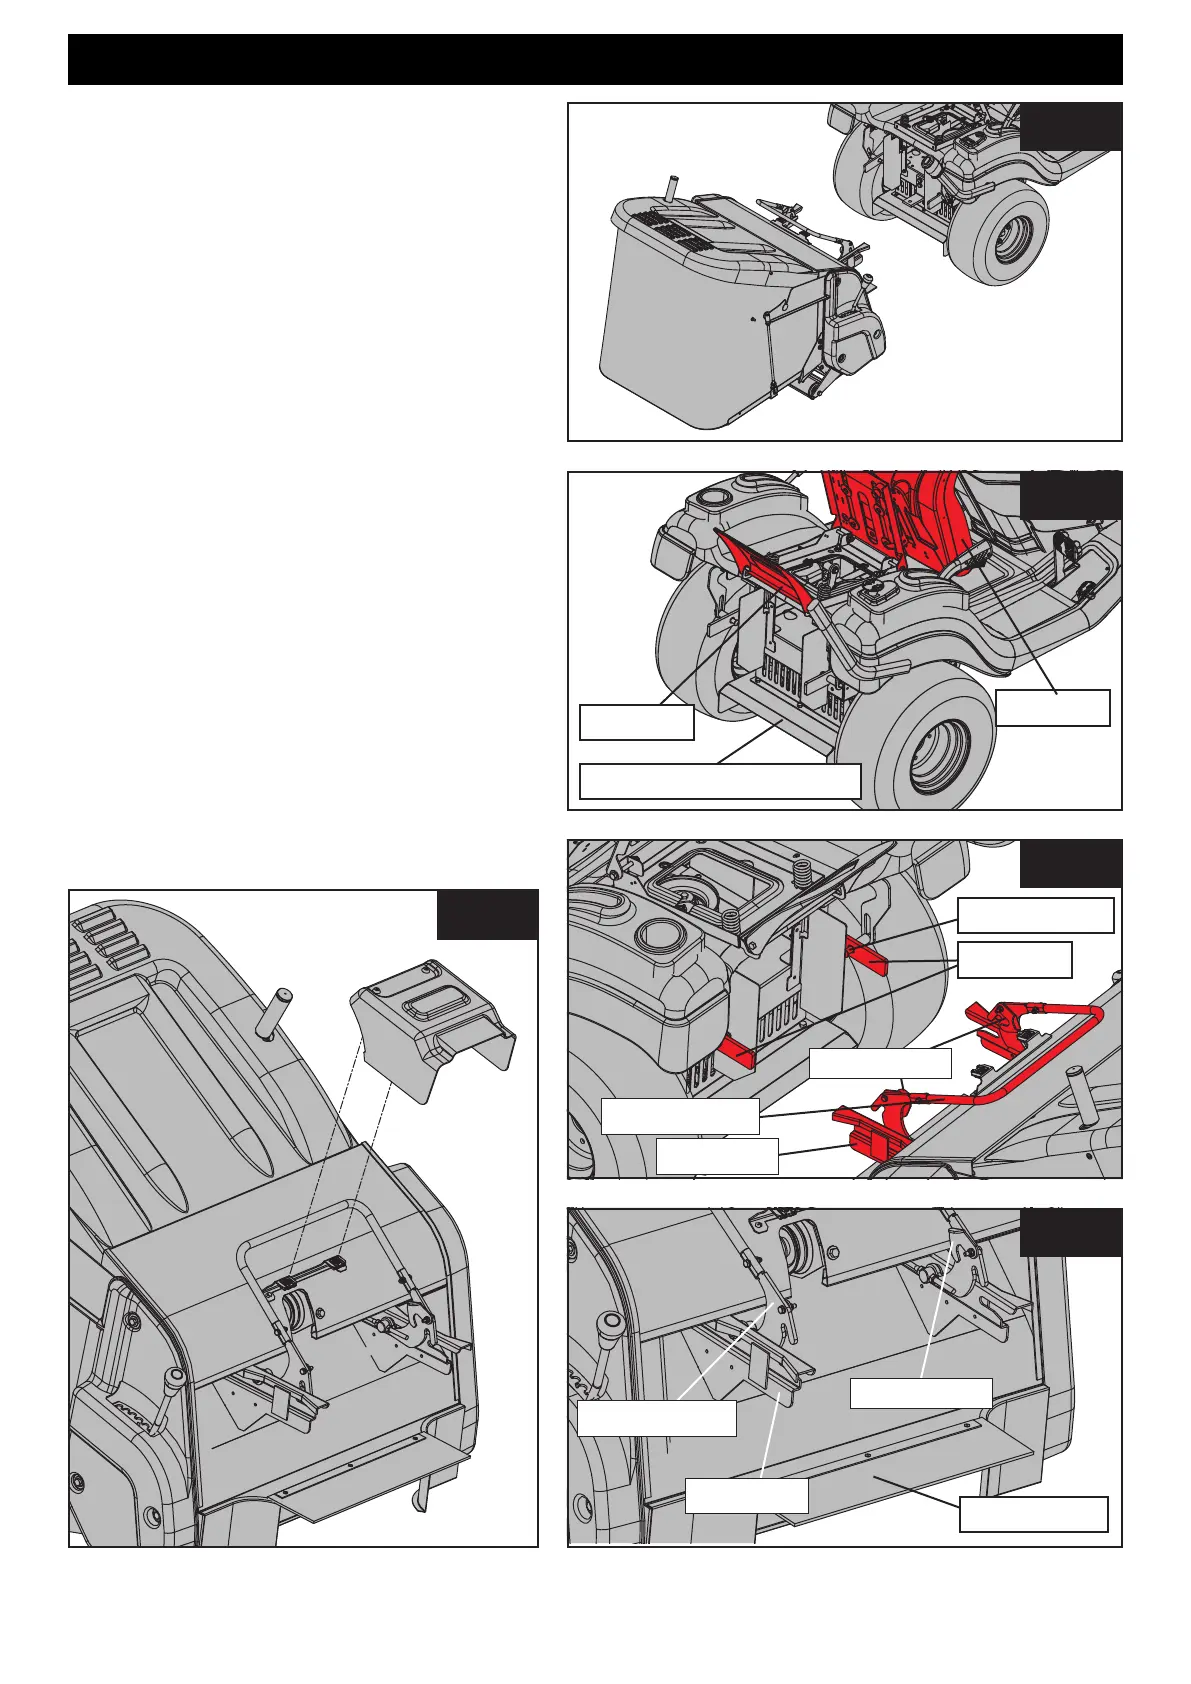
fig. 64
fig. 65
fig. 66
fig. 67
Seat
PTO Flap
Locating Lug
Locking Lever
Lift Arm
Channel
Rubber Flap
Locking Clip
Locking Lever
Channel
Transmission Grass Deflector
PGC Connection
Before attempting to install PGC Net park the
tractor on at and level ground. Engage parking
brake, disengage engine and remove ignition key.
To connect the Powered Grass Collector (PGC) to
the tractor, ensure that both are on an even surface
with the locking levers on the PGC collector facing
the lift arms on the tractor (g. 64 & 66).
1 - Remove the PGC belt guard by turning the
xings and lifting the guard piece (g.64a).
2 - Lift the seat and the PTO ap so that both are
resting in the upright position (g. 65).
3 - Move the PGC manually to the tractor; set the
tractor lift arms to the lowest position. This makes
installation easier (g. 66).
4 - Near the end of each lift arm you will nd a
locating lug (g. 66). Slide the channels (g. 66 &
67) on either side of the Powered Collector over the
lifting arms and lugs but do not engage the locking
lever yet.
5 - Ensure that the rubber ap (g. 67) at the
opening of the PGC locates above the connecting
tractor transmission grass deector (g.65).
fig. 64a
Locking Clip

 Loading...