EasyManua.ls Logo

CraftBot Plus User Manual

CraftBot Plus
2 pages
To Next Page IconTo Next Page
Page #1 background imageLoading...
Page #1 background image
QUICK START GUIDE
Thank you for purchasing a CraftUnique product and welcome to the world of 3D crafting!
You are just a few steps away from having your rst 3D object printed by your brand new CraftBot.
I. UNPACKING
Step #1
You’ve already found the Quick Start Guide. Excellent! Now remove the large sheet resting under the foam.
Under the sheet you will nd your CraftBot attachable accessories in a cardboard cradle resting in the cavity
of the CraftBot 3D printer.
Step #2
Remove this cradle from the box with care and place it in a safe out-of-the-way place.
Step #3
The printer is wrapped in a tight tting plastic protective cover. Open up the covering.
Firmly grasp the frame of the CraftBot and lift it out of the box without touching the fragile inner parts.
CraftBot weights 14 kg (almost 31 lbs) – seek assistance if needed!
Step #4
Place the printer on a stable and level surface with sucient space around.
II. ACCESSORY CHECK
It’s time to unpack additional parts.
Below you can see the contents of the
box. First of all, check the list to make
sure nothing is missing!
1. Filament guide tube holder
2. Filament guide tube
3. Filament spool holder
4. Filament spool
5. Hex wrenches (5x)
6. USB Flash storage
7. USB A-B cable and AC power cable
8. Filament monitoring system (FMS)*
1
4
7
2
5
8
3
6
1 2 3 4
PLUG&PLAY 3D PRINTER
WITH 5 YEARS WARRANTY
WWW.CRAFTBOT.COM WWW.CRAFTBOTUSA.COM
Question and Answer IconNeed help?

Do you have a question about the CraftBot Plus and is the answer not in the manual?

CraftBot Plus Specifications

General IconGeneral
Build Volume250 x 200 x 200 mm
Layer Resolution50-300 microns
Nozzle Diameter0.4 mm
Filament Diameter1.75 mm
Frame MaterialSteel
Heated BedYes
Bed LevelingManual
ConnectivityUSB
Supported MaterialsPLA, ABS, PETG, Nylon
Power Requirements110-240V
Weight14 kg

Summary

Unpacking and Accessory Check

Unpacking Steps

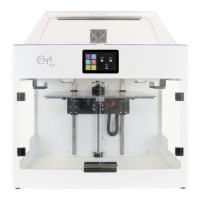
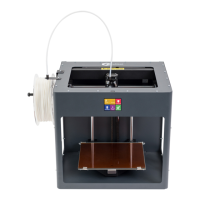
Steps for safely removing the CraftBot 3D printer and its accessories from the packaging.

Accessory Check List

Verify all included accessories are present to ensure a complete setup.

Assembling the CraftBot

Install Filament Guide Tube Holder/FMS

Mount the filament guide tube holder and FMS using a hex wrench.

Install Filament Guide Tube

Connect one end to the holder/FMS and the other to the extruder.

Install Filament Spool Holder

Attach the spool holder near the guide tube holder, leaving space for connectors.

Mount Filament Spool

Place the PLA filament spool onto its holder, ensuring proper lead orientation.

Attach Power Cord

Connect the AC power cord to the printer's input with the power switch OFF.

Converting 3D Objects to Printable Format

Using CraftWare Software

Download, install, and use CraftWare to convert 3D object files into printable G-code.

Related product manuals