Do you have a question about the Craftsman 113.177260 and is the answer not in the manual?
Explains DANGER, WARNING, CAUTION terms used in the manual.
Provides essential safety advice to reduce risks of fire, shock, and injury.
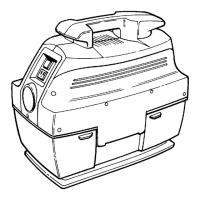
Lists all items included in the carton with their respective quantities.
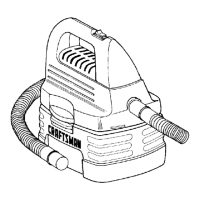
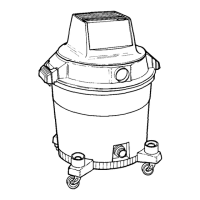
Instructions on how to detach the power head from the drum.
Steps for correctly installing the filter cage into the lid.
Detailed steps for assembling the filter, filter plate, and filter nut.
Instructions for securing the power head onto the drum.
Explains the function of the rocker switch for different operating modes.
Outlines essential safety warnings for operating the tool vac to prevent hazards.
Guides on connecting the hose to the vac for dry debris cleaning with power tools.
Explains how to use flexible adapters for connecting hand-held tools to the vac hose.
Details the process of removing the power head to empty the dust drum safely.
Provides instructions on cleaning, removing, and reinstalling the filter.
Describes methods for cleaning the dry filter, including tapping and gentle tapping.
Steps for correctly installing a clean or new filter to ensure a proper seal.
Instructions for cleaning the exterior of the vac and the dust drum.
Explains how to properly connect the appliance to a grounded outlet for safety.
Details how to use temporary adapters for grounding if a proper outlet is unavailable.
Provides contact numbers for ordering repair or replacement parts.
Offers contact information for scheduling in-home major brand repair service.
Provides contact numbers to find the nearest Sears Repair Service Center.
Offers contact details for purchasing or inquiring about Sears Maintenance Agreements.
This document is the owner's manual for the Sears Craftsman Tool Vac, Model No. 113.177260. It provides essential information for assembly, operation, and maintenance of the vacuum cleaner, along with important safety instructions and warranty details.
The Craftsman Tool Vac is designed for household use, specifically for dry vacuuming jobs and for use with small, handheld power tools. Its primary function is to collect dust and debris generated by power tools, such as fine dust from sanders used in wood finishing or drywall sanding projects. The vacuum features an "AUTO" mode, allowing it to synchronize with a connected power tool, turning on automatically when the tool is energized and continuing to run for approximately 5 seconds after the tool is turned off to clear debris from the hose. This feature makes it particularly useful for maintaining a clean workspace when operating power tools. The unit is intended for dry debris only and should not be used to pick up liquids or hazardous materials.
The Craftsman Tool Vac comes with a full one-year warranty against defects in material or workmanship for household use. For commercial or rental purposes, the warranty coverage is 90 days. Warranty service is available by contacting the nearest Sears Service Center.
The manual emphasizes several critical safety precautions:
| Brand | Craftsman |
|---|---|
| Model | 113.177260 |
| Category | Vacuum Cleaner |
| Language | English |