Do you have a question about the Craftsman 139.18857 and is the answer not in the manual?
Understand hazard symbols and safety alerts for safe operation.
Crucial safety rules for installing the garage door opener correctly.
Essential safety advice for daily use and maintenance of the opener.
Connect T-rail sections and attach the cable pulley bracket to the opener.
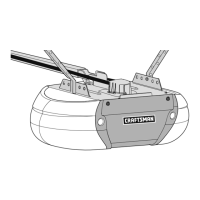
Mount the trolley assembly onto the main opener T-rail.
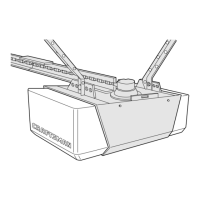
Securely connect the T-rail assembly to the opener motor unit.
Route the drive chain and install the protective sprocket cover.
Adjust the chain tension for proper opener operation.
Find the optimal mounting point for the header bracket above the garage door.
Securely attach the header bracket to the structural support.
Connect the opener's T-rail to the mounted header bracket.
Place the opener unit in its final mounting location.
Securely suspend the opener unit using hanging brackets.
Mount the wall control and wire it to the opener.
Install the opener's light bulb and protective lens cover.
Connect the emergency release rope and handle for manual operation.
Ensure correct power connection and grounding for safe operation.
Mount and align the safety sensors for automatic door reversal.
Attach the door bracket to the garage door for arm connection.
Link the door arm assembly to the opener trolley for power transfer.
Set the maximum open and close positions for the garage door.
Calibrate the opener's force to ensure safe door operation and reversal.
Verify the functionality of the safety reversing sensor system.
Confirm the door reverses correctly upon encountering an obstruction.
Routine maintenance checks and cleaning for optimal opener performance.
How to properly use the opener with controls and sensors.
Pair remote controls and keyless entry systems with the opener.
Solutions for common issues and troubleshooting tips for the opener.
Detailed list and diagrams of replacement parts for the opener.
Information on additional accessories to enhance opener functionality.
How to order replacement parts and obtain warranty or repair service.
| Brand | Craftsman |
|---|---|
| Model | 139.18857 |
| Category | Garage Door Opener |
| Language | English |