EasyManua.ls Logo

Craftsman 139.18876 User Manual

Craftsman 139.18876
80 pages
To Next Page IconTo Next Page
Page #1 background imageLoading...
Page #1 background image
1/2 HP
GARAGE DOOR OPENER
OWNER’S
MANUAL
Model No.
139.18865
139.18866
139.18875
139.18876
For Residential Use
Only
Caution:
Read and follow all
safety rules and
operating instructions
before first use of this
product.
Fasten the manual
near the garage door
after installation.
Cover Page SEARS 139.53515 SR (Dual Sidelight)
6/21/89 - 4/6/92
®
®
®
®
®
®
®
®
®
®
®
®
®
Safety Precautions
Assembly
Installation
Adjustment
Care and Maintenance
Operation
Troubleshooting
Parts List
®
MD
Sears Canada, Inc., Toronto, Ontario M5B 2B8

Table of Contents

Question and Answer IconNeed help?

Do you have a question about the Craftsman 139.18876 and is the answer not in the manual?

Craftsman 139.18876 Specifications

General IconGeneral
BrandCraftsman
Model139.18876
CategoryGarage Door Opener
LanguageEnglish

Summary

Safety Alert Symbols

Sectional Door Installation Overview

One-Piece Door Installation Overview

Garage Door Opener Assembly

Step 1: Assemble T-rail and Cable Pulley Bracket

Assembling the main rail and attaching the cable pulley bracket.

Step 2: Install Trolley on T-rail

Attaching the trolley assembly to the T-rail.

Step 3: Fasten T-rail to Opener

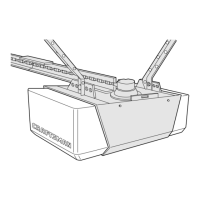
Connecting the assembled T-rail to the opener unit.

Step 4: Install Chain/Cable & Sprocket Cover

Installing the chain/cable and covering the sprocket.

Step 5: Tighten Chain & Cable

Adjusting chain tension and securing it.

Important Installation Instructions

Installation Step 1: Determine Header Bracket Location

Identifying and marking the correct position for the header bracket.

Installation Step 2: Install Header Bracket

Securely mounting the header bracket to the wall or ceiling.

Installation Step 3: Attach T-rail to Header Bracket

Connecting the main opener rail to the installed header bracket.

Installation Step 4: Position the Opener

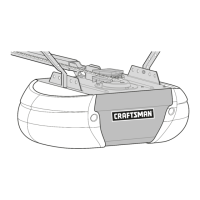
Placing the opener unit correctly relative to the garage door.

Installation Step 5: Hang the Opener

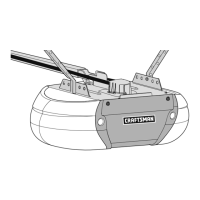
Securely mounting the opener unit to the garage structure.

Installation Step 9: Electrical Requirements

Understanding the power connection needs and safety.

Installation Step 10: Install Safety Reversing Sensor

Mounting the safety sensors that detect obstructions.

Installation Step 11: Fasten Door Bracket

Attaching the bracket to the garage door itself.

Adjustment Procedures

Step 3: Test Safety Reversing Sensor

Verifying the safety reversing sensor is functioning correctly.

Step 4: Test Safety Reverse System

Final test to ensure the door reverses on obstruction.

Critical Safety Guidelines

Opener Care and Maintenance

Operating Your Garage Door Opener

Receiver and Remote Control Programming

Troubleshooting Common Issues

Available Accessories

Related product manuals