EasyManua.ls Logo

Craftsman 139.53615SR User Manual

Craftsman 139.53615SR
22 pages
To Next Page IconTo Next Page
Page #1 background imageLoading...
Page #1 background image
/
®
Owners anual
00000
Garage Door Opener
Model
Model
Model
Model
Model
139.53315SR ", 1/3HP
139.53415SR- 1/2HP
139.53615SR = 1/2HP
139.53625SR - 1/2HP
139.53699SR _ 1/2HP
FASTEN THIS MANUAL NEAR THE GARAGE DOOR AFTER
INSTALLATION, PERIODIC CHECKS OF THE OPENER ARE
REQUIRED TO INSURE SATISFACTORY OPERATION.
FOR RESIDENTIAL USE ONLY,
, ,= ,= ,,NIU = I , , I ............................
CAUTION
PLEASE READ THIS
MANUAL CAREFULLY
CONTENTS PAGE
Safety Rules ................... 2
Operation of Your Opener ....... 3
Maintenance Schedule ......... 3
Features of Your Opener ........ 4
Specifications ................. 4
Accessories .................... 4
Carton Check List .............. 5
You'll Need Tools ............... 5
Assembly ...................... 6
Installation Information ......... 9
Installation ................... 10
Force & Limit Adjustment ........ 17
Safety Reverse Test ............ 18
SettingtChanging Code ......... 19
Having a Problem ? .............. 20
Repair Parts, Rail Assembly ...... 22
Repair Parts, Installation ........ 22
Repair Parts, Chassis Assembly.. 23
How To Order Repair Parts ...... 24
Maintenance Agreements ........ 24
Sears Warranty ................. 24
Question and Answer IconNeed help?

Do you have a question about the Craftsman 139.53615SR and is the answer not in the manual?

Craftsman 139.53615SR Specifications

General IconGeneral
TypeChain Drive
Horsepower1/2 HP
Voltage120V
Frequency60Hz
Remote Controls Included2
Safety SensorsYes
Battery BackupNo

Summary

Important Safety Rules

Garage Door Balance and Tension Safety

Ensuring the garage door is balanced and its springs are not under extreme tension.

Personal Safety Precautions

Guidelines for personal protection during installation and operation, including clothing and child safety.

Opener Installation and Electrical Safety

Ensuring correct wiring, grounding, and safe installation practices for the opener.

Opener Operation and Maintenance

Using the Opener and Manual Operation

How to activate the opener via transmitter/button and perform manual door operation.

Opener Care and Adjustments

Covers door balance, limit/force adjustments, chain tension, and transmitter battery replacement.

Scheduled Maintenance

Recommended maintenance checks for the opener at different intervals (4x/year, 2x/year, 1x/year).

Features and Accessories

Key Opener Features Overview

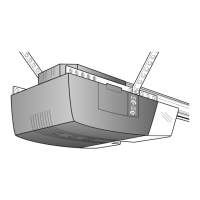
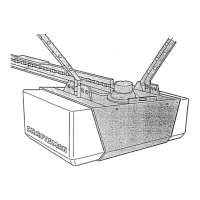
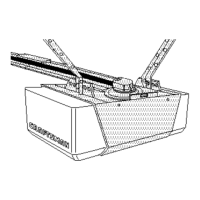
Details on the opener's motor, light, safety system, limit adjustment, and digital radio controls.

Optional Accessories

List and description of available accessories like extra transmitters and sensors.

Assembly Instructions

Carton Contents and Required Tools

Inventory of parts and hardware in cartons, along with necessary tools for assembly.

Assembling the Rail and Trolley

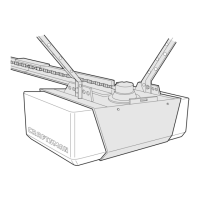
Step-by-step guide for assembling the tee rail, attaching the pulley bracket, and installing the trolley.

Installing and Tightening Chain and Cable

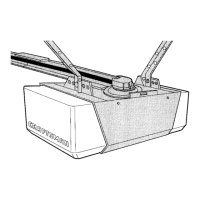
Procedure for attaching the chain and cable, and ensuring proper tension.

Installation Procedures

Header Bracket Mounting

Positioning and securely fastening the header bracket to the garage wall for sectional or one-piece doors.

Attaching Rail and Chassis

Connecting the tee rail to the header bracket and mounting the opener chassis.

Connecting Door Arm to Trolley

Linking the door arm to the opener trolley for different door types.

Adjustment and Safety Testing

Setting Up and Down Travel Limits

Adjusting the opener's limits for full door opening and closing.

Adjusting Force for Operation

Setting the correct force levels for safe opening and closing operations.

Safety Reverse System Test

Testing the safety reverse system by ensuring the door reverses on a 1-inch obstruction.

Infrared Reversing Sensor Setup

Instructions for installing the optional infrared reversing sensor for added safety.

Radio Controls Configuration

Matching Transmitter and Receiver Codes

Procedure to set code switches for matching transmitters to the opener receiver.

Using Transmitters with Multiple Devices

How to use transmitters to operate other garage door openers or light controls.

Troubleshooting Common Problems

Opener or Transmitter Not Working

Solutions for opener failure, unresponsive wall buttons, or transmitter issues.

Door Operation and Reversal Issues

Addressing problems like incomplete travel, door reversing unexpectedly, or doors opening by themselves.

Noise and Range Issues

Resolving issues like noisy operation, short transmitter range, or light not turning on/off.

Repair Parts Identification

Rail Assembly Parts List

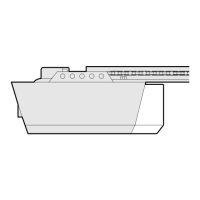
Identification of parts for the garage door opener rail assembly.

Installation Parts List

Identification of parts used during the installation process.

Related product manuals