Do you have a question about the Craftsman 139.53628SRT and is the answer not in the manual?
Lists various Sears/Craftsman garage door opener model numbers.
Highlights initial safety precautions and manual importance for proper operation.
Explains the meaning of warning and caution symbols used throughout the manual.
Provides overarching safety guidelines for operating and installing the opener.
Lists all necessary tools for assembly, installation, and adjustment procedures.
Instructs on checking garage door balance and disabling locks before installation.
Guides on surveying the garage for sectional door installation requirements.
Details on fastening the header bracket to structural supports and ceiling needs.
Guides on surveying the garage for one-piece door installation requirements.
Instructions for mounting the header bracket for one-piece doors.
Illustrates and lists all parts included in the opener cartons.
Lists and illustrates hardware used for assembling the opener components.
Lists and illustrates hardware used for installing the opener.
Lists and illustrates hardware specifically for the safety reversing sensor.
Step-by-step guide to align and join T-rail sections correctly.
Instructions for securing the cable pulley bracket to the front end of the T-rail.
Steps to attach the trolley and its threaded shaft to the T-rail.
Instructions for fastening the assembled T-rail to the opener unit.
Detailed steps for attaching the chain/cable to the trolley and shaft.
Instructions for securely attaching the sprocket cover for safety.
Steps to correctly tighten the chain for optimal opener performance.
Essential warnings and instructions before proceeding with installation.
Guides on finding the correct header bracket location for sectional doors.
Guides on finding the correct header bracket location for one-piece doors.
Instructions for locating the header bracket on the wall for one-piece doors.
Method for determining the correct height for the header bracket based on door travel.
Steps for securely attaching the header bracket to the garage wall.
Steps for securely attaching the header bracket to the garage ceiling.
Instructions for connecting the T-rail assembly to the header bracket.
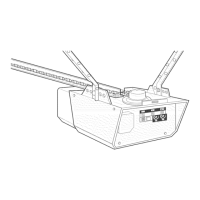
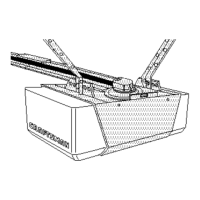
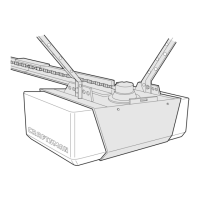
Guide on how to position the opener for sectional doors with tracks.
Guide on how to position the opener for one-piece doors without tracks.
Instructions for attaching the opener securely to structural supports.
Steps for wiring and securely mounting the wall control unit.
Instructions for installing the opener's light bulb and lens cover.
Steps to attach the emergency release rope and handle to the trolley.
Guidelines for safe electrical hookup and permanent wiring compliance.
Explains the function and critical importance of the safety reversing sensor.
Guide on assembling the mounting brackets and 'C' wraps for sensors.
Steps for mounting sensor brackets on the wall or floor.
Instructions for connecting the sensor wires to the opener terminal screws.
Common problems and solutions for the safety reversing sensor.
Steps for attaching the door bracket to sectional garage doors.
Instructions for attaching the door bracket to one-piece garage doors.
Steps for assembling and connecting the door arms to the trolley.
Steps for assembling the door arm and connecting it to the trolley.
Procedures for adjusting the UP and DOWN travel limits.
Explains how to set the door's open and close travel limits.
Guidance on when limit adjustments are necessary for proper operation.
Procedures for setting the force required to open and close the door.
Guidance on when force adjustments are needed for opener performance.
How to test the safety reversing sensor for proper function.
Procedures for testing the door's automatic reversal on obstruction.
Key safety rules for operating and maintaining the garage door opener.
Recommended maintenance tasks and frequency for the opener.
Methods for activating the opener using remote, wall control, or keyless entry.
Explains how the opener behaves when activated or obstructed.
Instructions for programming and managing remote controls for the opener.
Solutions for when the opener fails to respond to controls.
Troubleshooting steps for doors not opening or closing completely.
Addresses issues where the door reverses or stops without cause.
Solutions for motor humming or chain sagging issues.
Lists and identifies all parts related to the opener's rail assembly.
Lists and identifies various parts used during the installation process.
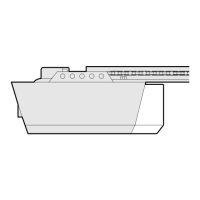
Lists and illustrates internal components of the opener assembly.
Details various accessories available for the garage door opener.
Instructions on how to order replacement parts for the opener.
Information on purchasing maintenance plans and warranty coverage.
| Type | Chain Drive |
|---|---|
| Horsepower | 1/2 HP |
| Remote Control | Yes |
| Remote Controls | 2 |
| Battery Backup | No |
| Max Door Height | 7 ft |
| Voltage | 120V |