EasyManua.ls Logo

Craftsman 13918 - User Manual

Craftsman 13918
2 pages
Print Icon
To Next Page IconTo Next Page
Loading...
Clicker Style Digi-Click™
TorqueWrench
Owner’s Manual Model No’s:
13918, 13919
SAFETY RULES
1. STUDY THIS BOOKLET CAREFULLY BEFORE ATTEMPTING
TO OPERATE THIS WRENCH.
2. Never apply more torque than the maximum scale
reading.
3. This torque wrench is designed for manual tightening of
threaded fasteners only. DO NOT USE IT AS A NUT-
BREAKER OR FOR ANY OTHER PURPOSE.
4. Over-torqued or defective fasteners and sockets may
suddenly break. Ratchets that are improperly engaged,
worn out, damaged, or over-torqued may slip or break.
TO PREVENT INJURY, KEEP PROPER FOOTING AND
BALANCE AT ALL TIMES. DO NOT USE THE WRENCH IN
PLACES FROM WHICH YOU MAY FALL OR SLIP, OR
AROUND OPERATING MACHINERY.
5. This wrench will not prevent you from applying more
torque than set, it is not a torque limiting tool. The LCD
display will flash “STOP” if you exceed either the lower or
upper limit of intended use. At low settings the release is
gentle and there usually is no audible ‘click’ signal. Learn
how different amounts of torque ‘feel’, so you will reduce
the possibility of damage and/or injury due to accidental
over-torquing.
6. APPLY FORCE TO THE GRIP ONLY. DO NOT USE ‘CHEATER
BARS’ (a piece of pipe placed over the hand grip).
7. There are no user-serviceable components inside the
wrench. Disassembling the wrench or making any
adjustments will result in the loss of accuracy, and will
void the warranty.
OPERATING INSTRUCTIONS
Before adjusting the wrench to the desired torque setting,
make sure that you are using the correct torque units.
Torque values may be displayed in units of Inch Pounds, Foot
Pounds, Newton Meters, or Centimeter Kilograms.
Your CRAFTSMAN DIGI-CLICK™ Torque Wrench is calibrated
in Foot-Pounds (default on the LCD display) and can be
changed to other units as desired.
WARNING: DO NOT turn the adjusting knob either below the
lowest scale reading or above the highest scale reading. The
LCD display will show torque settings beyond the calibrated
upper and lower limits of your DIGI-CLICK™torque
wrench,these are intended for adjusting purposes only and
are not within the calibrated range.
WARNING: DO NOT use the wrench when batteries are not
installed or when batteries do not have sufficient power to
operate the wrench
TO SET TORQUE
1. Press the red PWR button to turn the wrench on.
2. At initial power up, the LCD display will flash all icons
twice and then show the current torque setting. When
stored or not in use, the wrench should be set to less
than 25% of the maximum capacity.
NOTE: The battery level indicator on the LCD display will
indicate the remaining battery life.
3. Press the gray UNIT button to toggle through desired
units (ft-lb, in-lb, N-m, kg-cm)
4. Pull the adjusting knob out to unlock the adjusting
mechanism.
5. While holding the adjusting knob unlocked, turn it
clockwise to increase the torque, and counterclockwise
to decrease torque. Keep turning until the desired
TARGET torque reading is displayed on the LCD screen.
6. If during a torque setting adjustment the intended
TARGET value is exceeded on the LCD display, the torque
wrench should be first adjusted back to below the
TARGET value, and then back up to the intended TARGET
value.
7. Lock the setting by releasing and, if necessary, pushing
the adjusting knob in. The knob can be turned slightly
back and forth without changing the torque setting to
assure proper engagement of teeth in the locking
mechanism.
8. Press and hold the red PWR button for 2 seconds to turn
the wrench off. This torque wrench has an automatic
shut off feature and will power down after 10 minutes of
non-use.
NOTE: The TARGET torque setting and units will be saved
after shut off. If the torque is adjusted while the power is
off, the correct torque target will be displayed at the power
on screen .
TO APPLY TORQUE
1. Attach the proper socket or other attachment to the
drive. Set the reversing lever of the proper direction of
the operation.
NOTE: If special attachments are used, torque setting must
be corrected in accordance with the directions given below
in the extensions section.
2. Place the socket or attachment onto the fastener to be
torqued.
3. Utilizing the ratcheting head, you may ‘spindown’ the
fastener until resistance is felt.
4. Holding the wrench BY THE GRIP ONLY*, apply SLOW
AND STEADY pull until a momentary release impulse or
‘click’ is felt. Release tightening pressure immediately
when the release is felt.
WARNING: At low torque settings the release is gentle and
there usually is no audible ‘click’ signal. Learn how the
release feels BEFORE you torque to avoid accidental over-
tightening or damage.
*When using long sockets or extensions, the wrench may be
supported at the head (only at the head) with only negligible
effects on accuracy.
5. The wrench resets automatically and is ready for the next
operation.
Question and Answer IconNeed help?

Do you have a question about the Craftsman 13918 and is the answer not in the manual?

Summary

Safety Rules for Torque Wrench Operation

General Operating Precautions

Guidelines for safe use, including avoiding over-torquing, proper fastener engagement, and preventing slips or falls.

Proper Wrench Handling and Maintenance

Instructions on applying force correctly, avoiding cheater bars, and noting internal components are not serviceable.

Operating Instructions Overview

Unit Selection and Battery Check

Guidance on selecting torque units and ensuring the wrench has sufficient battery power for operation.

Setting Torque Values

Step-by-step instructions for turning the wrench on, setting the desired torque, and adjusting units.

Applying Torque Correctly

Procedures for attaching sockets, applying steady pull until release, and understanding low-torque indicators.

Overview

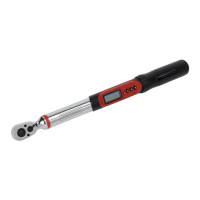
The Craftsman Digi-Click™ Torque Wrench is a precision instrument designed for the manual tightening of threaded fasteners. It is not intended for use as a nut-breaker or for any other purpose. This wrench provides a digital display for torque settings and offers various features for accurate and safe operation.

Function Description:

The primary function of the Digi-Click™ Torque Wrench is to apply a precise amount of torque to fasteners. It features a fine-tooth ratchet drive head with a reversing lever, allowing for both clockwise and counter-clockwise operation, though it only actuates or "clicks" in the clockwise direction. The wrench utilizes an LCD display to show the current torque setting and units. Users can adjust the target torque using an adjusting knob and toggle between different units such as foot-pounds (ft-lb), inch-pounds (in-lb), Newton-meters (N-m), and centimeter-kilograms (kg-cm). An automatic shut-off feature powers down the wrench after 10 minutes of non-use, and the last TARGET torque setting and units are saved. When the target torque is reached, the wrench provides a momentary release impulse or an audible "click" signal, prompting the user to release tightening pressure immediately. If the set torque limits are exceeded, the LCD display will flash "STOP."

Important Technical Specifications:

The manual describes two models: 13918 and 13919.

  • Operating Temperature Range: 40°F - 110°F (5°C - 42°C).
  • Model 13918:
    • Drive: 3/8" Ratchet
    • Calibrated Capacity: 5-80 ft-lbs, 60-960 in-lbs, 6.78-108.48 N-m, 69.1-1105.6 kg-cm.
    • Increments & Display Resolution: 0.25 ft-lbs, 3.0 in-lbs, 0.25 N-m, 3.0 kg-cm.
    • Dimensions: 19.3" x 1.6" x 2.2".
    • Weight: 1 lb 11 oz (767 gm).
    • Lever Length: 15.0" (center of drive to center of handle).
  • Model 13919:
    • Drive: 1/2" Ratchet
    • Calibrated Capacity: 25-250 ft-lbs, 300-3000 in-lbs, 33.9-339 N-m, 345.5-3455 kg-cm.
    • Increments & Display Resolution: 0.5 ft-lbs, 6.0 in-lbs, 0.5 N-m, 6.0 kg-cm.
    • Dimensions: 23.3" x 1.6" x 2.4".
    • Weight: 2 lbs 7 oz (1110 gm).
    • Lever Length: 18.9" (center of drive to center of handle).
  • Accuracy: ±4% on clockwise or right-hand readings greater than or equal to 20% of capacity. It complies with American National Standard B107.14M and International Standard ISO 6789.
  • Power Source: Three (3) 1.5V (LR44 or equivalent) batteries.
  • Housing: Chrome plated, hardened steel.

Usage Features:

To operate the wrench, users first press the red PWR button to turn it on. The LCD display will flash all icons twice before showing the current torque setting. The gray UNIT button allows toggling through the available torque units. The adjusting knob, which must be pulled out to unlock, is then turned clockwise to increase torque or counter-clockwise to decrease it until the desired TARGET torque is displayed. It is crucial to adjust the wrench back below the TARGET value and then back up to it if the intended value is exceeded during adjustment. The setting is locked by releasing or pushing the adjusting knob in.

When applying torque, the proper socket or attachment is attached to the drive, and the reversing lever is set for the correct direction. The fastener can be "spindown" until resistance is felt. Torque is then applied by pulling SLOW AND STEADY on the grip only until a release impulse or "click" is felt, at which point tightening pressure must be released immediately. The wrench automatically resets for the next operation. Special attachments that extend the effective length of the wrench require a calculation to correct the torque setting using provided formulas: T(W) = T(E) * (L / (L+E)) or T(E) = T(W) * ((L+E) / L), where T(W) is the torque setting on the wrench, T(E) is the effective torque at the fastener, L is the lever length of the wrench, and E is the effective length of the extension.

Maintenance Features:

The Craftsman Digi-Click™ Torque Wrench is a precision instrument and should be handled with care. It should never be used as a hammer or pry bar. It is lubricated for life with a special lubricant and should not be oiled in any manner, though the ratchet head can be lubricated for smooth operation. When not in use, the wrench should be stored in its protective case and set to less than 25% of its maximum capacity. If left set to over 50% capacity for more than a few hours, it should be reset to the lowest setting and left for a few minutes before use. Batteries should be removed when the wrench is stored for extended periods.

The rubberized grip is resistant to petroleum products but can be damaged by Acetone and certain industrial solvents. It can be cleaned with a cloth wetted in mineral spirits or denatured alcohol, but the wrench should never be immersed in any liquid.

Periodically, the wrench should be checked for accuracy, especially if used frequently, subjected to abnormal handling, or after approximately 5,000 torque applications in assembly line usage. Calibration service is available by returning it to a Sears store. With the exception of the ratchet mechanism, the wrench is not user-serviceable. Disassembling the wrench or making adjustments will void the warranty and result in a loss of accuracy. Ratchet head repair kits (#44525 for 3/8" drive and #43445 for 1/2" drive models) can be ordered from Sears.

The product comes with a full 90-day warranty on the Craftsman Digi-Click™ Torque Wrench. If it fails due to a defect in material or workmanship within 90 days, it can be returned to any Sears store or Craftsman outlet for free repair or replacement. Free re-calibration is also offered within 90 days of purchase.

Craftsman 13918 Specifications

General IconGeneral
BrandCraftsman
Model13918
CategoryPower Tool
LanguageEnglish

Related product manuals