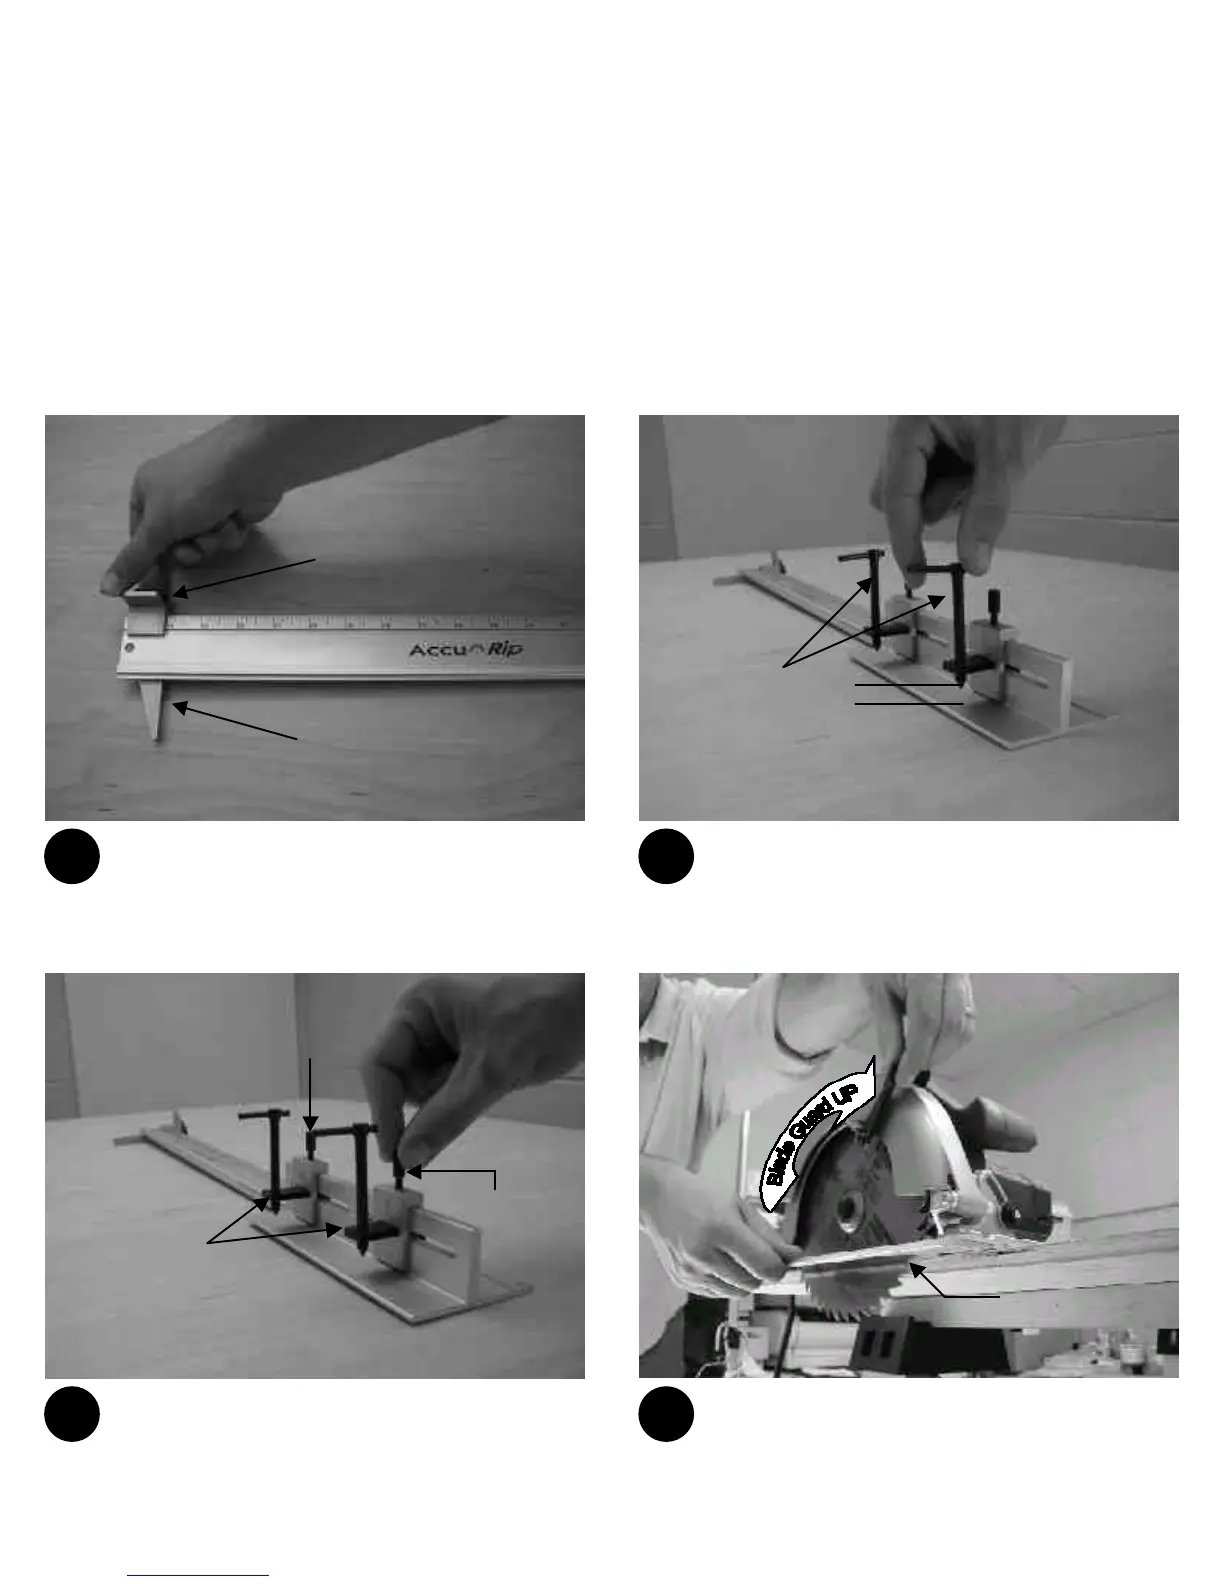
Loosen the Cut-Guide handle (D), and slide the Cut
Guide (E) to the 24" end of t
the handle (Fig.1). This will hold the guide out of
the way during the setup.
NOTE: The Accu-Rip is fully assembled. The various
screws and bolts should not be removed. You should
only loosen and retighten these parts as you setup,
attach, and remove the Accu-Rip.
The Accu-Rip is designed to allow you to adjust the
tool to fit most circular saws with blades on the RIGHT
SIDE. Some circular saws, particularly older saws, may
have designs that prevent the use of the Accu-Rip with
that saw.
Screw
(C) L-Brackets
Loosen the T-bolts (A) so that there is roughly 1/2
inch clearance between the Accu-
points of the T- Bolts (Fig. 2) Do not remove the
T-bolts completely.
Loosen the Retainer Screws (B) just enough to
allow the L-Brackets (C) to move freely (Fig 3).
Do not remove the Retainer Screws
completely.
Raise the saw blade guard. Position saw on a
securely held in place flat surface, such as a
worktable, so that the blade is firmly against the
surface straight edge.
½”
against edge
Fig. 1 Fig. 2
Fig. 3 Fig. 4
7
7
7
7
IMPORTANT!
ALWAYS DISCONNECT THE POWER SOURCE BEFORE ATTACHING THE ACCU-RIP TO YOUR SAW.
HOW TO SET UP AND ATTACH THE ACCU-RIP TO YOUR SAW
Make sure your saw is unplugged from the power source!
 Loading...