Do you have a question about the Craftsman 358.797251 and is the answer not in the manual?
Details the one-year warranty, exclusions, and terms for the gas blower.
Emphasizes reading the manual and restricting unit use to informed users.
Advises on wearing protective gear and preparing the work area before operation.
Warns about flammability and precautions when handling fuel.
Provides essential guidelines for safe operation of the blower/vacuum unit.
Outlines recommended maintenance procedures and user responsibilities.
Lists all items included in the product carton for assembly.
Instructions for assembling the blower tube and nozzle to the main unit.
Steps to attach and adjust the shoulder strap for blower operation.
Details the process of assembling the vacuum attachment and bag.
Instructions for adjusting the shoulder strap when using the vacuum bag.
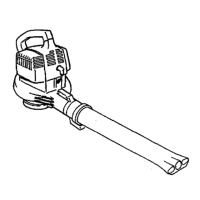
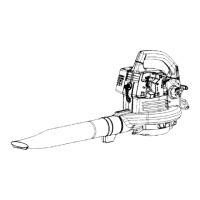
Familiarizes the user with the blower's controls and components before operation.
Provides tips for efficient and safe operation, including noise reduction and debris management.
Important steps and warnings before starting the engine.
Instructions on how to properly mix and add fuel to the engine.
Procedure for safely stopping the engine.
Step-by-step guide for starting a cold engine or one that ran out of fuel.
Instructions for starting an engine that has recently been used.
Troubleshooting steps for engines that are hard to start or flooded.
Lists tasks the owner is responsible for maintaining.
Guide for inspecting the unit for loose or missing components.
How to identify and address damaged or worn parts on the unit.
Detailed steps for cleaning the air filter to maintain engine performance.
Procedure for replacing the spark plug annually for better starting.
Steps for replacing the fuel filter in the fuel tank.
Critical procedures for adjusting the carburetor to ensure proper engine function.
Detailed steps for adjusting carburetor screws for idle and mixture.
Guidance on cleaning and preparing external surfaces for storage.
Instructions on fuel system preparation for storage, including stabilizer use.
Steps for internal engine preparation for long-term storage.
Additional storage recommendations, including fuel and container care.
Explains owner responsibilities regarding emissions control warranty.
Details what the manufacturer covers under the emissions warranty.
Reinforces owner duties for maintaining the engine for warranty coverage.
Outlines the parts and services covered under the warranty.
Lists conditions and actions that void the warranty coverage.
Explains how using non-approved parts can affect warranty claims.
This document is an Operator's Manual for a Craftsman Gasoline Blower/Vacuum, Model No. 358.797251.
The Craftsman Model 358.797251 is a versatile 2-cycle gasoline-powered tool designed for both blowing and vacuuming tasks. As a blower, it can clear debris with a powerful air stream. When configured as a vacuum, it collects debris into a bag and features mulching blades that automatically reduce debris at a ratio of up to 16:1, making it efficient for yard and garden cleanup.