Do you have a question about the Craftsman 390.291558 and is the answer not in the manual?
Pre-pump checks, pressure settings, and air bleeding procedures.
How to check and adjust the tank's air pressure for proper operation.
Step-by-step guide for replacing the vinyl bag in smaller tanks.
Step-by-step guide for replacing the vinyl bag in larger tanks.
Contact information for parts, repair service, and service center locations.
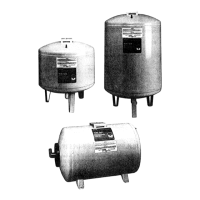
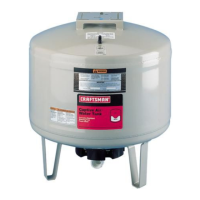
The device described in the manual is a Craftsman Captive Air Tank, designed for use in cold well water systems. It functions as a water storage tank, working in conjunction with a pump to provide a steady supply of water to a household or other system. The tank utilizes a pre-charged air bladder system to maintain water pressure and deliver water on demand.
The Craftsman Captive Air Tank is a crucial component in a well water system, acting as a reservoir for pressurized water. When the pump fills the tank, the air inside a vinyl bag within the tank is compressed. This compressed air then forces water out of the tank when a faucet or other water outlet is opened, reducing the frequency with which the pump needs to cycle on and off. This not only conserves energy but also extends the life of the pump. The tank is designed to operate within a specific pressure range, typically up to 100 PSI, and a relief valve is recommended for systems that may exceed this pressure to prevent tank blow-up and ensure safety. The internal vinyl bag separates the air from the water, preventing waterlogging and maintaining the air charge over time.
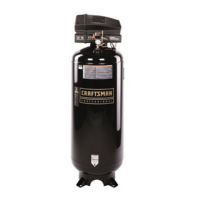
The Captive Air Tank is available in various sizes, including 6, 19, 36, 50, and 85-gallon capacities, catering to different household or system demands. Installation involves connecting the tank to the pump and the household water system using standard pipe fittings. The manual provides detailed diagrams for typical installations, including configurations for shallow well and deep well jet pumps, as well as multi-stage and submersible pumps, for both horizontal and vertical tank orientations. For specific pump-to-tank connections, a separate fittings package (Kit Stock No. 2788) may be required.
Before initial use, it's essential to set the tank's air pre-charge to match the pump's cut-in pressure setting. This involves bleeding air from the tank's valve if the factory pre-charge (typically 40 PSI) is higher than the pump's cut-in pressure. The system must also be purged of all air by opening faucets and allowing the pump to run until a steady, air-free stream of water is achieved. This process is crucial for new installations, after repriming a pump, or after pump service. The tank's design eliminates the need for external air charging devices or bleeder orifices, simplifying the system.
Multiple tanks can be connected in parallel to increase the usable water supply (drawdown), effectively doubling or tripling the supply depending on the number of tanks used. This flexibility allows for customization based on water demand. The system, including the pump, tank, and piping, must be protected from freezing temperatures to prevent damage and maintain warranty validity.
Regular maintenance is key to the longevity and efficient operation of the Captive Air Tank. An annual check of the tank's air charge is recommended to prevent waterlogging. This involves disconnecting power to the pump, draining the system, and checking the air pressure at the tank's air valve with a standard tire pressure gauge. The air pressure should match the pump's cut-in setting. If the pressure is low, air should be added using an air compressor or portable air storage tank. Air leaks around the valve can be identified using soapy water, and a new valve core, similar to those used in automobile tubeless tires, can be installed if necessary.
The manual also provides instructions for testing the pump pressure switch and replacing the air valve if it becomes broken or leaks beyond repair. For more extensive maintenance, such as replacing the internal vinyl bag, detailed procedures are outlined for different tank sizes. This involves expelling all air and water from the tank, removing the cover assembly, and carefully removing the old bag. The new bag must be tightly rolled and inserted into the tank, then unrolled and seated properly in the flange ring groove. For larger tanks (50 and 85 gallons), two people are recommended for the bag replacement process. After replacing the bag, the cover assembly is reinstalled, and the nuts are tightened in a specific pattern and to a precise torque (85 inch-pounds) to ensure a proper seal and prevent damage to the studs. Finally, the tank is recharged with the correct amount of air. These maintenance steps ensure the tank continues to function optimally, providing reliable water pressure and extending the overall life of the well water system.
| Model Number | 390.291558 |
|---|---|
| Max PSI | 150 PSI |
| CFM at 90 PSI | 5.1 CFM |
| Voltage | 120V |
| Pump Type | Oil-Free |
| Horsepower | 1.5 HP |
| Noise Level | 78 dBA |