Do you have a question about the Craftsman 50280 and is the answer not in the manual?
Explains the warranty terms for Craftsman products, including limitations for commercial use.
Lists the items included in the jack's packaging for initial setup.
Provides step-by-step instructions for assembling the jack handle and holder.
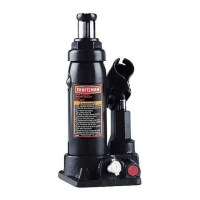
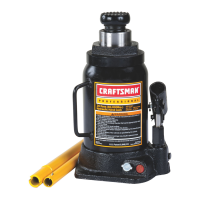
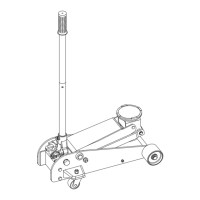
Identifies key components of the hydraulic bottle jack using diagrams for user familiarity.
Details pre-operation checks and procedures to release trapped air for optimal performance.
Explains the process of lifting a vehicle safely using the hydraulic jack.
Explains the hydraulic mechanics behind the jack's lifting and lowering actions.
Provides instructions on how to safely lower a load and the jack after use.
Lists technical specifications for the 2-ton and 6-ton hydraulic bottle jacks.
Details how to check and maintain the proper oil level in the jack for optimal function.
Instructions for adding the correct type of hydraulic jack oil to the unit.
Steps for draining and refilling the hydraulic oil in the jack.
Guidance on lubricating moving parts of the jack for smooth operation and longevity.
Tips for preventing rust and corrosion on the jack components during storage and use.
Instructions on properly storing the hydraulic bottle jack when not in use.
Lists available replacement parts and their corresponding model numbers for service.
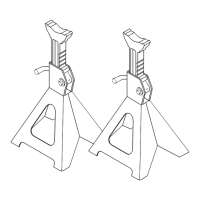
The Craftsman Hydraulic Bottle Jack is a lifting device designed to lift loads ranging from 2 tons to 6 tons, depending on the specific model. It is intended for vertical use and is not designed to sustain loads; after lifting, loads must be immediately supported by appropriate means, such as jack stands. The jack is also suitable for use in appropriately rated and designed vertical or bench press structures. It is explicitly stated that these jacks are not appropriate for lifting or positioning construction trailers, houses, or other building structures.
| Item | Model 50280 (2 Tons) | Model 50282 (6 Tons) |
|---|---|---|
| Base Dimension (A x B) | 3-3/4 in. X 3-3/4 in. | 4 in. X 4-1/2 in. |
| Maximum Height (C) | 13-11/16 in. (348mm) | 16-13/16 in. (427mm) |
| Minimum Height (D) | 7-1/4 in. (183mm) | 8-5/8 in. (219mm) |
| Hydraulic Stroke (E) | 4-1/2 in. | 5-1/4 in. |
| Extension Screw Travel (F) | 2 in. | 3 in. |
The jack operates on hydraulic principles. With the release valve closed, an upward stroke of the handle draws oil from the reservoir tank into the plunger cavity. Hydraulic pressure keeps the valve closed, retaining oil in the plunger cavity. A downward stroke of the handle releases oil into the cylinder, forcing the ram out and raising the saddle. When the ram reaches maximum extension, oil is bypassed back into the reservoir to prevent overextension and potential damage. Opening the release valve allows oil to flow back into the reservoir, releasing hydraulic pressure on the ram and lowering the saddle.
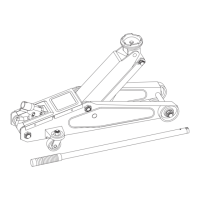
The jack comes with a 2-piece handle and a rubber handle holder. The rubber handle holder is installed onto the top nut and slid down to rest on the reservoir, oriented away from the handle socket to avoid interference with the release valve and handle socket operation. The handle sections are assembled by aligning the spring detent in the rubber grip section with the slot in the other section.
Occasionally, air can get trapped in the hydraulic system during shipment or handling, affecting performance. To release trapped air:
The jack is designed for compact and convenient storage. Insert the rubber handle holder onto the top nut. Depress the spring lock to separate the handle pieces and insert them into the handle holder.
The manual includes a troubleshooting table addressing common issues such as the jack not lifting, not holding a load, not lowering completely, poor lifting with a spongy pump, not lifting to full height, or the handle raising by itself. Possible causes and solutions are provided, often referencing specific operation and maintenance procedures like checking the release valve, releasing air from the hydraulic system, checking oil level, manually pushing down the saddle, draining over-filled oil, lubricating moving parts, or replacing the jack if the power unit is malfunctioning.
Craftsman offers a one-year full warranty. If the product fails due to a defect in material or workmanship within one year from the purchase date, it can be returned to any Sears store or Craftsman outlet in the United States for free replacement. For commercial or rental purposes, the warranty is 90 days from the date of purchase.
Replacement parts, including the handle, oil filler plug, and operators manual, are available. The model number and serial number, found on the jack label and handle socket, should be mentioned when requesting service or repair parts.
| Brand | Craftsman |
|---|---|
| Model | 50280 |
| Category | Automobile Accessories |
| Language | English |